FacebookTwitterDiggGoogle BookmarksRedditLinkedinRSS Feed
Welcome, Guest
Username: Password: Remember me
This section of The Interchange provides a space where members of the Reading Modeler community can showcase their Reading modeling efforts. If you've got a project that you'd like to share, start a new topic and "show and tell" the group how you did it!

TOPIC: Walthers 5517 Becomes 3615

Walthers 5517 Becomes 3615 8 years 3 weeks ago #5196

  • 2771-chris
  • 2771-chris's Avatar
  • OFFLINE
  • Road Foreman of Engines
  • Posts: 634
  • Thank you received: 94
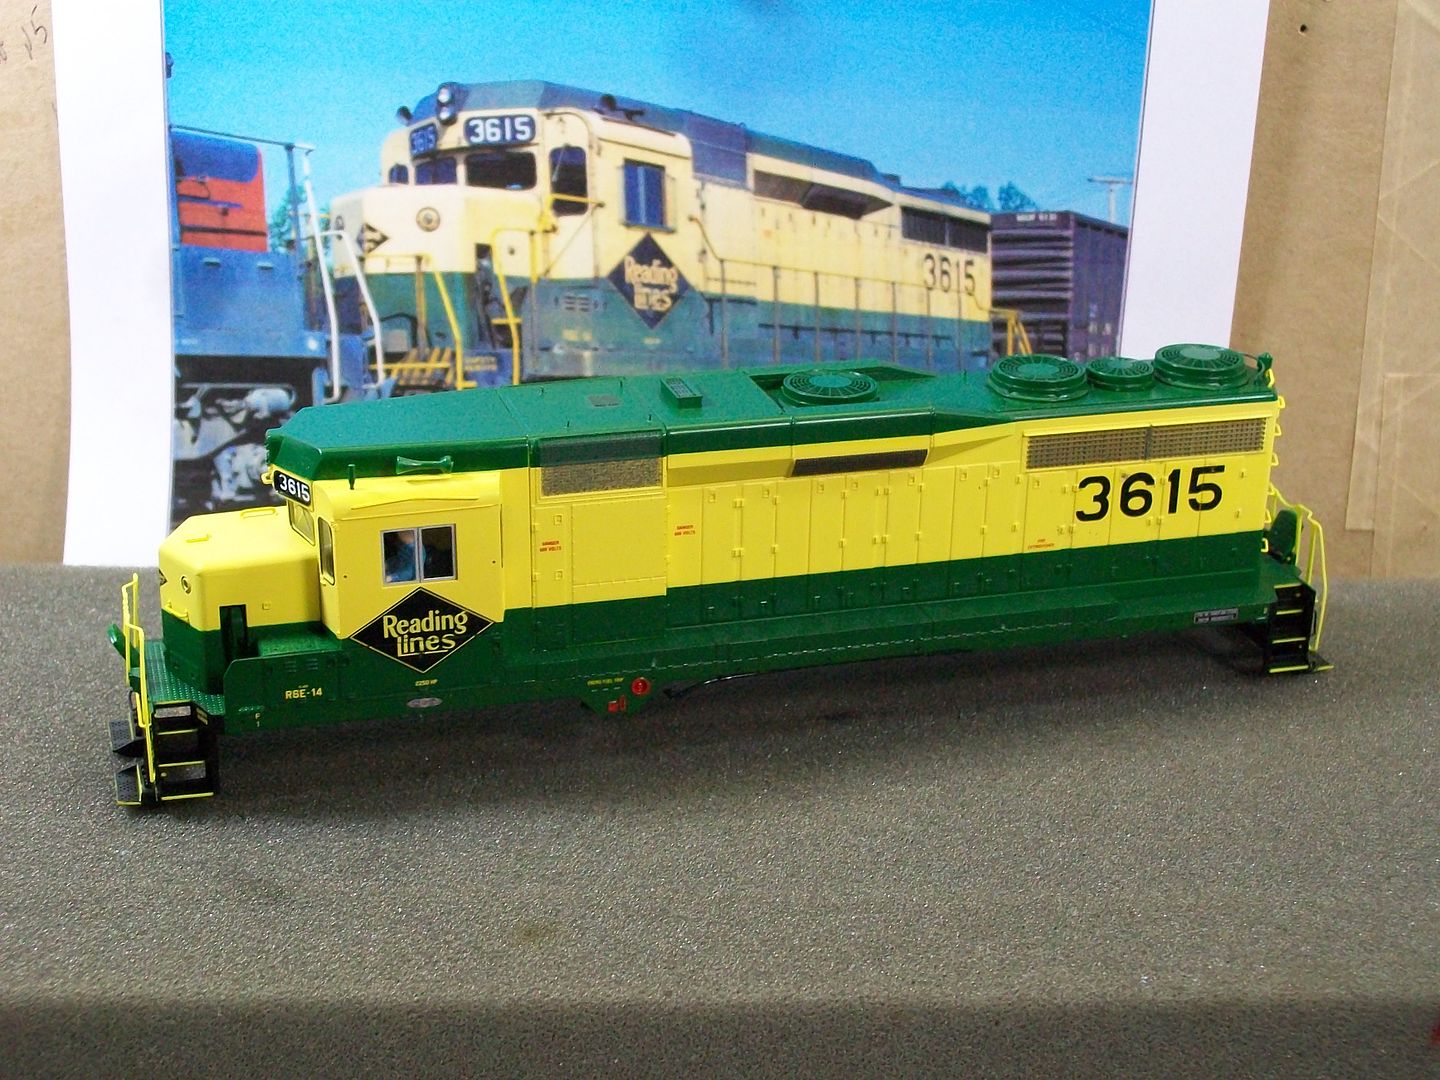
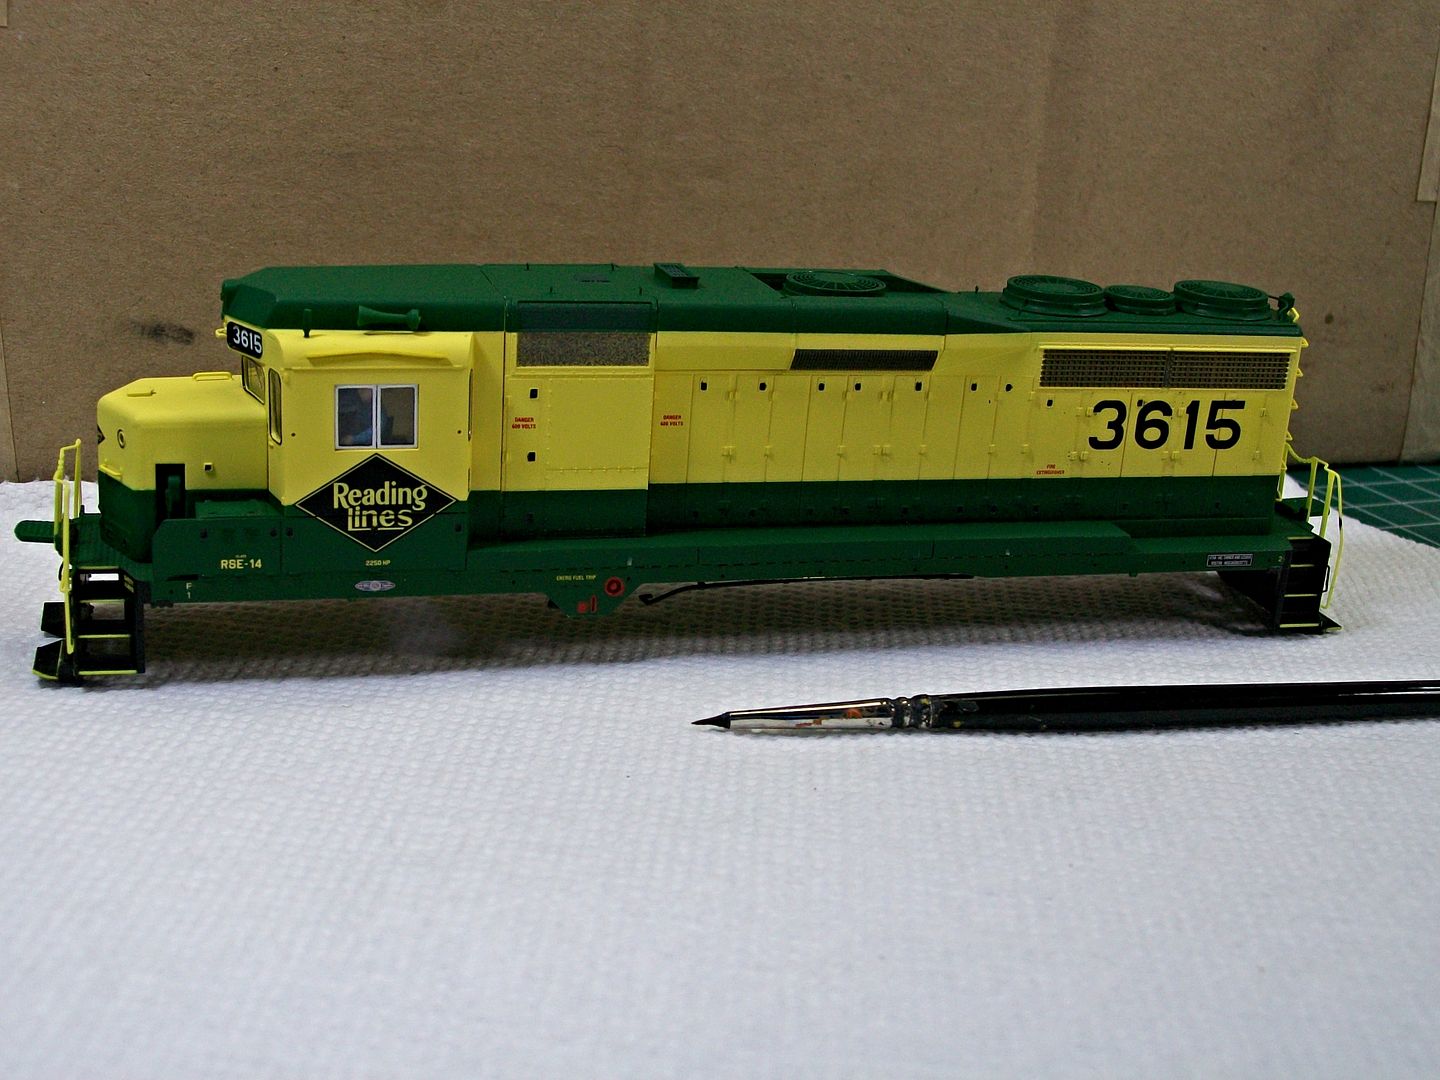
Lets move on to the decal work.Believe it or not the total number of decals applied in the project comes to 42.I used MS decals set numbers 87-686 RDG diesels,87-134 data and 87-527 data sheet.The marker light gasket decals are taken from 527.
After applying them to the proper location I snug them down using Solvaset.Several applications of Solvaset are used on the numbers to get them to settle over door hindges and latches.After they have cured I use a pin to relieve any air bubbles.I also use a razor sliding it between the hood doors to cut the decal.I then reapply the Solvaset.
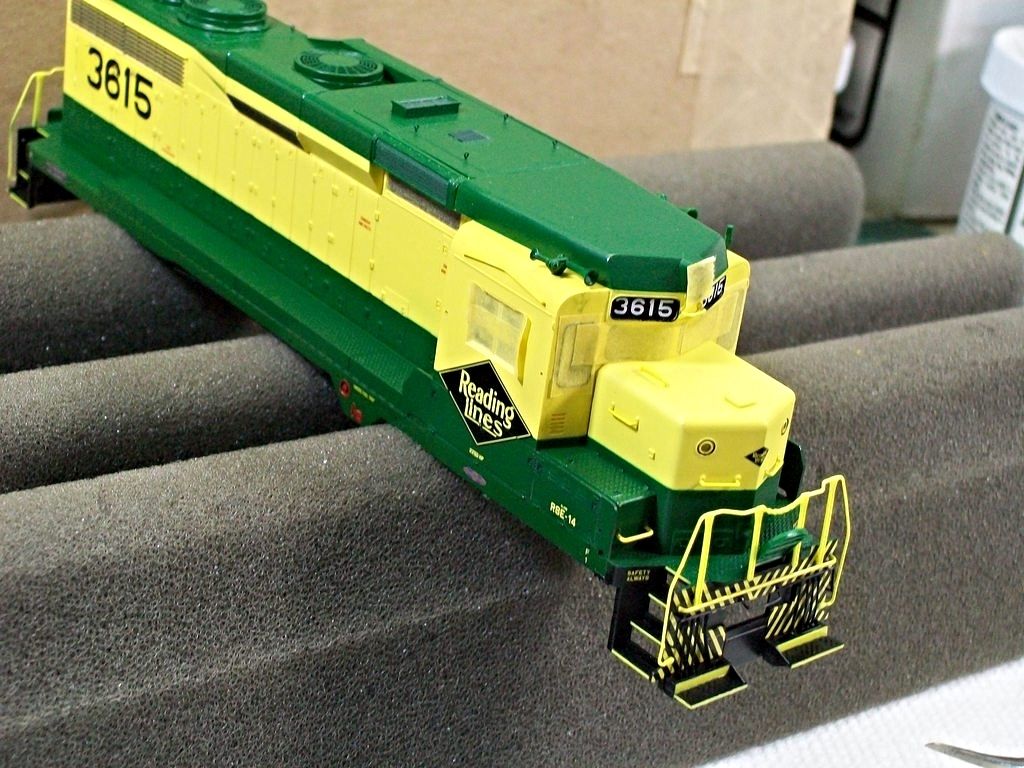
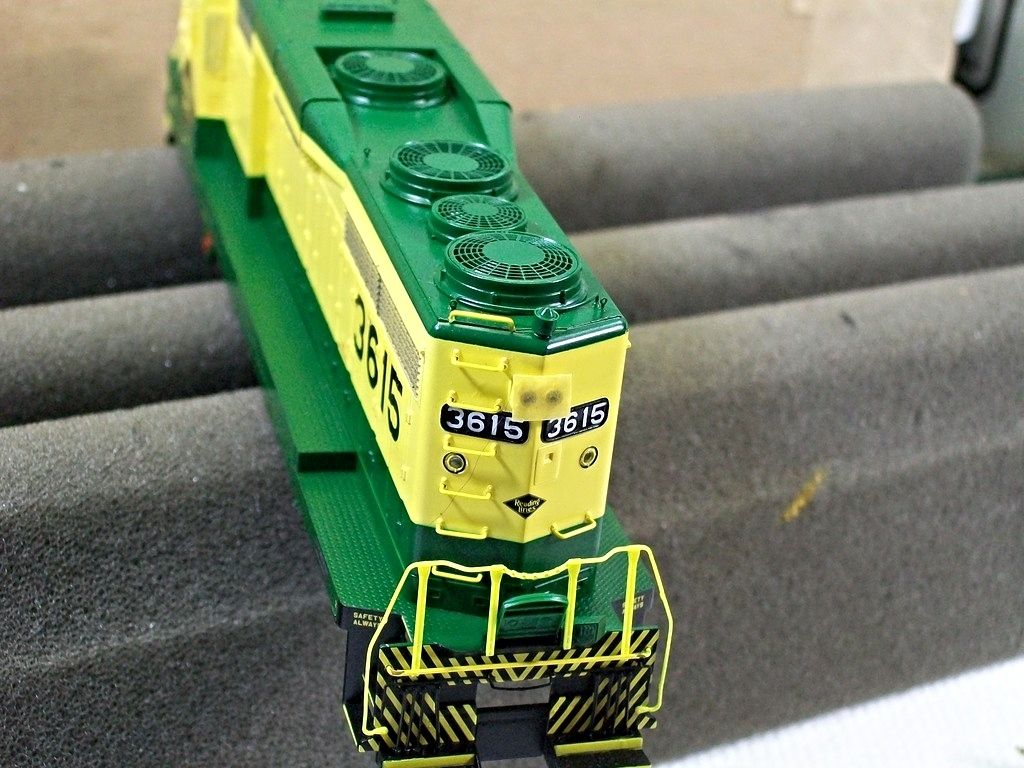
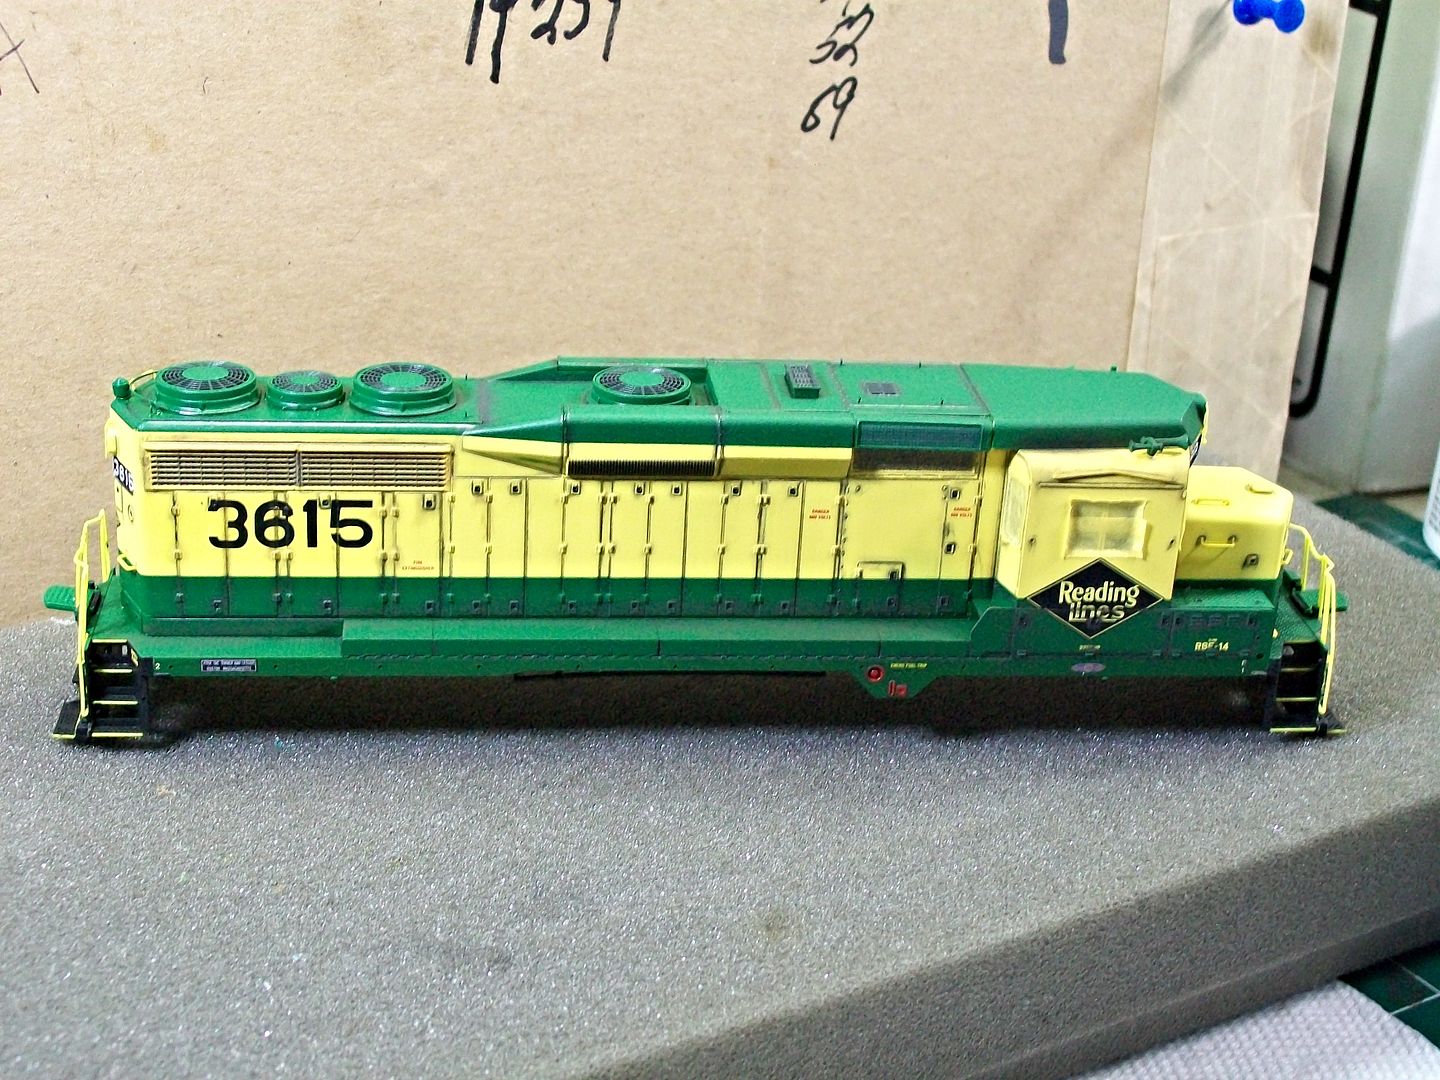
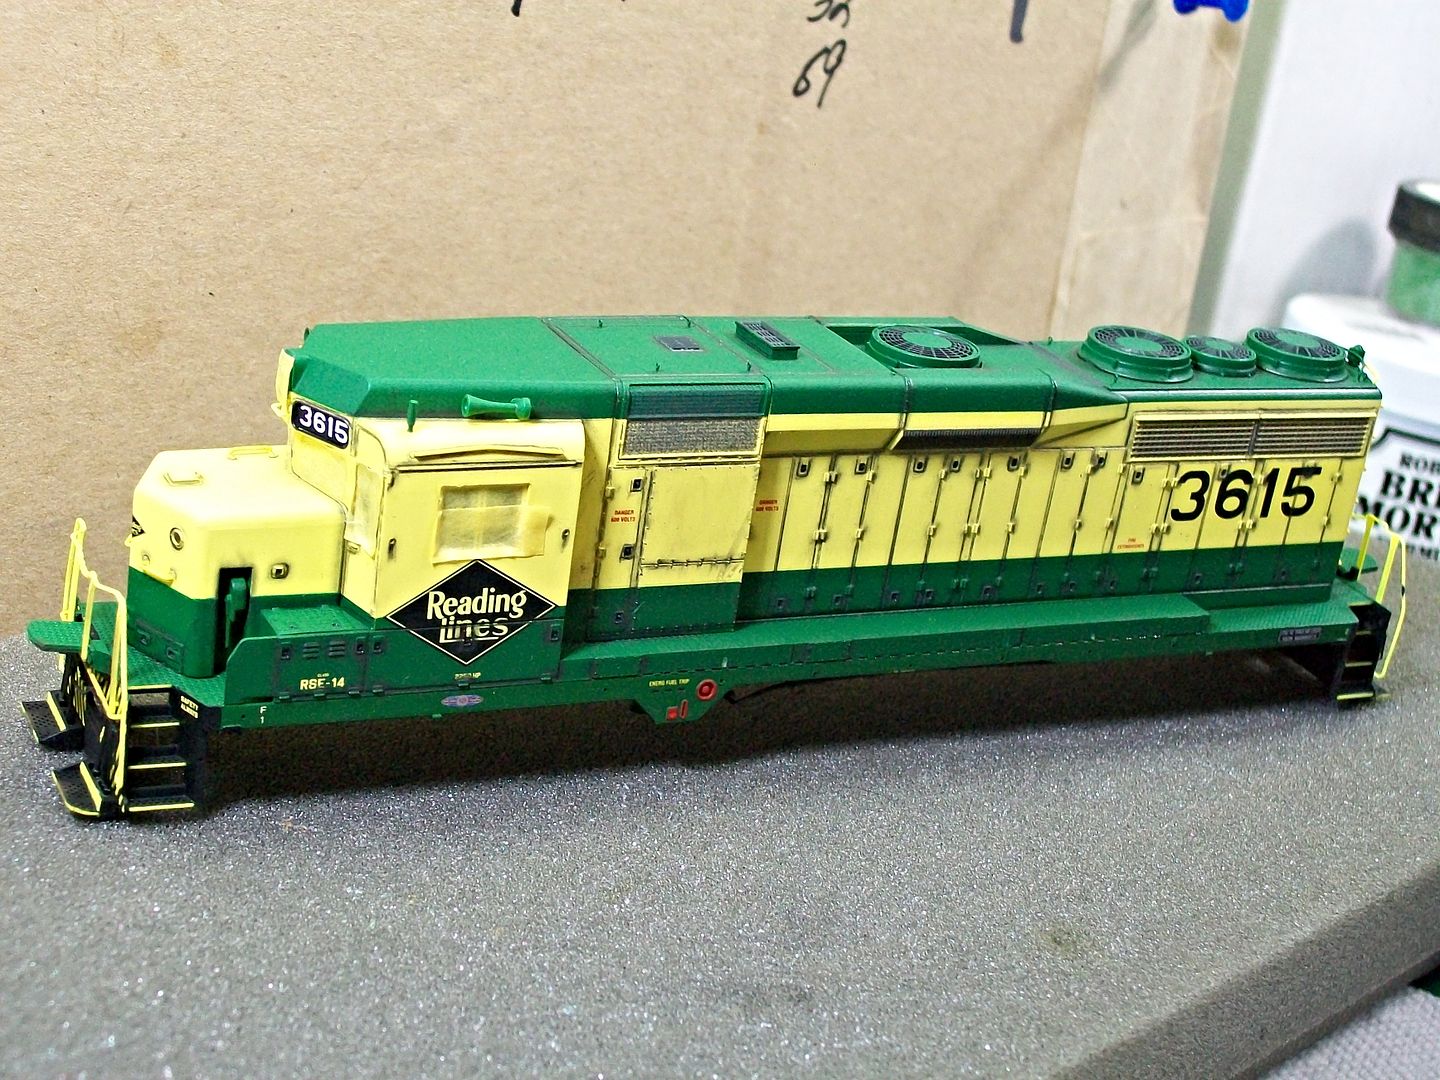
Unit after all decals applied
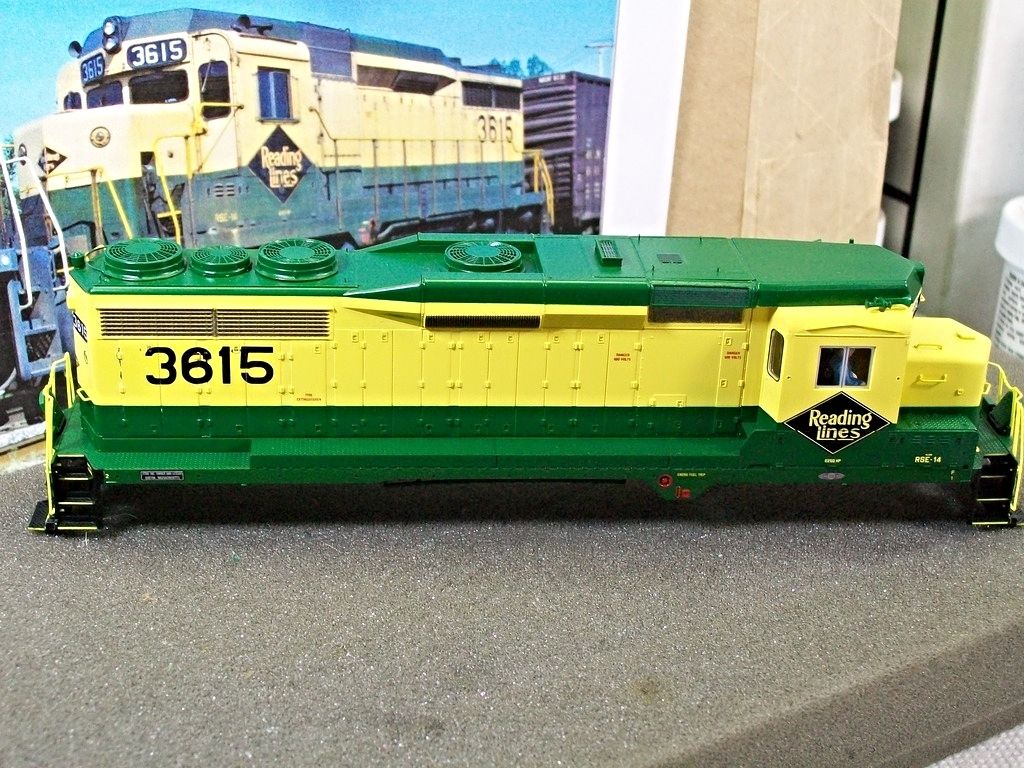
Side one

Side two


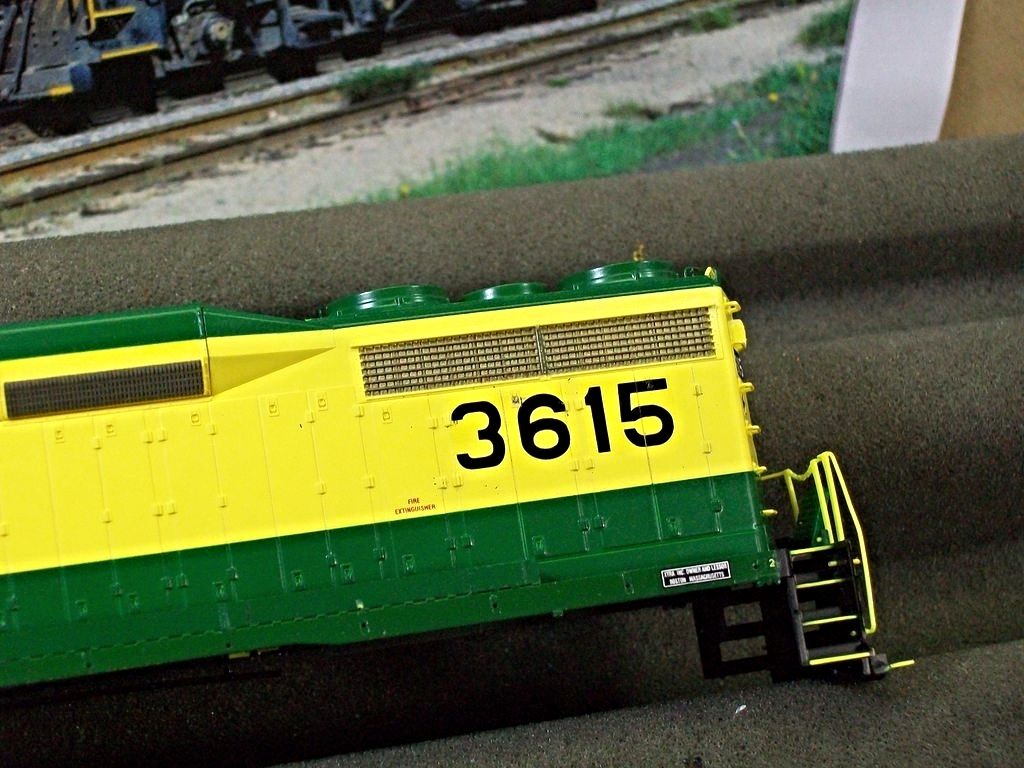
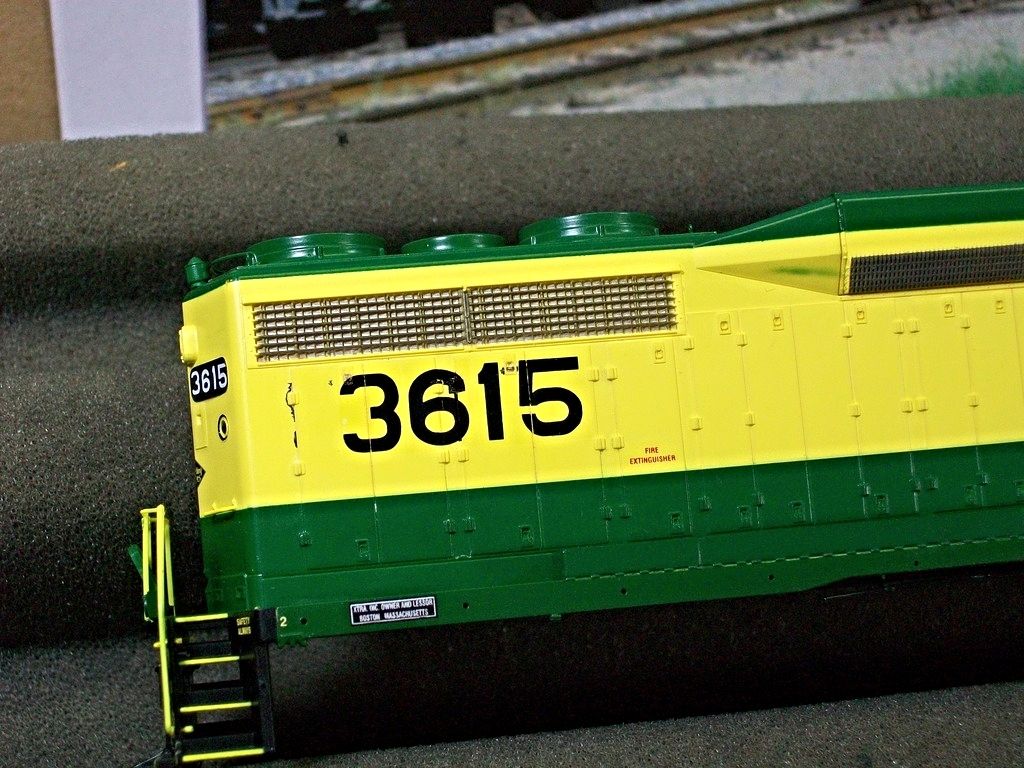
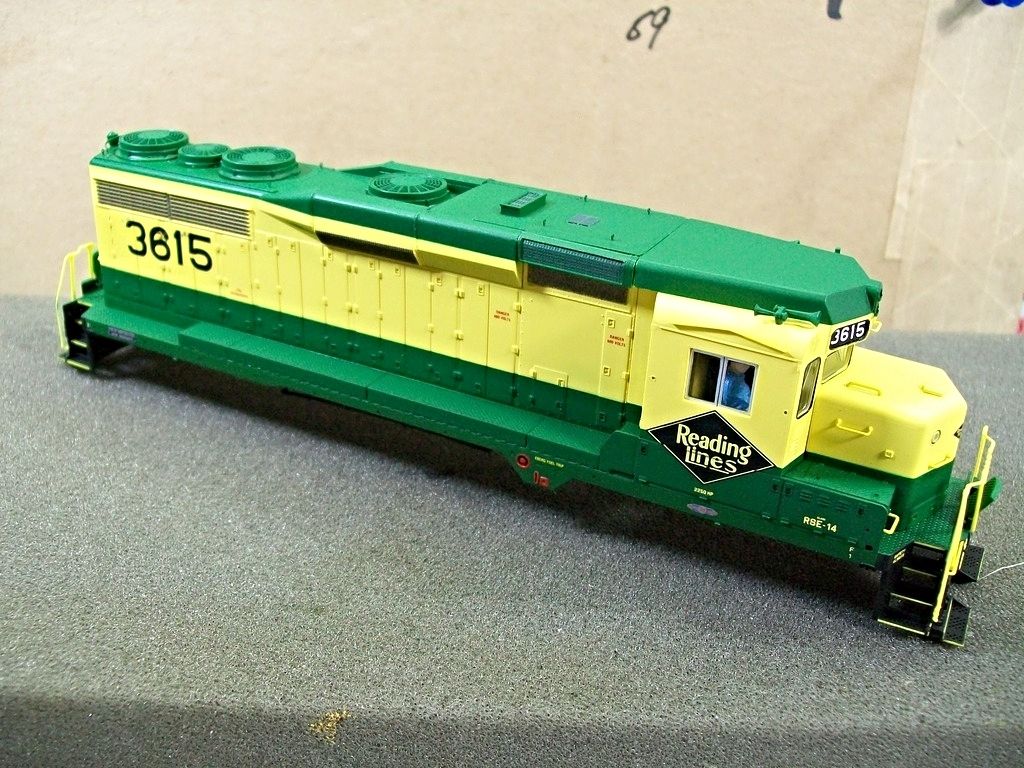
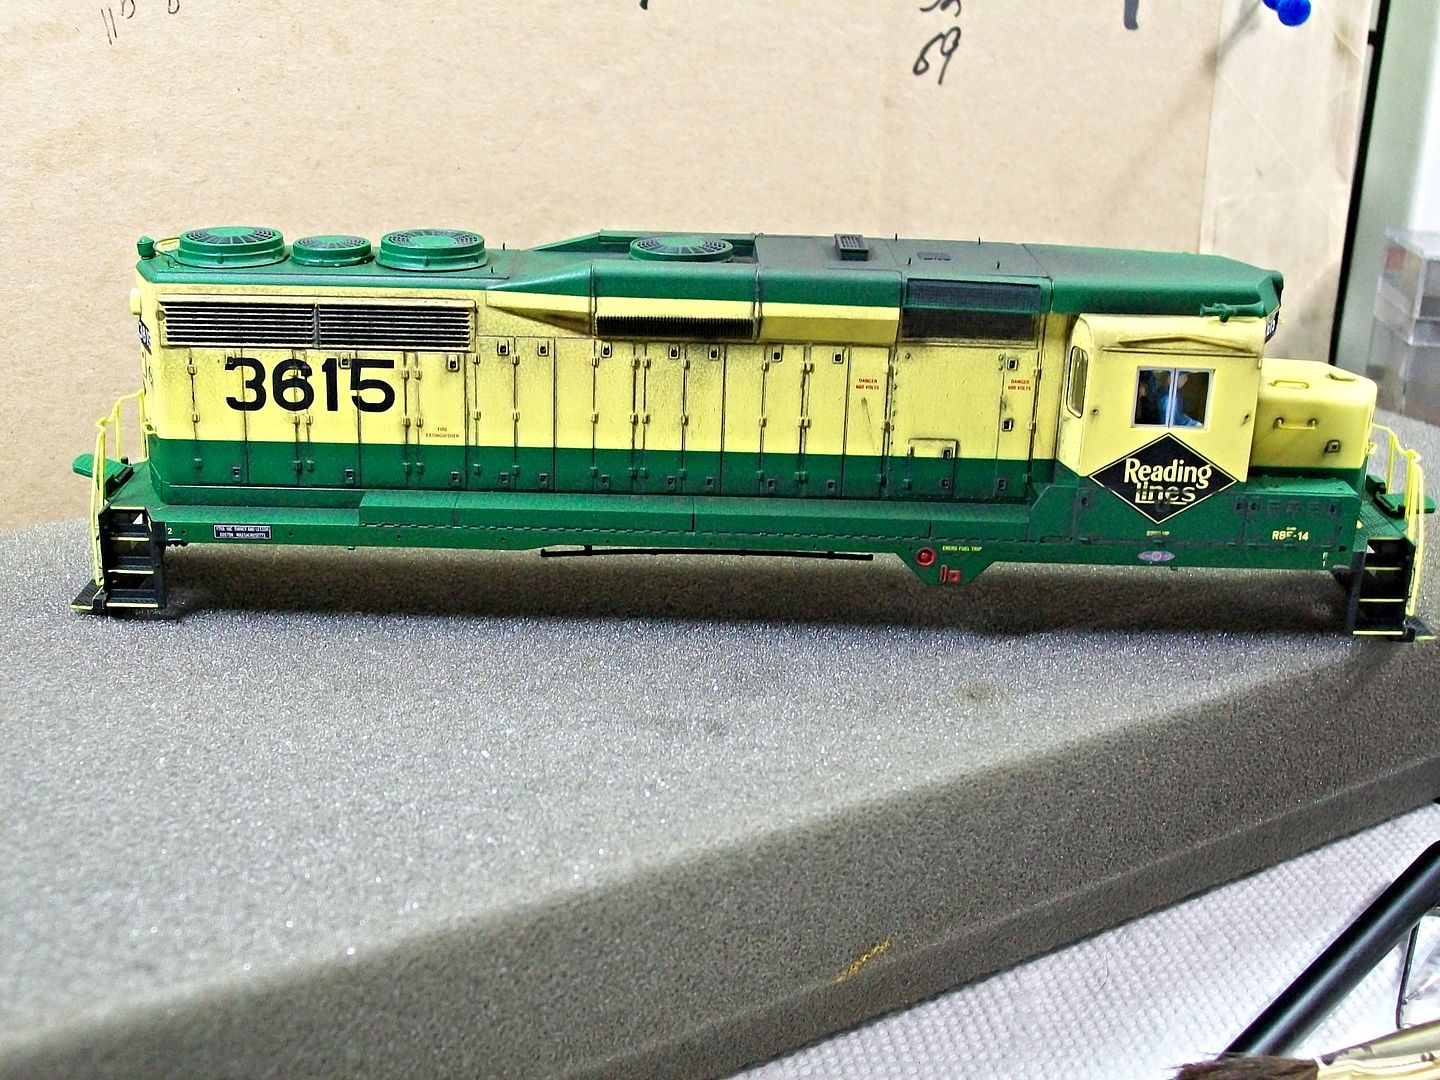
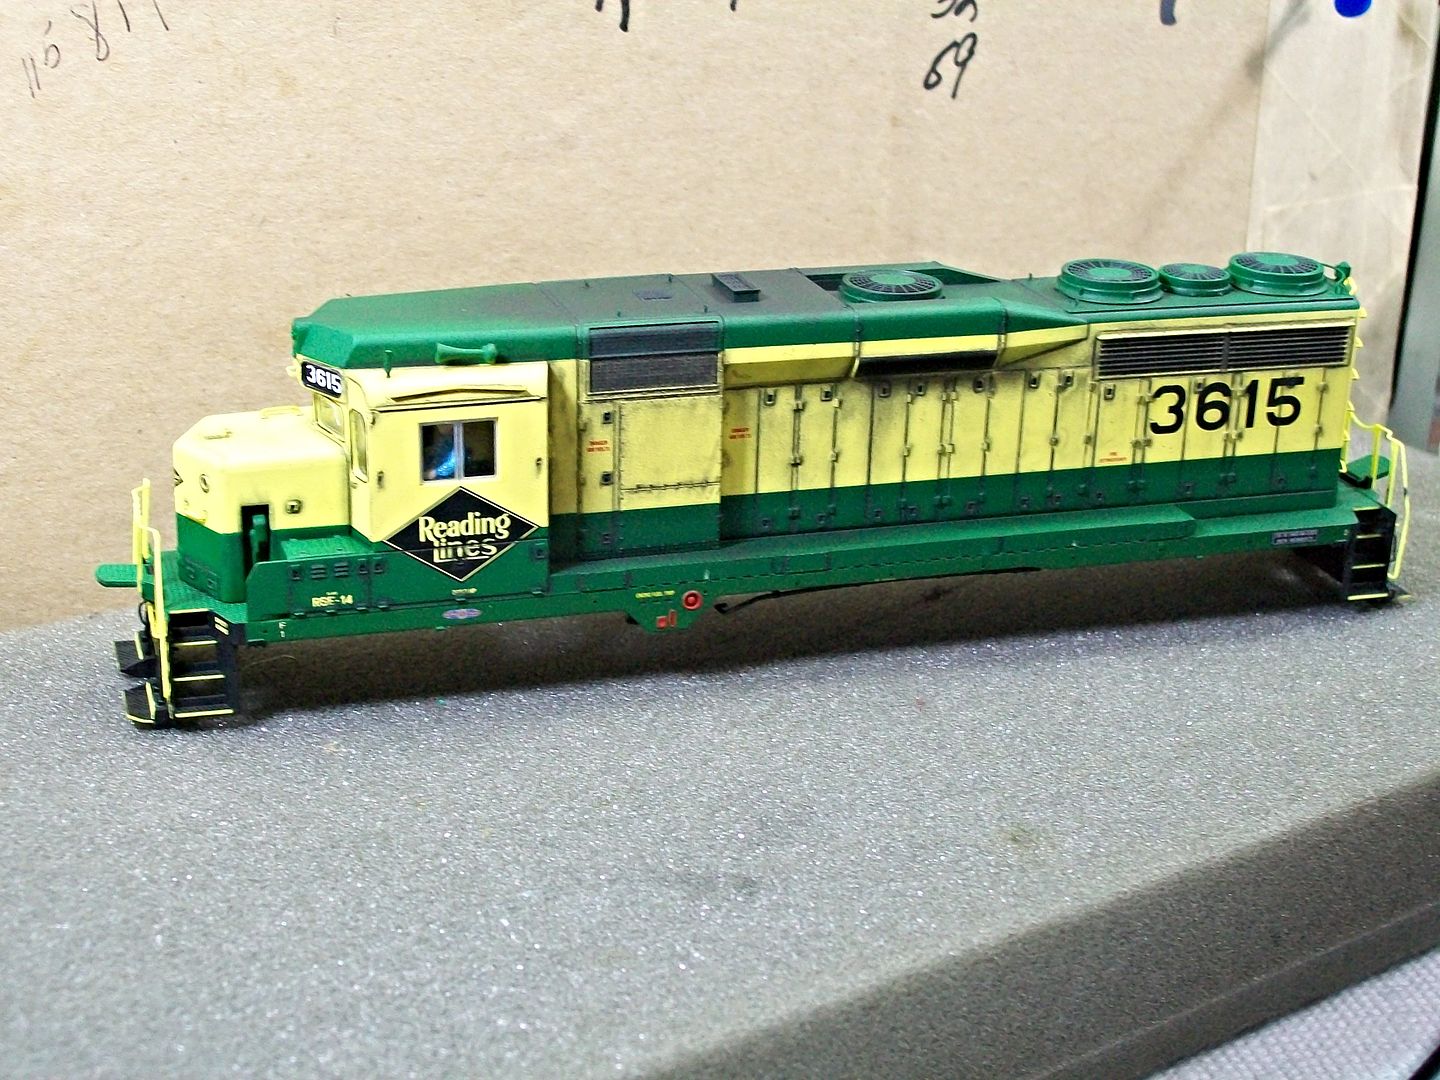
When the 30's were renumbered to the 3600 series the application of the new numbers was not a uniformed process.The direct location on the numbers varied from unit to unit,in fact it varied on the same unit.Studying pictures of 3615 the number was not identically applied to its flanks as illustrated in the following pictures of the model.
On the left side the 6 is basically applied dicectly on the third hood door,which gives the number a more spread out look to it.

On the right side the 6 is applied between doors 2 and 3 so the spacing of the numerals looks much closer.

Picture reference is always a great tool to use when working on a model.

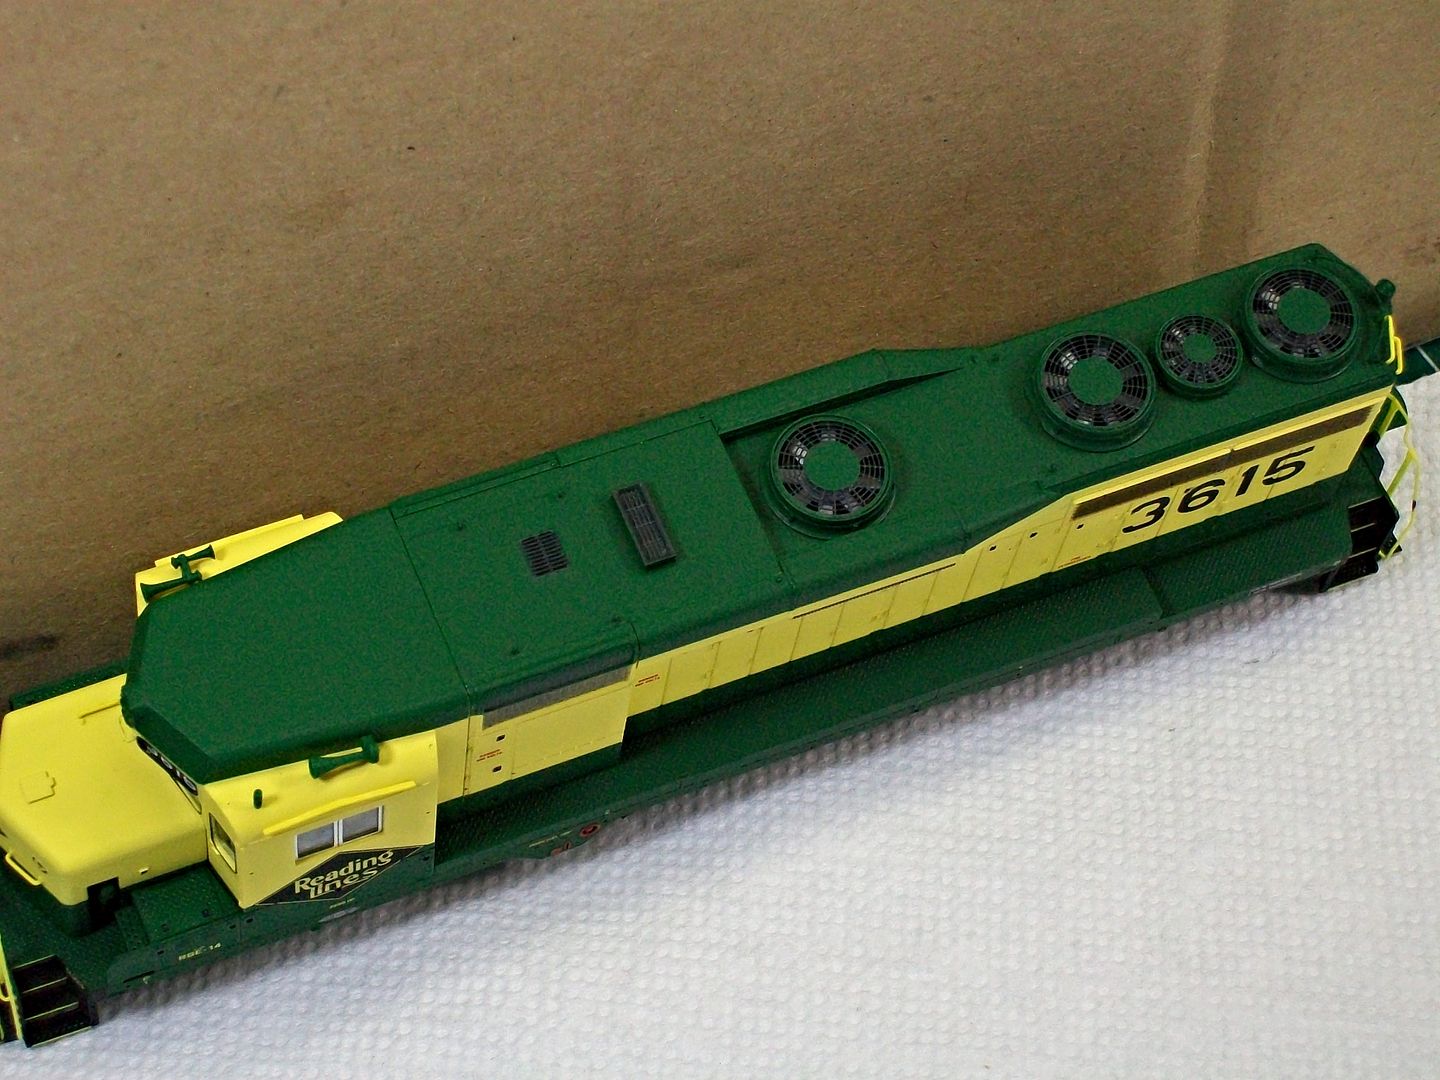
After all the decals were placed I did a little touch up painting.I used SCII ATSF red on the fuel fill,sight glass and emergency fuel cut off switch.I used SCII engine black on the piping under the frame,the jack pads and I also painted the yellow nubs located by the steps...the mounting pins for the end railings.After the paint dried I applied masking tape to the windows and head lights,I didn't worry about the marker lights,and gave the model its first bath with dullcoat.


The model after spraying.The dullcoat really helps blend in the new green on the frame and it also give the paint a good bite for adding the weathering.
The administrator has disabled public write access.

Walthers 5517 Becomes 3615 8 years 3 weeks ago #5197

  • Allan
  • Allan's Avatar
  • OFFLINE
  • Fireman
  • Posts: 60
  • Thank you received: 14
Very nice Chris! Looks great - easy on the weathering!
The administrator has disabled public write access.
The following user(s) said Thank You: 2771-chris

Walthers 5517 Becomes 3615 8 years 3 weeks ago #5199

  • RRDavey
  • RRDavey's Avatar
  • OFFLINE
  • Engineer
  • Posts: 98
  • Thank you received: 24
Chris--Your usual great work!!! I have a couple of these GP30s that I'll be keeping in the original paint scheme for my 1962-63 ish era. There's a few details I'd like to add including the drip strips. Do you or anyone else on the forum know anything about the CalScale RDG drip strips? Are they specific to the GP30 or a one size fits all for any RDG diesel? How many to a package? There are no pictures on the Bowser site that I found. Thanks.--Dave
The administrator has disabled public write access.
The following user(s) said Thank You: 2771-chris

Walthers 5517 Becomes 3615 8 years 3 weeks ago #5200

  • 2771-chris
  • 2771-chris's Avatar
  • OFFLINE
  • Road Foreman of Engines
  • Posts: 634
  • Thank you received: 94
Dave...I haven't seen the Bowser drip strips but my guess would be that they are spare parts applied to their RDG century locos.If that is the case then out of the package they would be too long for the GP30 and would need to be cut down to fit.Looking at the way they were mounted on the 430/630 there are two mounting pins located near the ends of the strip and these would have to be cut off.This is just my guess without seeing the part myself.
The administrator has disabled public write access.

Walthers 5517 Becomes 3615 8 years 3 weeks ago #5206

  • 2771-chris
  • 2771-chris's Avatar
  • OFFLINE
  • Road Foreman of Engines
  • Posts: 634
  • Thank you received: 94
Weathering...like beauty its in the eye of the beholder.
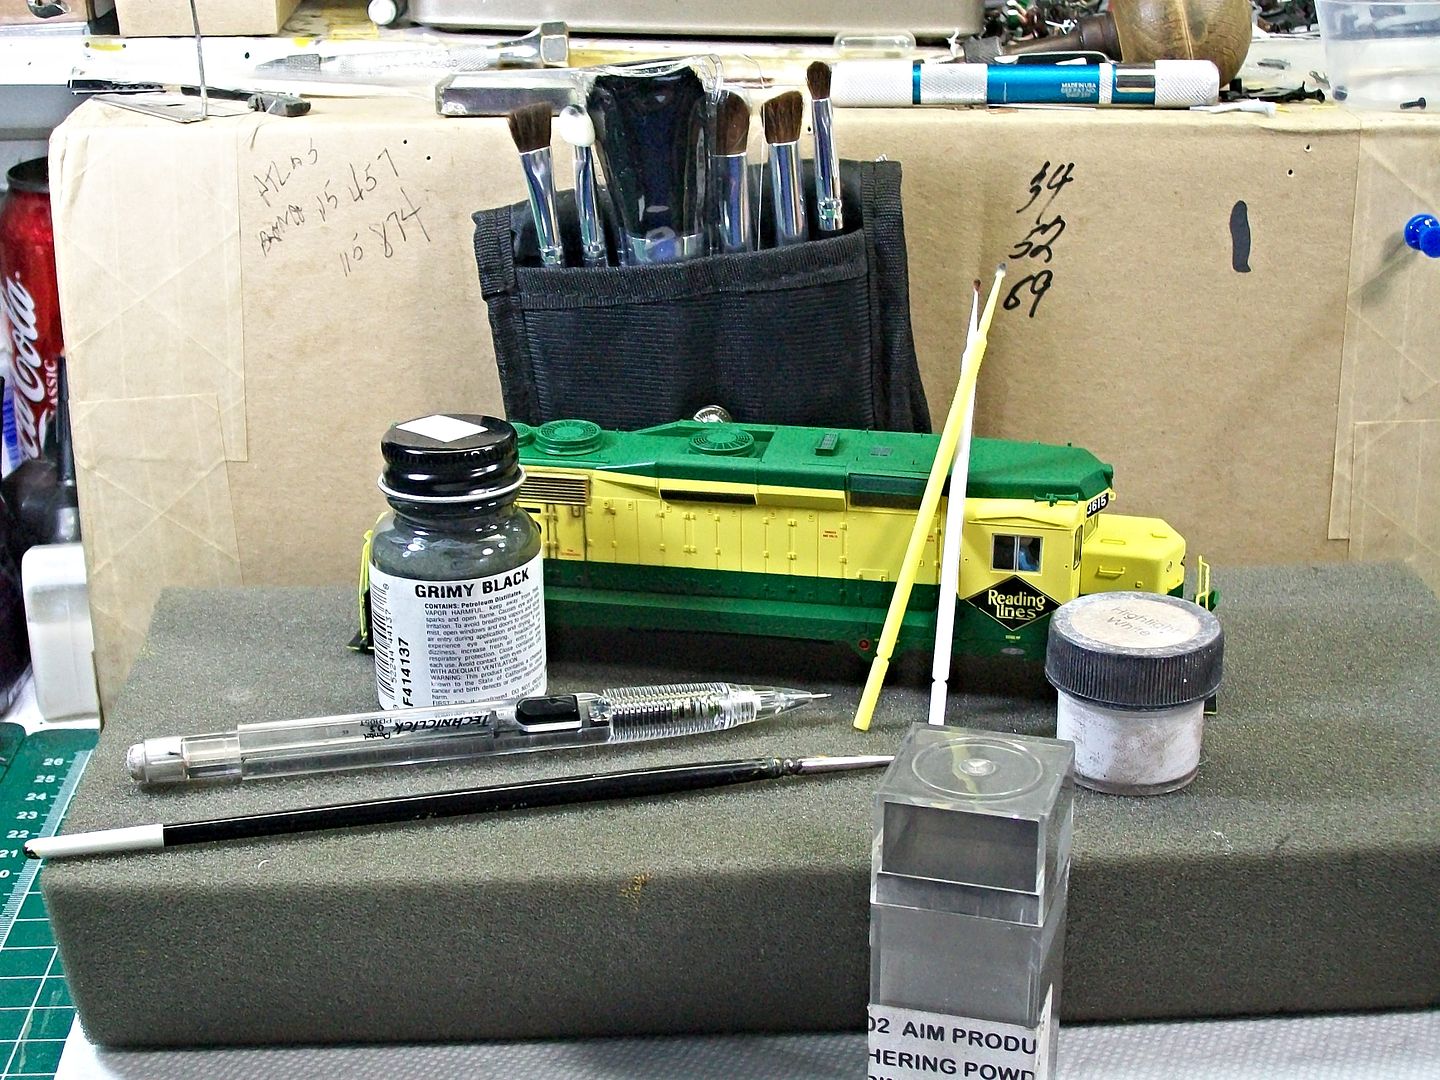
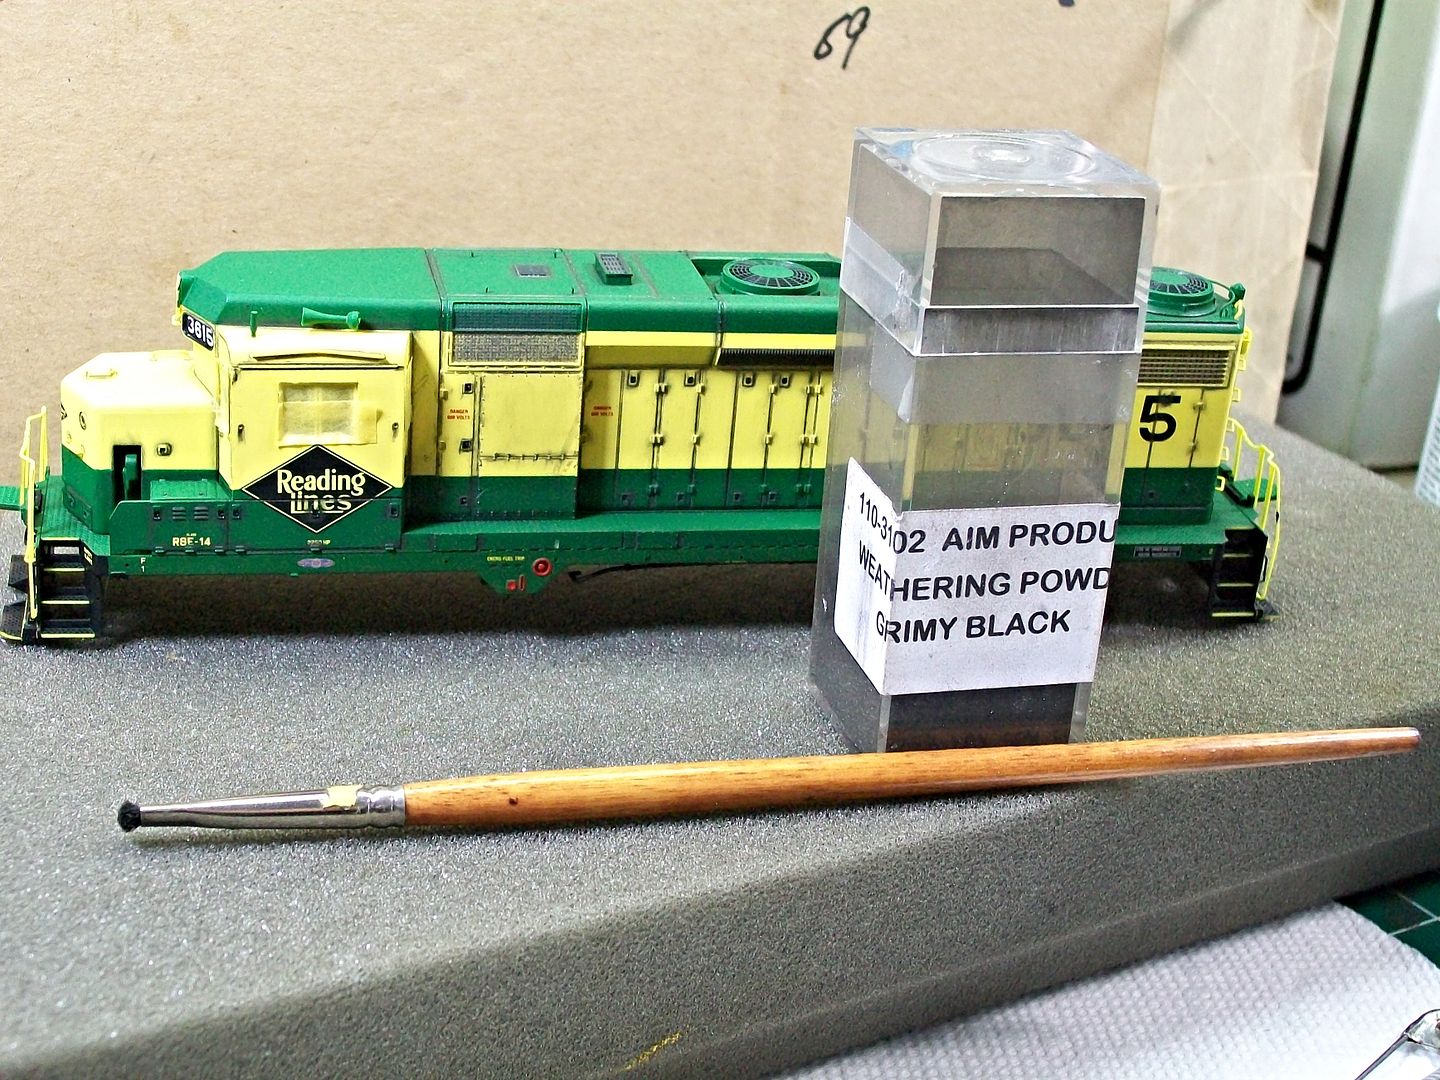
Pictured below are just some of the items I use when weathering.

My first step is to use a grimy or oily black paint.I start with the door latches and use a very fine tipped brush.The trick to this is to get enough paint on the brush and carefully insert it into the door latches and just let the paint flow off of the brush and into the latches...don't worry if it looks like a small puddle it will dry nicely.All the latches on the model receive this treatment...sides,ends and walkways.

Pictured with the model is the brush I've been using for years for this application.

When the paint dries I move on to painting all the grill work on the model with the same colored paint.Since the model came with all the side grills weathered I only painted the details on the roof.


Painting the screened areas above the fan blades really helps the detail standout as compared to leaving the screens green.

My next step is to use the mechanical pencil and trace around every detail...tedious but I find I have more control then using washes or dry brushing.I then repeat the process using the mini brushes to take away the crispness of the pencil lines and blend the lead markings into the details.At this point I mask the windows and prepare to work on the grills and roof area.


For the grill work I liberally apply the aim powder with the brush in the below picture and work it into the grill work.I lay the model on its side to limit the powder from going down the side of the unit I do each grill one at a time.The excess powder left on the grill...give it a puff of air to remove it.By doing this the powder will flow onto some details and result in some nice affects.

After the grills were done I added some weathering to the roof ares and sealed everything with the units second dullcoat application.
Side one

Side two


At this time there has been no final weathering done to the side sills or pilots.After the unit dried I added some silver paint to the ends of the mu connections and the fuel cap.I also painted the ends of the wind deflectors and windshield wipers for mounting later.

REMEMBER TO GLOVE UP DURING THIS ENTIRE PROCESS TO AVOID FINGER PRINTS ON THE MODEL.APPLY THE WEATHERING LIGHTLY...KEEP BUILDING ON THE PREVIOUS APPLICATION.
Yes...weathering is not completed on this unit.
The administrator has disabled public write access.

Walthers 5517 Becomes 3615 8 years 3 weeks ago #5207

  • 2771-chris
  • 2771-chris's Avatar
  • OFFLINE
  • Road Foreman of Engines
  • Posts: 634
  • Thank you received: 94
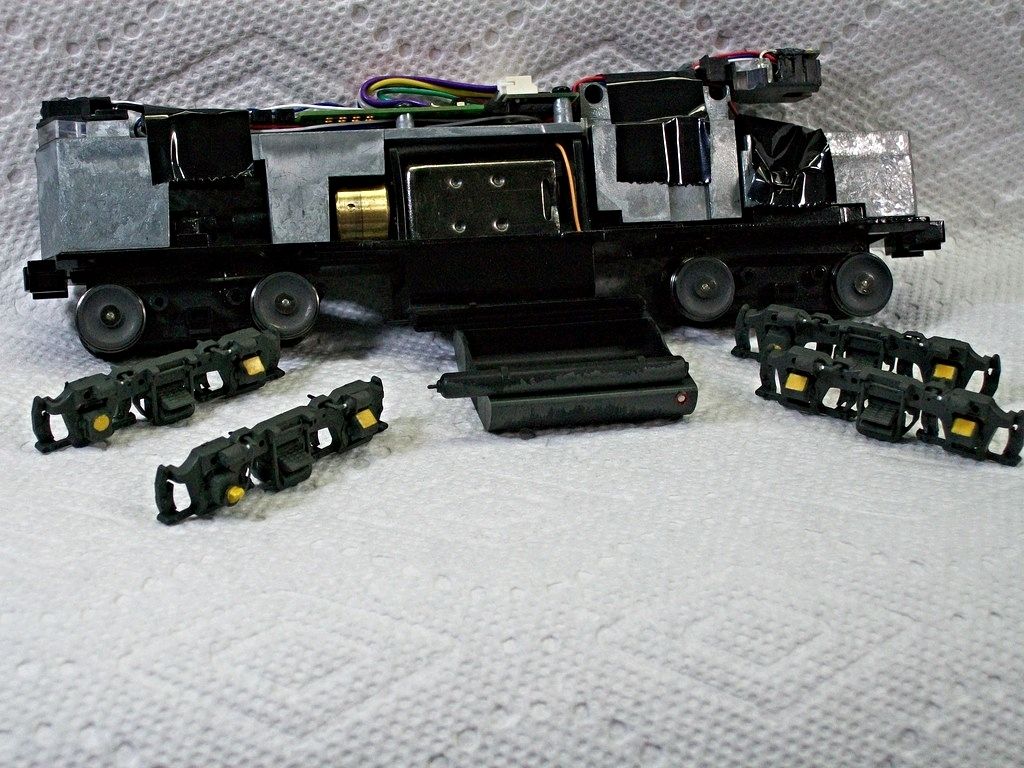
Lets place the body aside for now and work on the trucks and fuel tank.
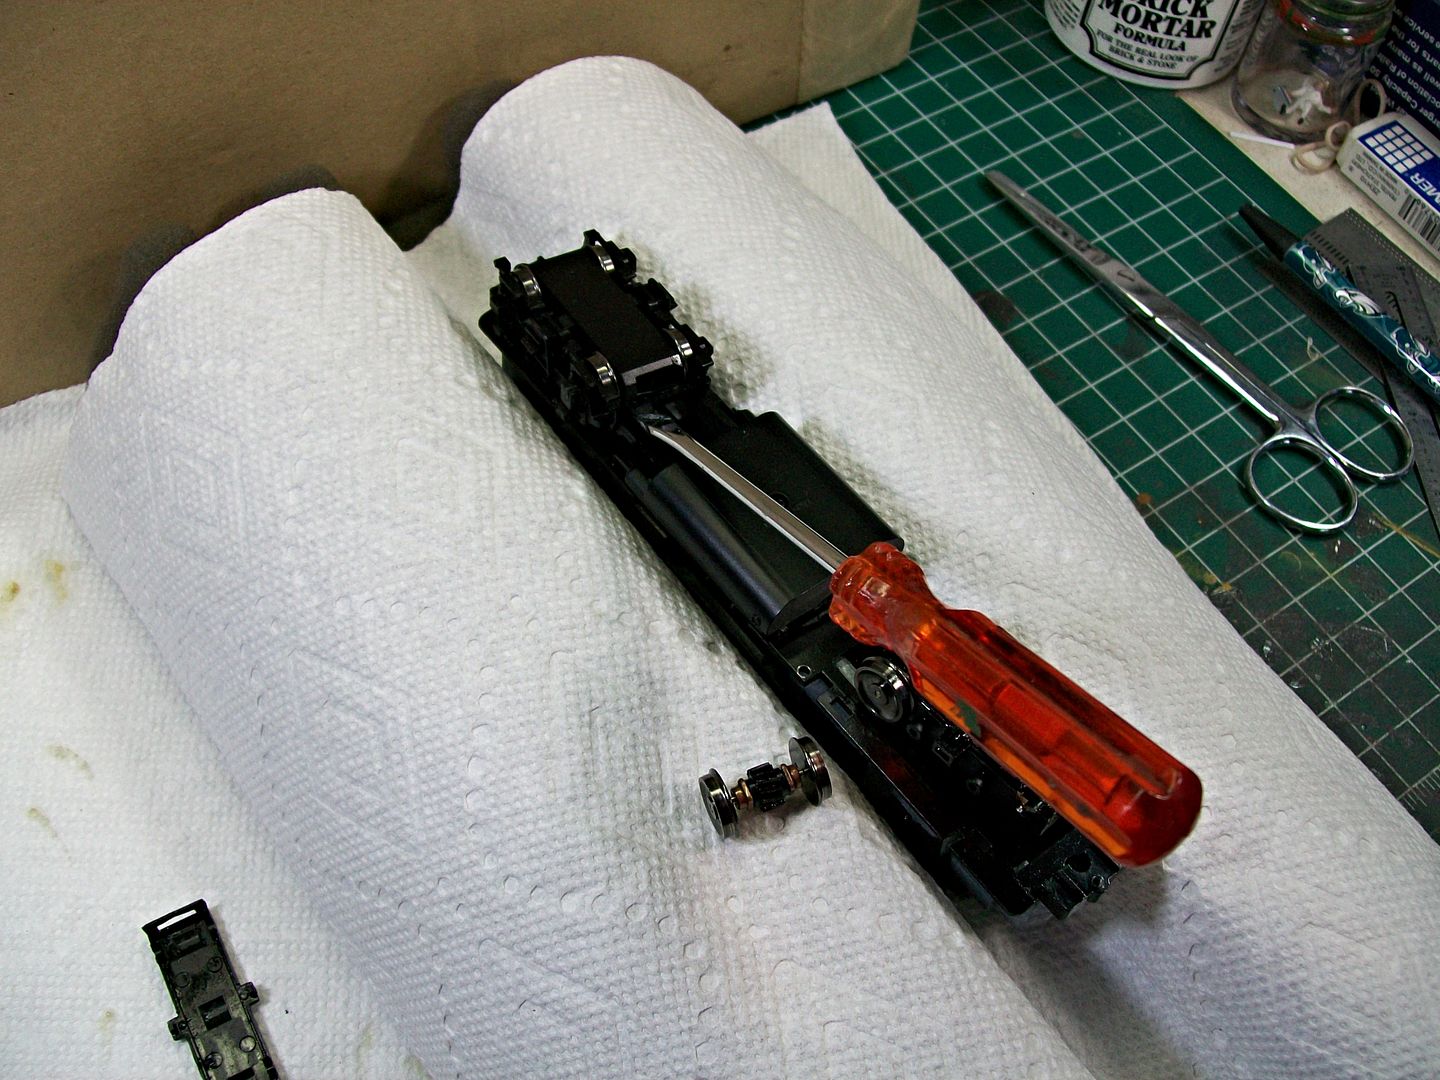
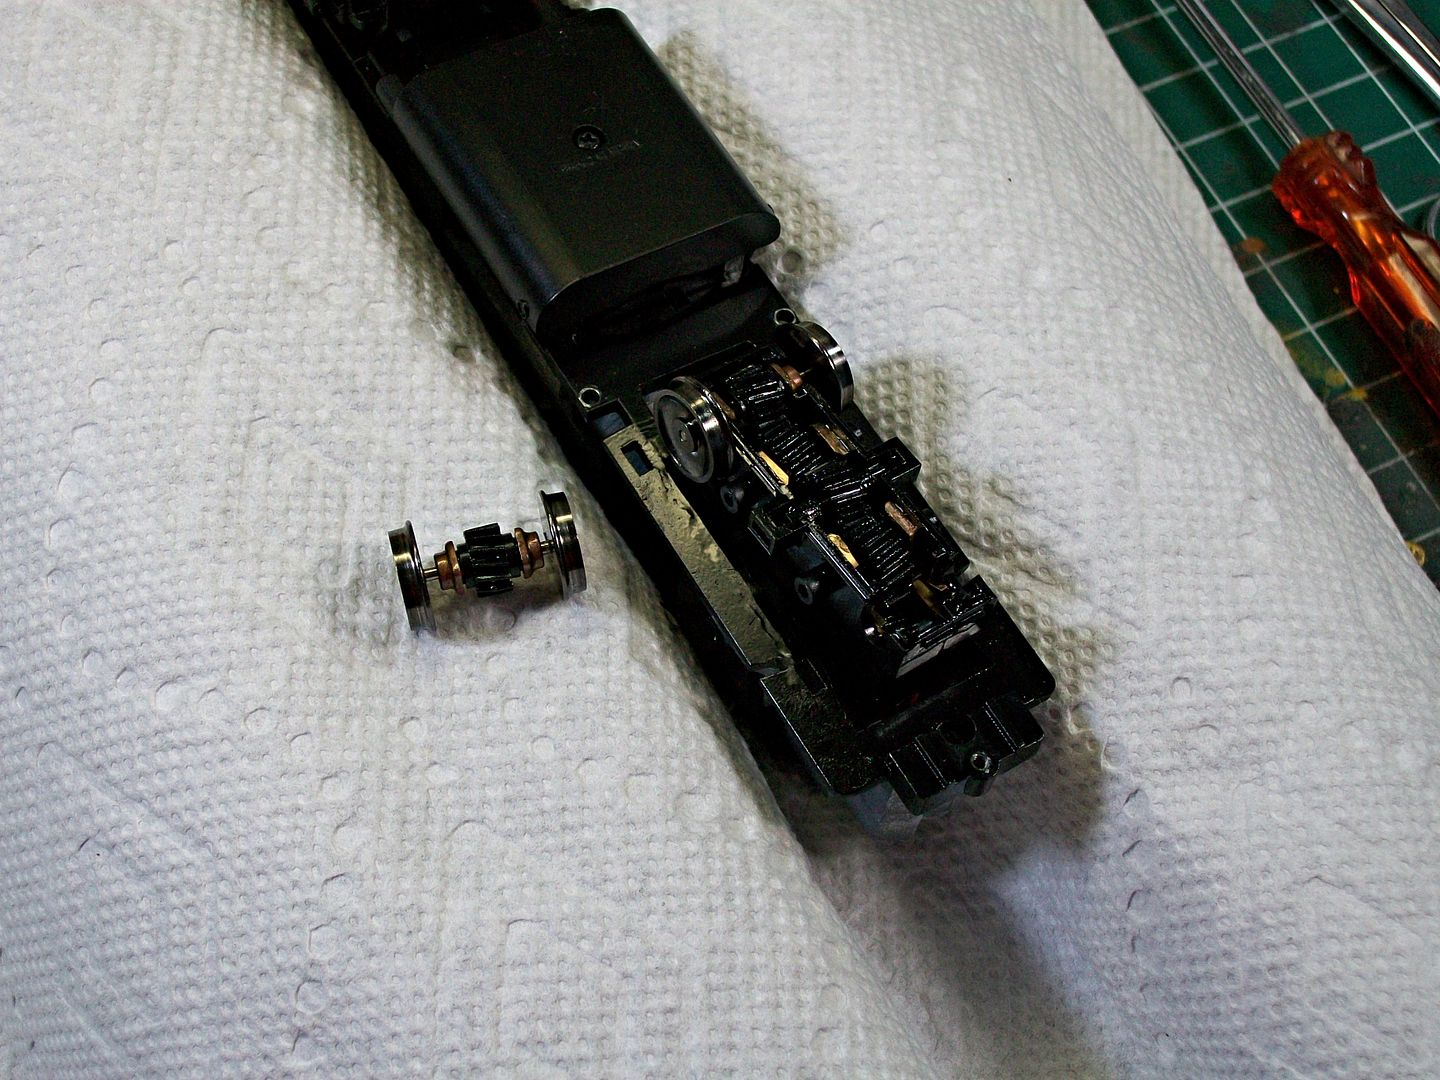
To remove the trucks the gear cover has to be removed from the truck assembly.Hold the unit upside down in the palm of your hand and stabilize the trucks with your fingers.Use a screw driver as a lever and pop the plate up and out of the way to remove the side frames.


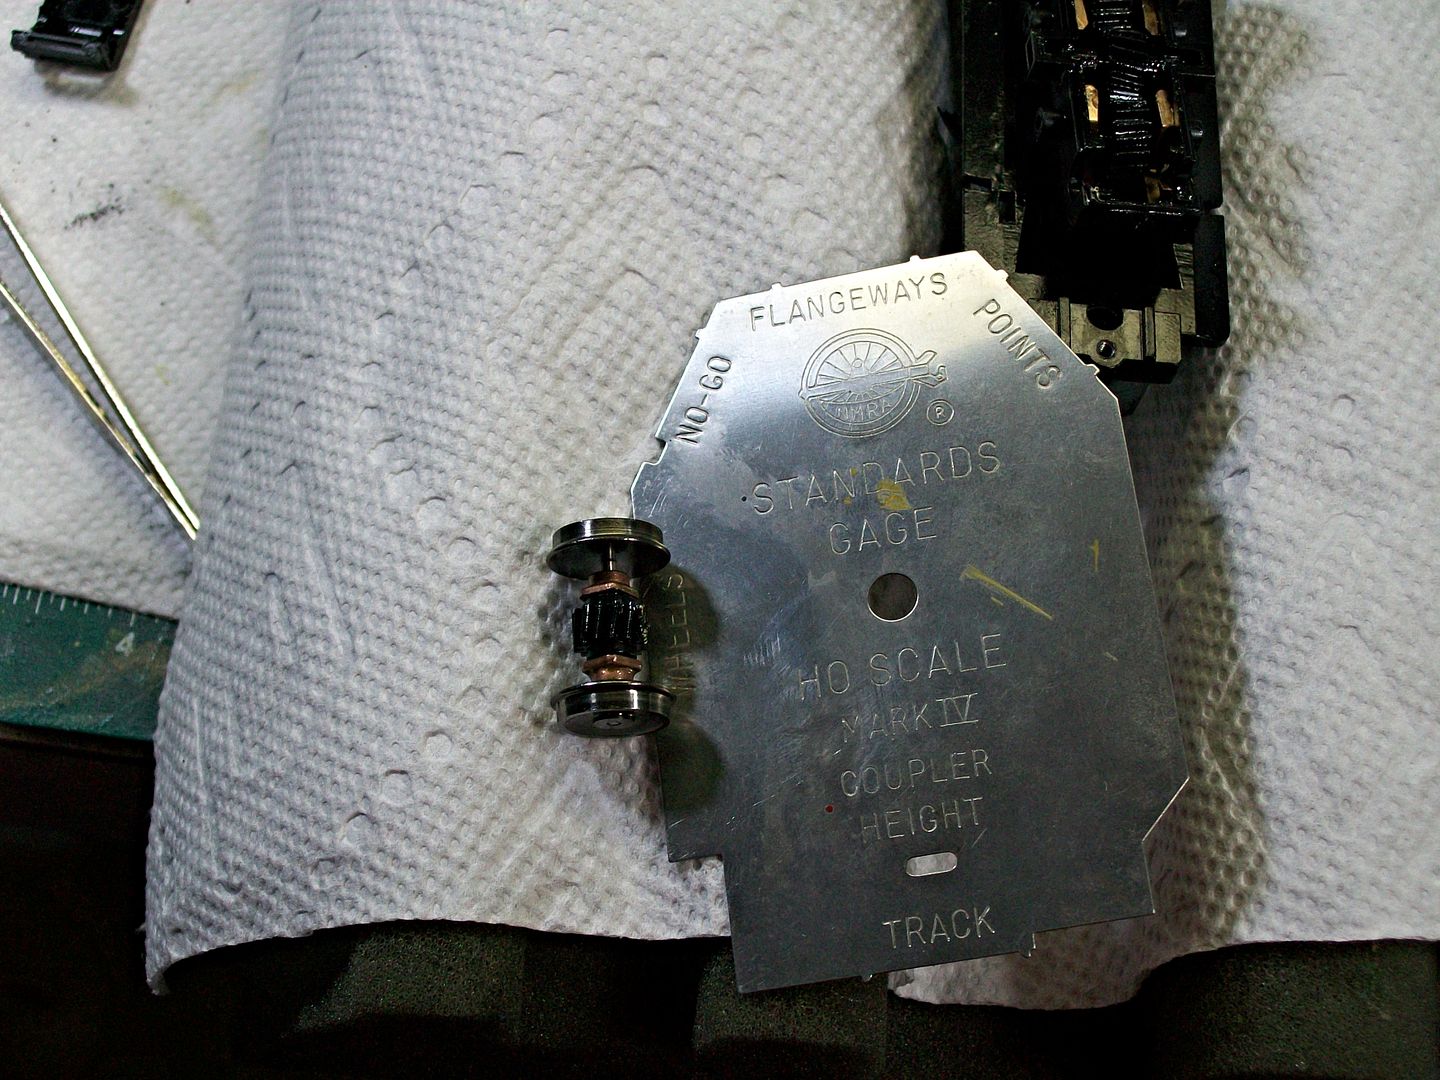
With the cover plate removed I removed the wheel assembly and cleaned all the excess grease from the gears.I also checked the wheels to make sure they were in gauge and reassembled the trucks leaving the side frames off.


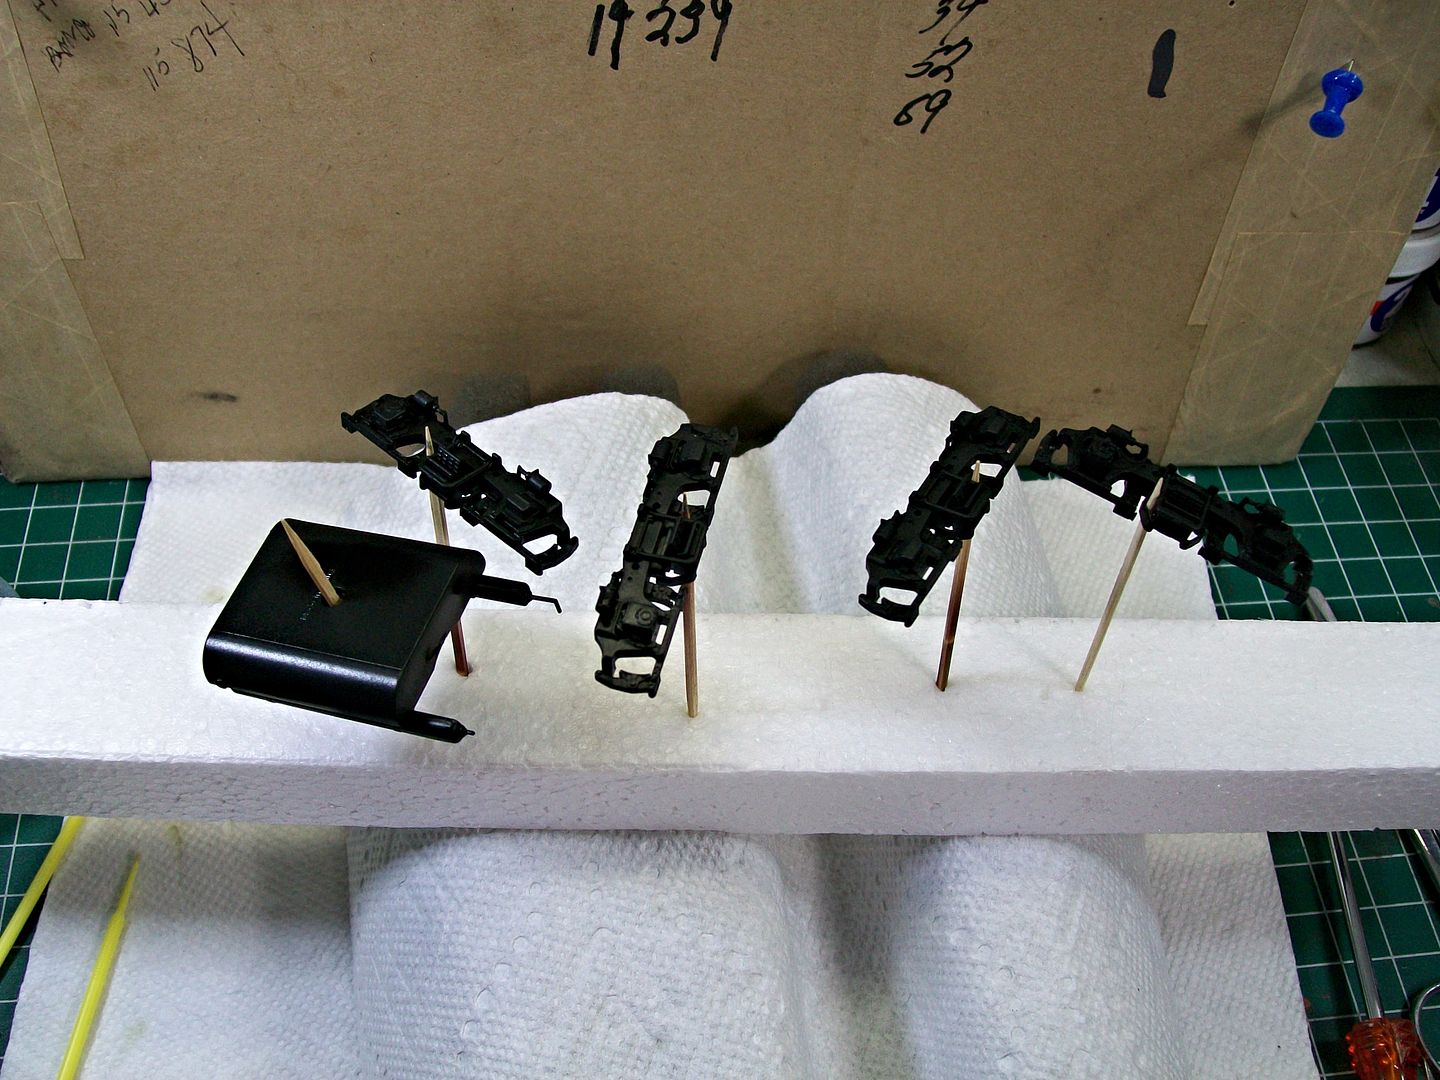
The side frames and fuel tank were then given a dullcoat spray and allowed to dry for an hour.


Painting and weathering the trucks...unless the unit is new or it just had wheel and truck work done you rarely see nice shiny black truck side frames.I hand brush the frames with a grimy or tarnished black.These frames were painted using SCII grimy black with the paint being applied yesterday.I let it dry overnight and applied dullcoat this morning.After the dullcoat dried I used PS RDG yellow as a primer on the journal box coverings and after it dried I applied FQ railbox yellow to them.I also added a little silver to the end of the ram on the brake cylinder.The wheel faces were painted FQ grimy black.
Side frames and fuel tank painted but not weathered.
The administrator has disabled public write access.
Time to create page: 0.144 seconds

Today's Image

Did You Know?

October, 1964
The Reading's new green and gold colors are used on 100 new boxcars.

Downloads

Operations Information

Click Here!A variety of Reading Company operations related documents, etc. that may be of use in your modeling efforts.

Operations Paperwork

Click Here!A variety of Reading Company operations paperwork, such as train orders, clearance forms, etc. that will help you operate your Reading layout in a prototypical manner.

Timetables, Rulebooks, Etc.

Click Here!Public Timetables, Employe Timetables, and Rulebooks that provide much useful operational information.

Modeling Goodies

Click Here!Signs, billboards, and other FREE goodies for your use.  We ask only that you help spread the word about The Reading Modeler!

Rolling Stock Reference

Click Here!Downloadable reference documents on the various classes of Reading Company Freight and Passenger rolling stock.

Thanks for Your Support!

If you find the content on The Reading Modeler valuable, won't you please consider supporting our efforts? Your donation will help to offset operating costs and acquire new material to share on the site. Thank you!

Amount: 

Advertisements