FacebookTwitterDiggGoogle BookmarksRedditLinkedinRSS Feed
Welcome, Guest
Username: Password: Remember me
This section of The Interchange provides a space where members of the Reading Modeler community can showcase their Reading modeling efforts. If you've got a project that you'd like to share, start a new topic and "show and tell" the group how you did it!

TOPIC: RDG SW1500 2763

RDG SW1500 2763 11 years 1 month ago #1038

  • 2771-chris
  • 2771-chris's Avatar
  • OFFLINE
  • Road Foreman of Engines
  • Posts: 634
  • Thank you received: 94
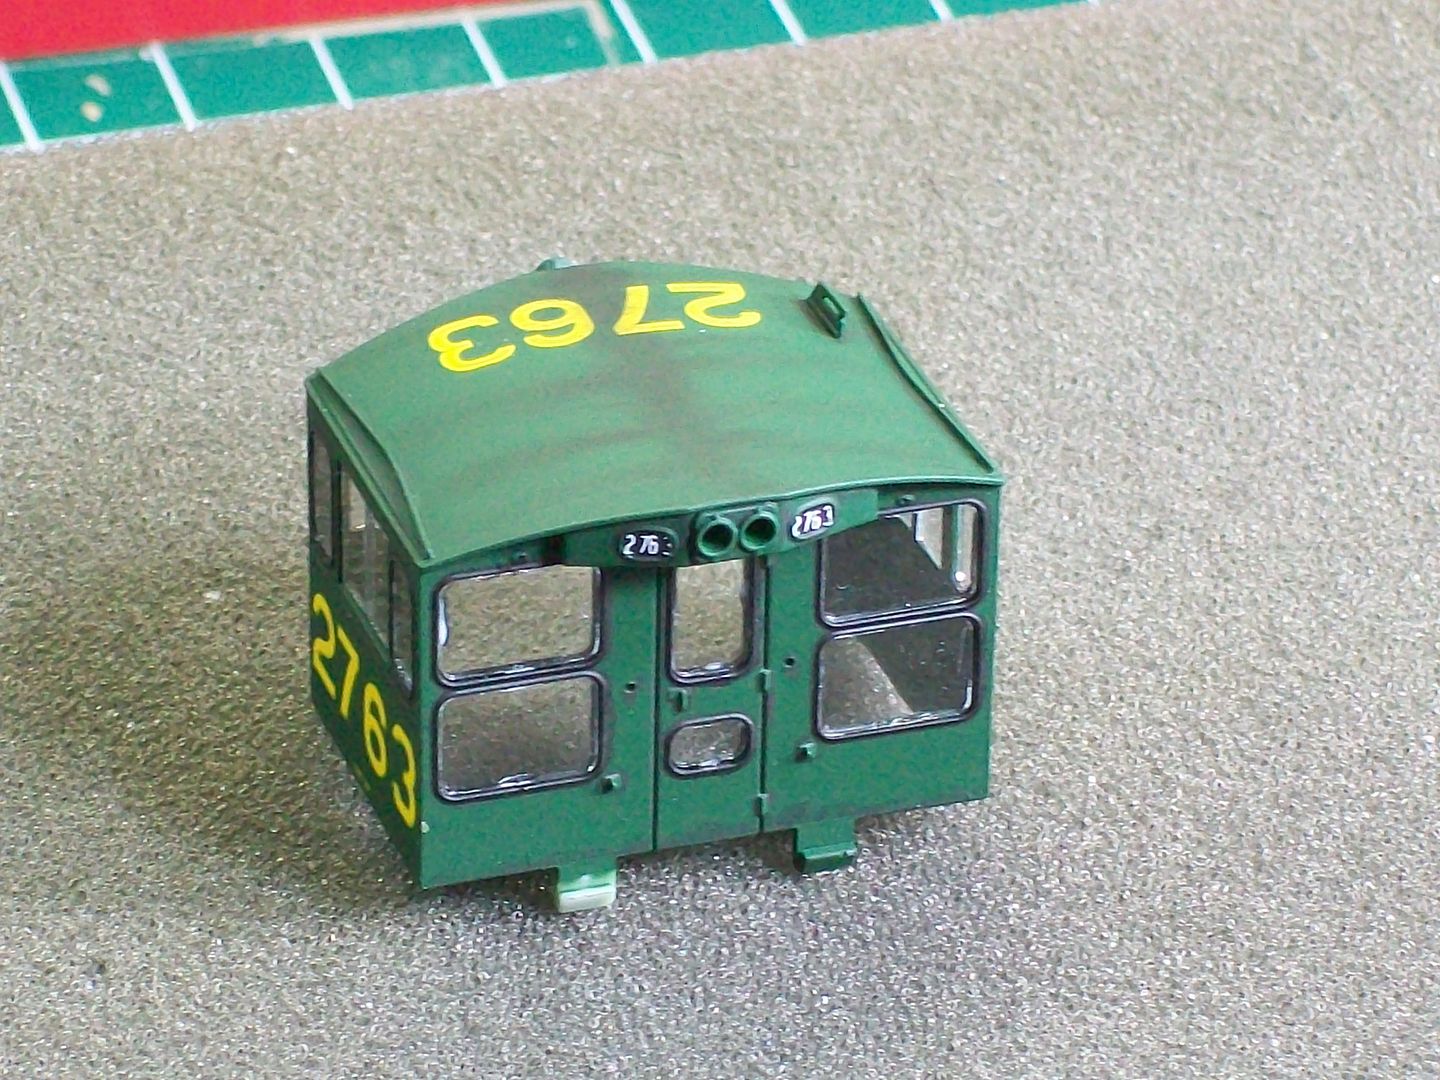
Moving on...I installed the window glazing to the cab.The windows are installed from the outside.I used Testor's white glue for clear styrene and applied it with a toothpick to the inside framing.I placed each individual window casting using tweezers.

Notice that some of the white glue can be seen,when it dries it will be clear.

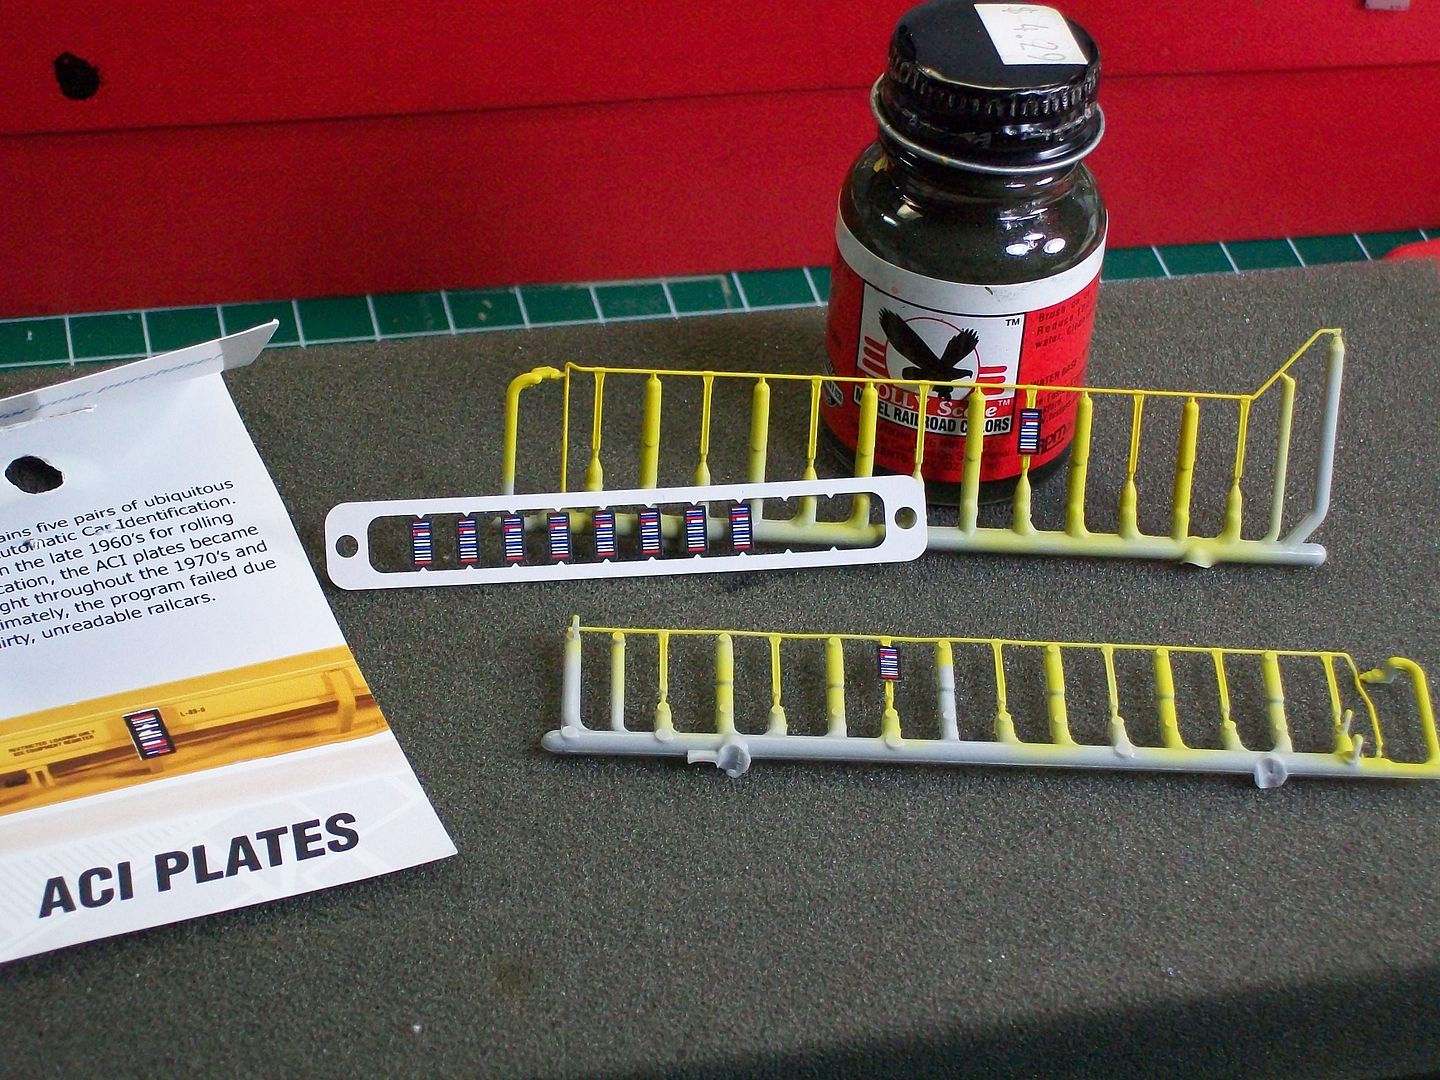
Next,I moved on to adding the aci plates to the railings.I used BLMA models #4556.They come 5 pair per package and they are brass castings.I secured them using Goo and Micro-bond.In the past I used MS decals.I would decal them to clear styrene and once they were set I'd cut them out of the sheet and apply them to the model.


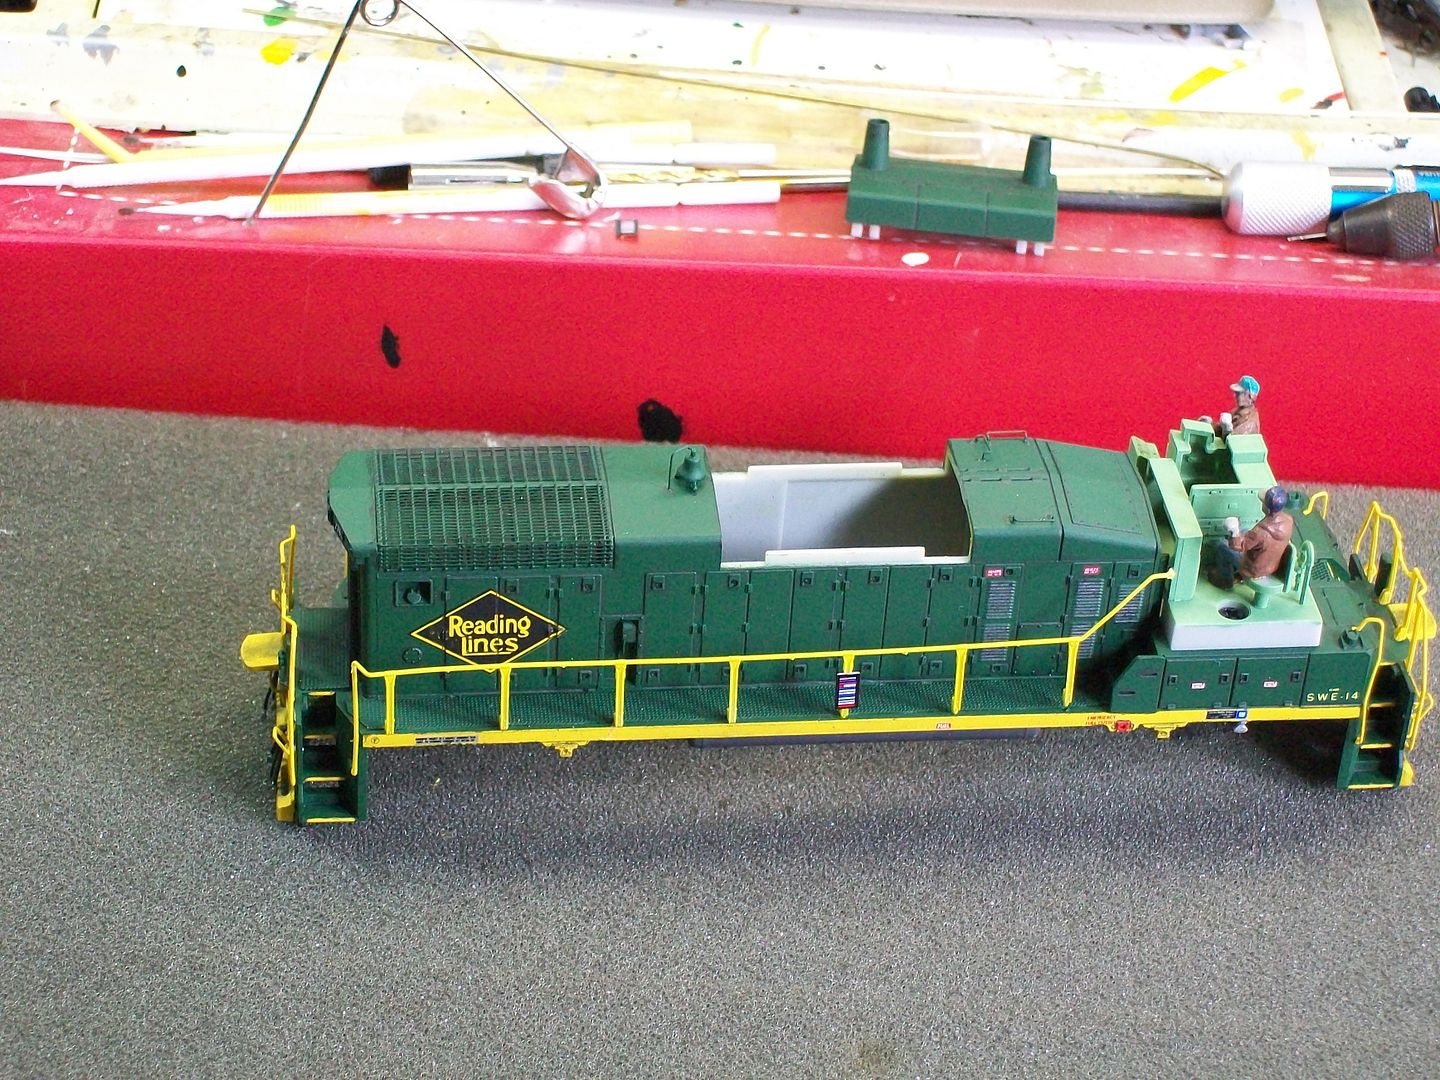
I then mounted the railings to the long hood.Two things,The railings at this point have not received their final paint and those little nubs on the bottom of the railings was the best I could do in removing them.Came close twice in completely breaking them so I didn't want to push my luck.


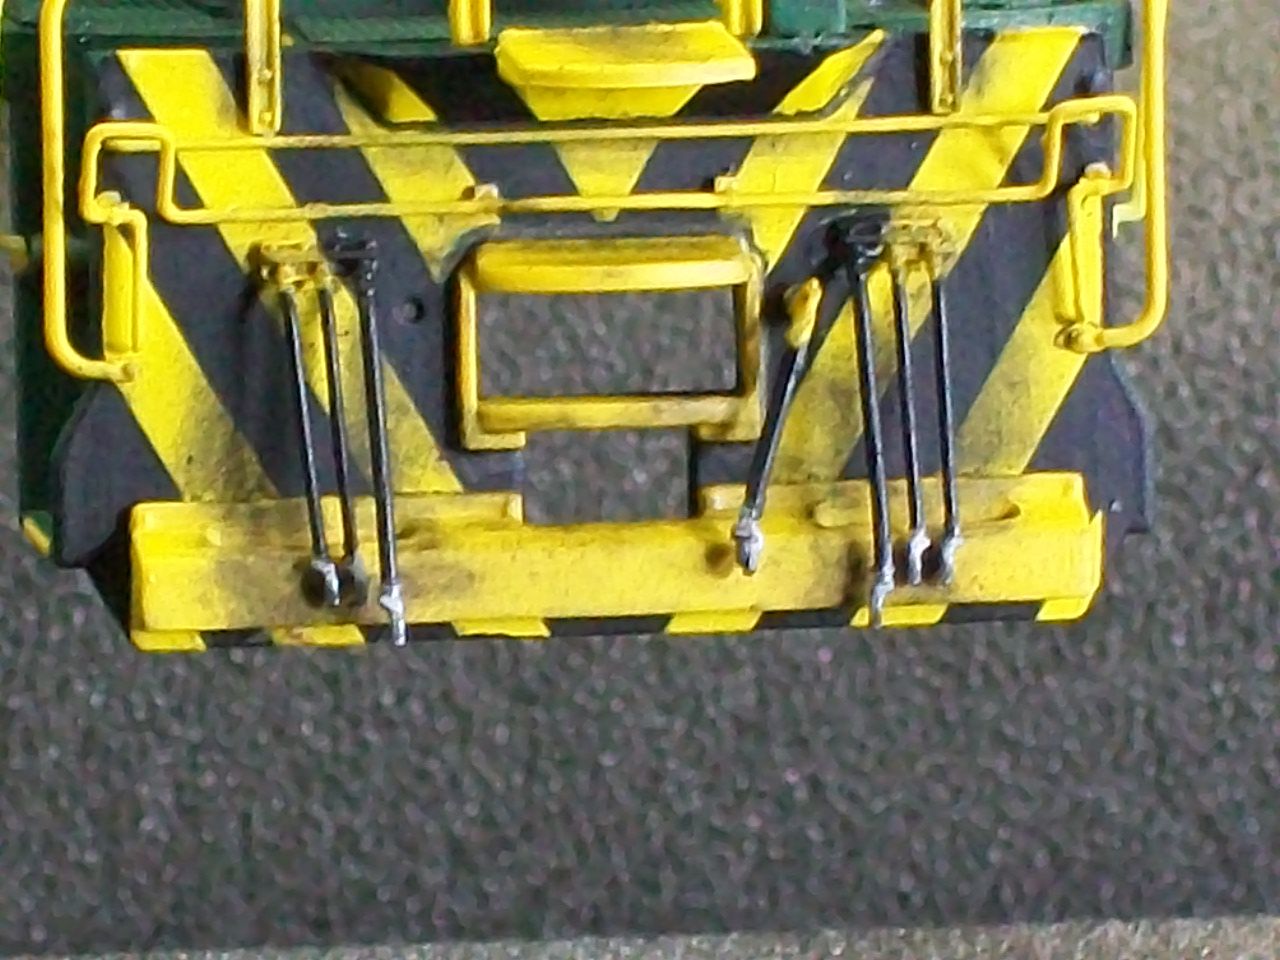
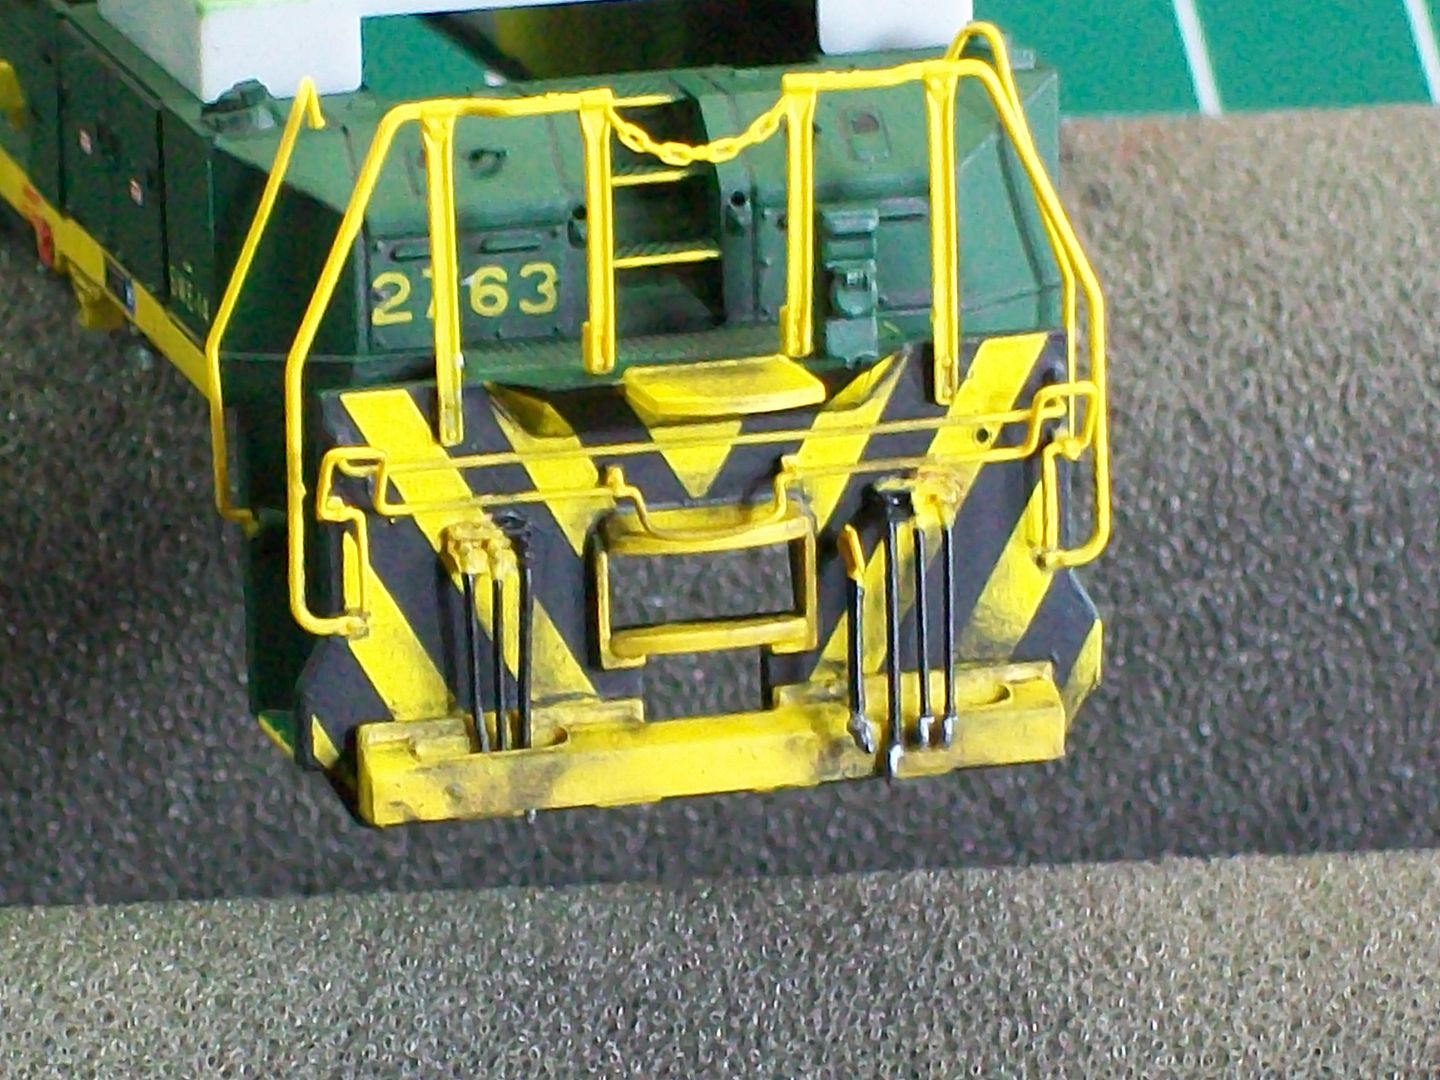
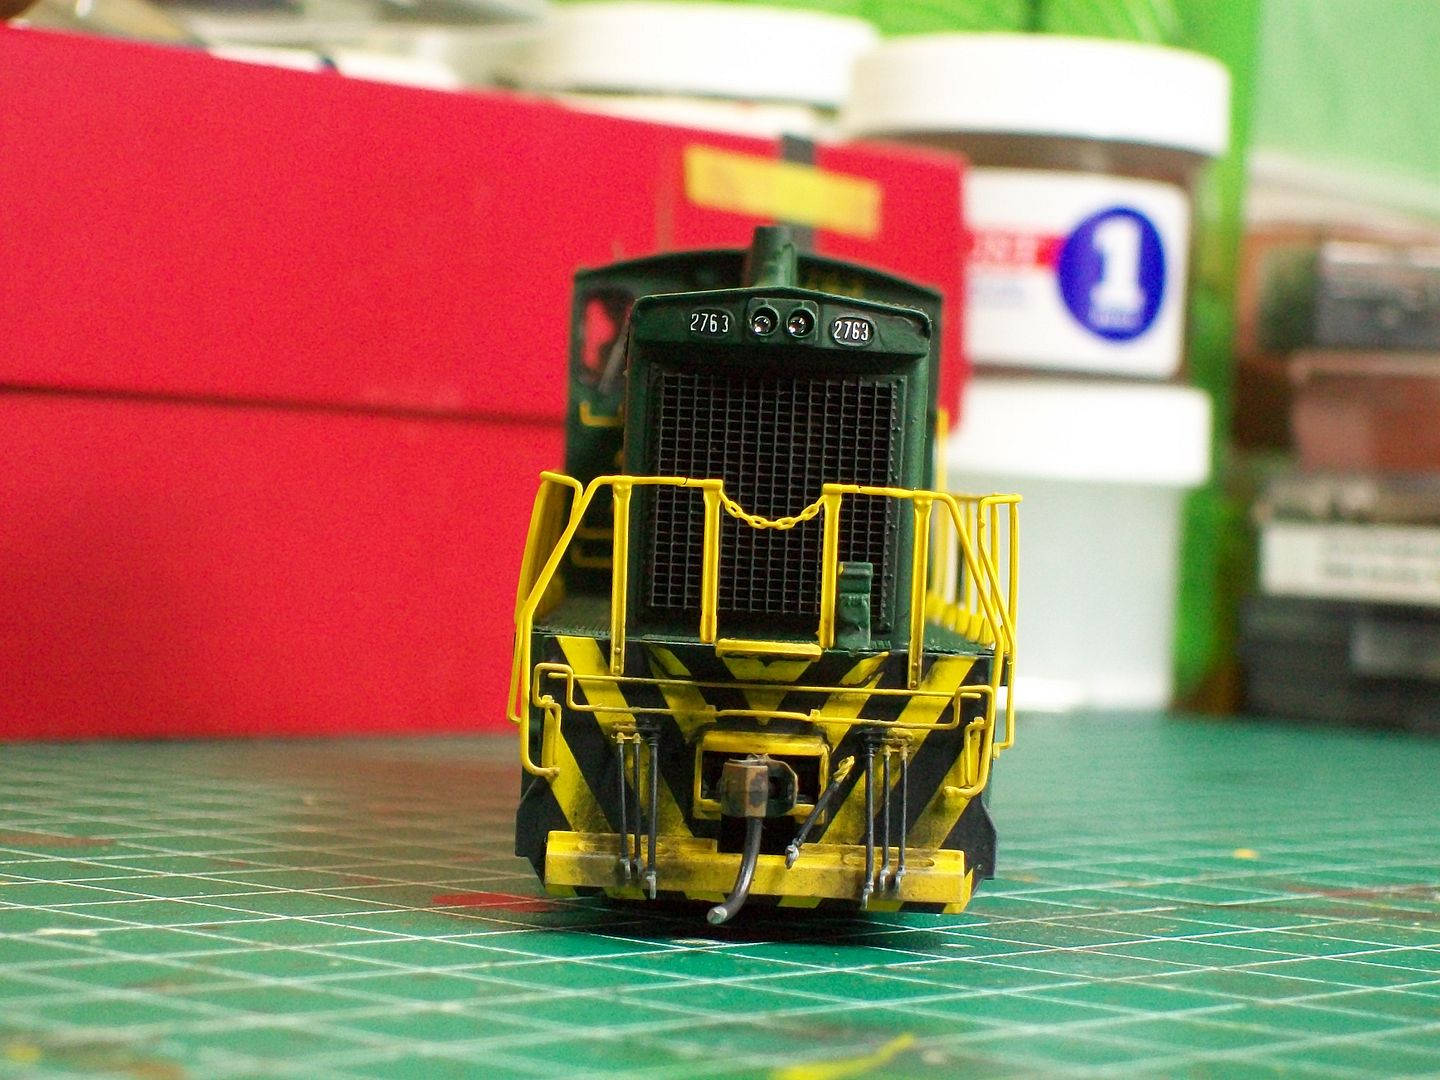
My original goal was to use the older style coupler lift bars and the pilot footboards.The older style were so warped I had to change plans and use the newer style so this eliminated the footboard use.Athearn provided the part so after painting I secured them to the pilots.Here are front and rear veiws.


Next final assembly.
The administrator has disabled public write access.

RDG SW1500 2763 11 years 1 month ago #1042

  • 2771-chris
  • 2771-chris's Avatar
  • OFFLINE
  • Road Foreman of Engines
  • Posts: 634
  • Thank you received: 94
After much frustration I finally assembled the 2763.The main cause was trying to keep those lights in place.I wish Athearn would go to led's.There's got to be a better way of mounting these instead of slipping them into the holes and securing them with tape,glue,whatever. :angry:
I mounted the couplers and boxes.I replaced the supplied couplers with Kadee #148 med. shank scale couplers.When I ran these on a Christmas tree layout with 18" radius curves the units,when mu'd would derail.The supplied coupler was too short and the footboards would override each other causing the derailment.With the 148's this was remedied.I added the rear railings near the door and secured the long hood railings to the cab.I then painted them using Floquil's reefer yellow.
I then masked all the windows and added some additional weathering using black and white powders.I sprayed dull coat to seal them.It was at this point I added the wipers and painted the couplers.I used Polyscale oily black for the fuel spills,when dried I brushed on some gloss coat.
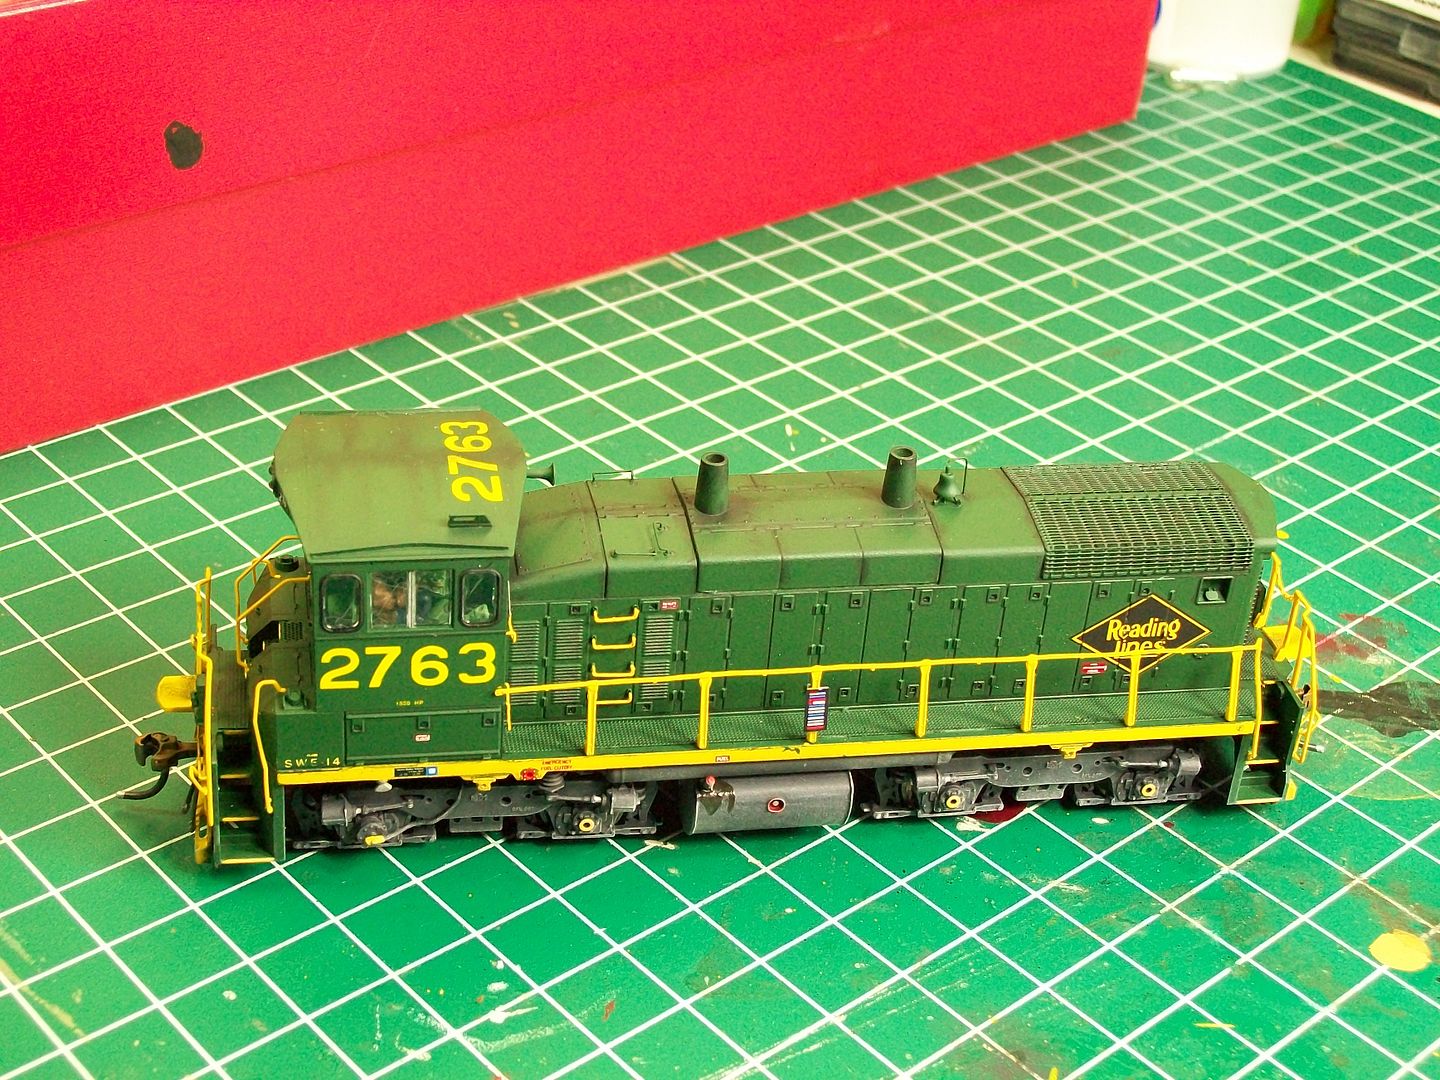
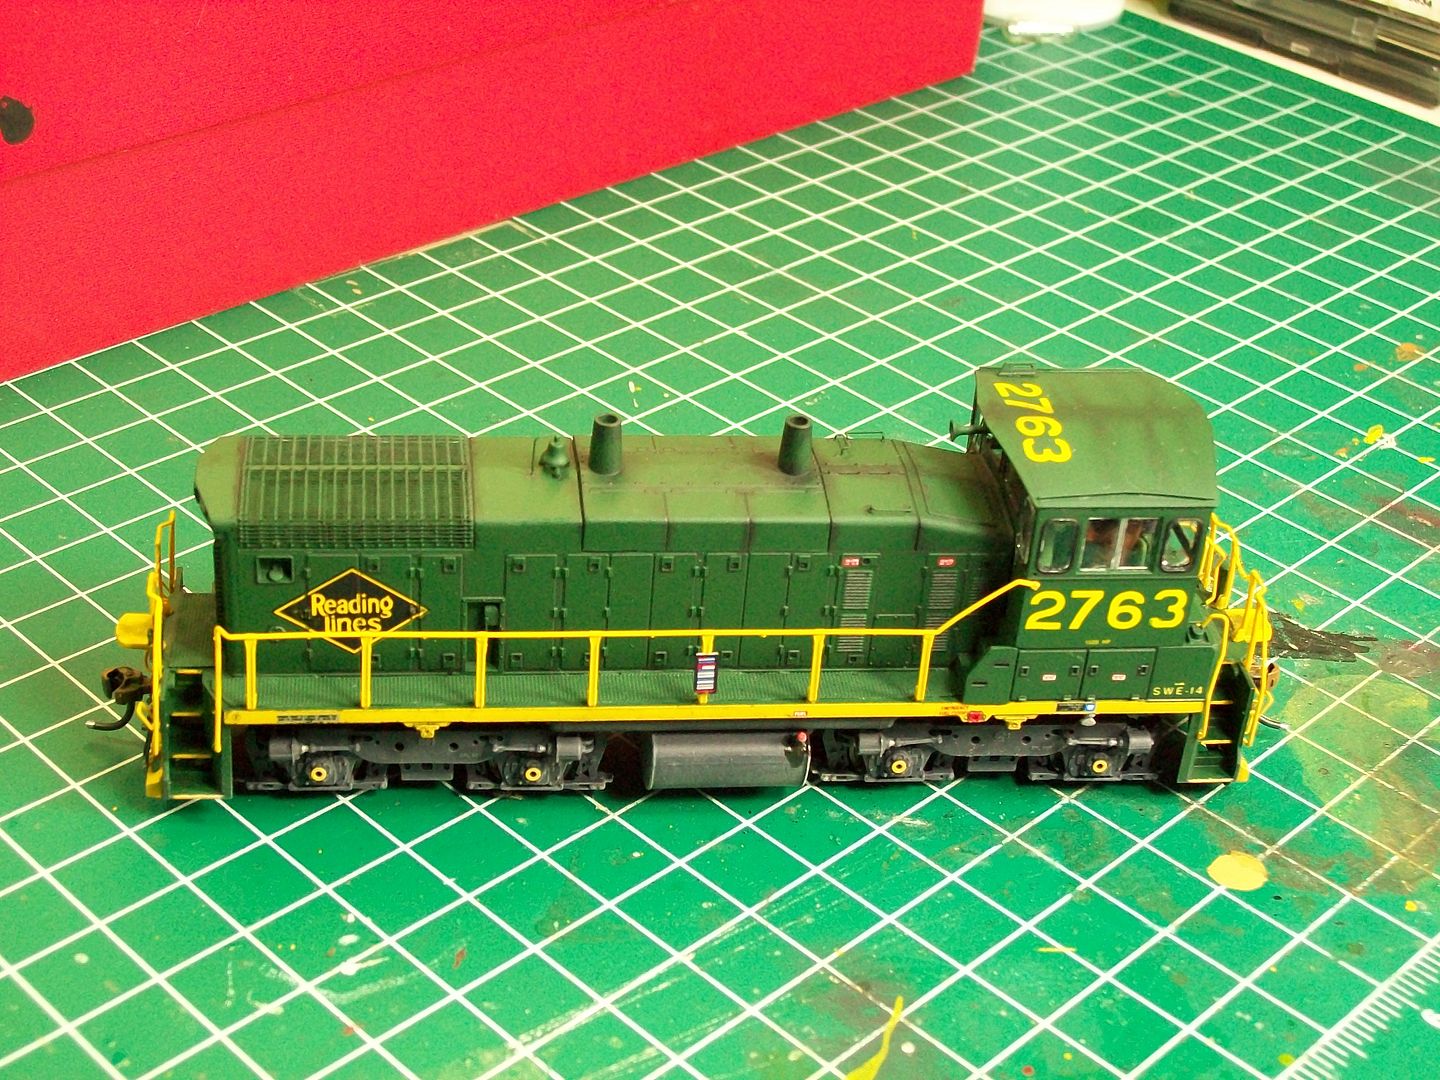
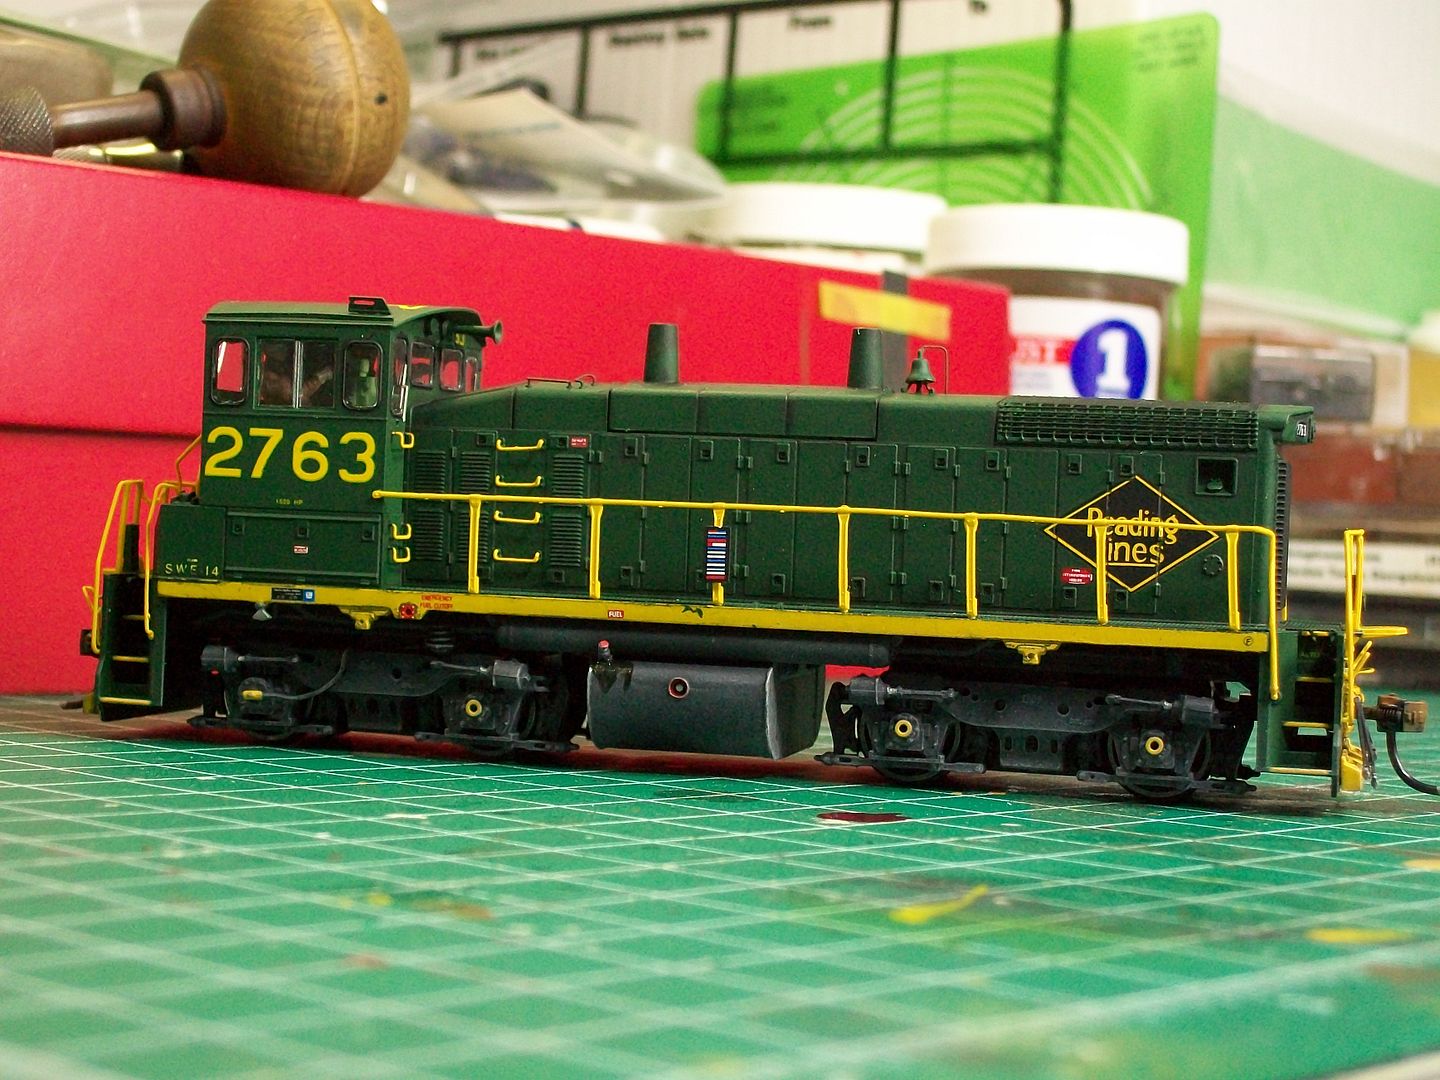
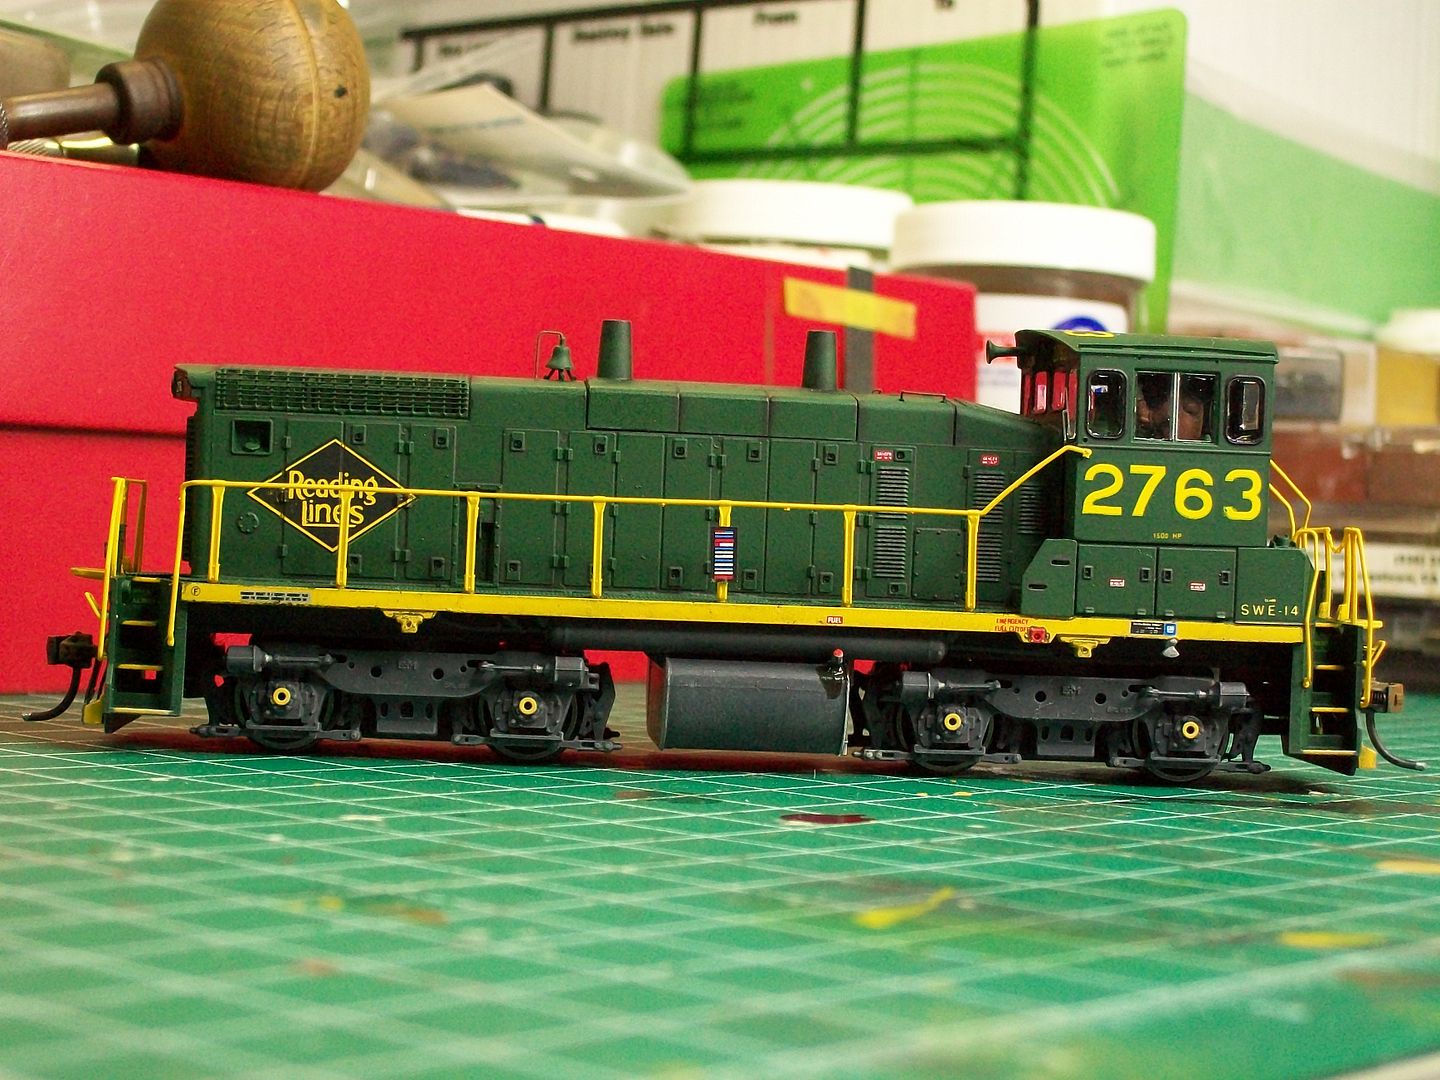
A look at the completed model.

The administrator has disabled public write access.

RDG SW1500 2763 11 years 1 month ago #1043

  • VCtrainmaster
  • VCtrainmaster's Avatar
  • OFFLINE
  • Engineer
  • Posts: 106
  • Thank you received: 12
Chris I guess I don't own any of the newer SW-1500's I have 3 of the older blue box ones Undec. and 3 or 4 Cary shells. I noticed the wire grill on top . Did that come with the unit or was that part of the cannon kit? and do you know if those wire grill screens are available to put on the older blue box models. It sure would dress them up.
P.S. Great job!
Daniel J Mohr
The administrator has disabled public write access.

RDG SW1500 2763 11 years 1 month ago #1044

  • 2771-chris
  • 2771-chris's Avatar
  • OFFLINE
  • Road Foreman of Engines
  • Posts: 634
  • Thank you received: 94
VC first off...Thank You

The wire grill came with the unit.Looking at the blue box unit I have the grill work is molded into the body and it looks like a lot of work to cut it out.I would leave it in place and just weather it to give it some depth.
The administrator has disabled public write access.

RDG SW1500 2763 11 years 1 month ago #1045

  • 2771-chris
  • 2771-chris's Avatar
  • OFFLINE
  • Road Foreman of Engines
  • Posts: 634
  • Thank you received: 94
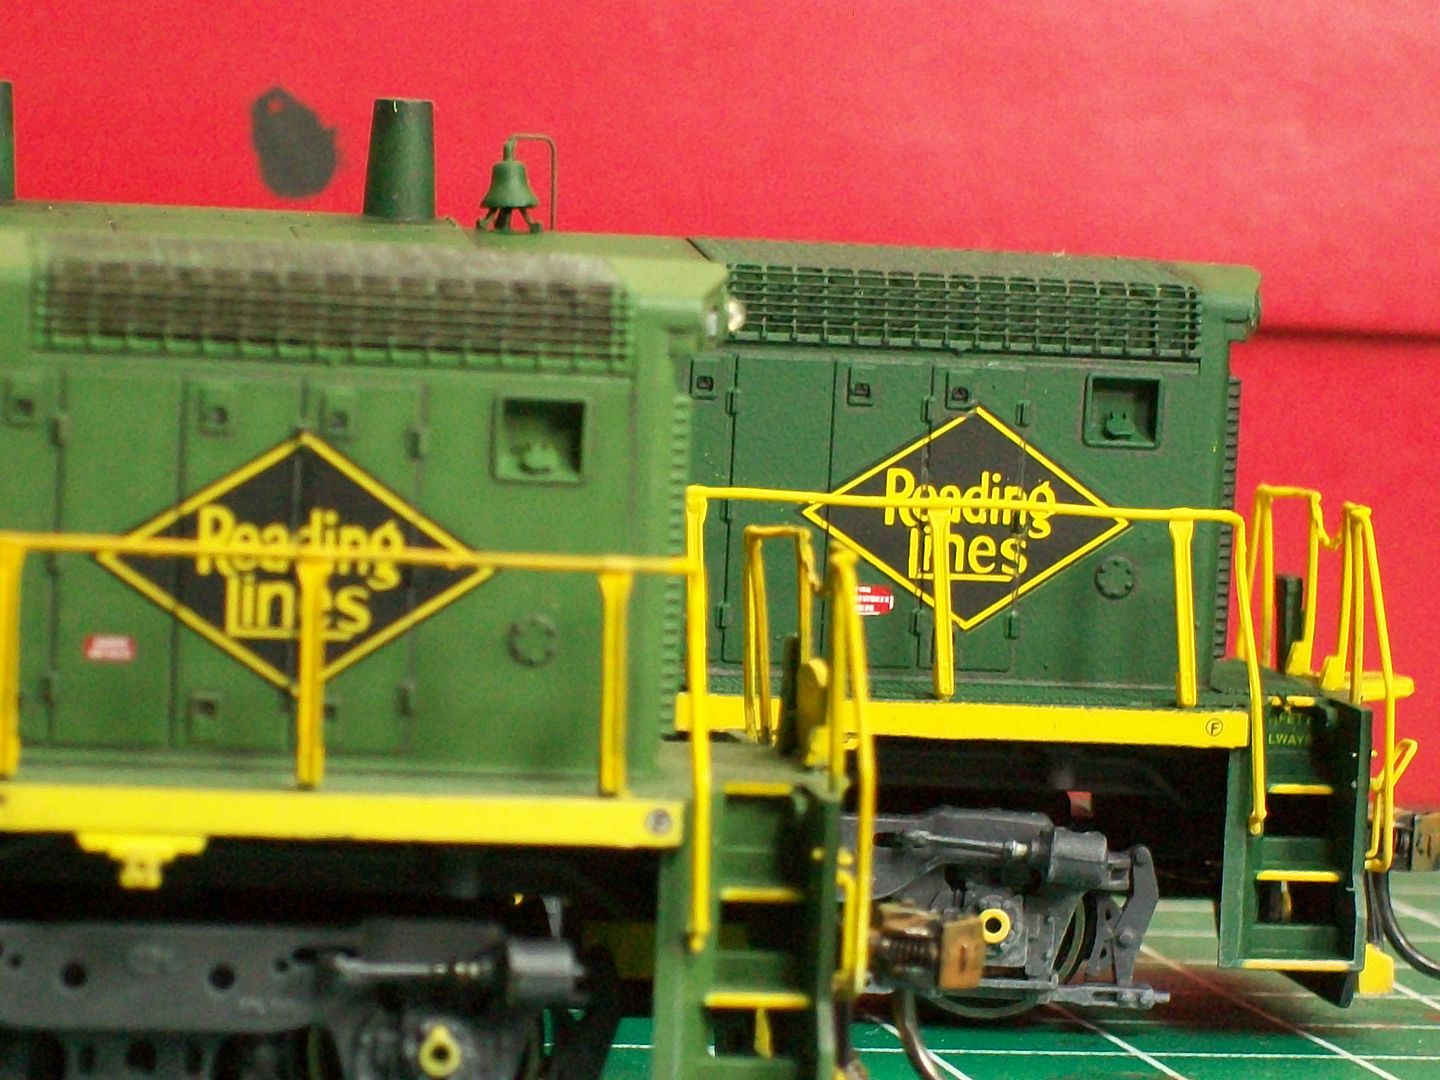
OK I decided to compare the factory painted model to my model.Now I'm not trying to ruffle any feathers so let me make it clear...crystal.My intent is to NOT bash Athearn or any other manufacturer,there's always some short comings.And I'm pleased that they release RDG units.With that said,these are observations.
Just a pic of the units side by side.


The next pic shows the difference in the pilot stripe application.Now with a little homework I think the right application could have, should have been applied.


Now,one thing I never spotted until I worked on this unit was the incorrect position of the RDG herald.On the factory unit it's applied closer to the cab end.It should be more towards the front.
Here's a left side comparison.Use the door latches as your guide.


Now on the right side,the incorrect placement off the RDG herald results in the wrong placement of the fire extinguisher inside decal.It should be on the 2nd door.


Now one thing I'll never be happy about,unless they find a better way of mounting and keeping them in place,is their choice of lighting.I worked a good hour trying to get them to seat well and I was finally satisfied.The next two pics,with minimum handling show how the lights have shifted.It's just frustrating :angry: To me it stands out and takes away from the finished model.


Well,thanks for listening to some of my frustrations with this build.Would I do another Athearn SW1500?...of course.
Two ground level shots of 2763.

The administrator has disabled public write access.

RDG SW1500 2763 11 years 1 month ago #1046

  • MarkFJ
  • MarkFJ's Avatar
  • OFFLINE
  • Conductor
  • Posts: 227
  • Thank you received: 39
Nice work as always Chris!

Do you think the misplaced herald on the factory-decorated unit is due to how Athearn must stamp the printing on the shell? Maybe (and I’ll be quick to point out that I’m just guessing) they can’t get the stamping closer to the end because there is a tolerance issue with the jig they use to hold the shell. Again, I’m purely speculating.

For those interested in how factory paint is applied, check out this youtube video on LGB Trains former Nurnberg operation. They start showing the paint process about seven minutes into the video. Neat stuff!

How it’s made: Model Trains
Last Edit: 11 years 1 month ago by MarkFJ. Reason: fixed link
The administrator has disabled public write access.
Time to create page: 0.294 seconds

Today's Image

Did You Know?

January 1, 1955
The Reading begins Trailer-on-Flatcar (TOFC) service between Philadelphia and Chicago in cooperation with the WM, P&WV, and NKP (the "Alphabet Route").

Downloads

Operations Information

Click Here!A variety of Reading Company operations related documents, etc. that may be of use in your modeling efforts.

Operations Paperwork

Click Here!A variety of Reading Company operations paperwork, such as train orders, clearance forms, etc. that will help you operate your Reading layout in a prototypical manner.

Timetables, Rulebooks, Etc.

Click Here!Public Timetables, Employe Timetables, and Rulebooks that provide much useful operational information.

Modeling Goodies

Click Here!Signs, billboards, and other FREE goodies for your use.  We ask only that you help spread the word about The Reading Modeler!

Rolling Stock Reference

Click Here!Downloadable reference documents on the various classes of Reading Company Freight and Passenger rolling stock.

Thanks for Your Support!

If you find the content on The Reading Modeler valuable, won't you please consider supporting our efforts? Your donation will help to offset operating costs and acquire new material to share on the site. Thank you!

Amount: 

Advertisements