FacebookTwitterDiggGoogle BookmarksRedditLinkedinRSS Feed
Welcome, Guest
Username: Password: Remember me
This board is the place where questions and information specific to MODELING the Reading Company, its equipment and operations can be shared - questions like "What was the window arrangement of AF Tower in Alburtis?" and "What color paint do YOU use to paint the Reading's cream-and-brown buildings?" We also want to hear about YOUR Reading modeling projects!

TOPIC: Athearn's RDG GP7's

Athearn's RDG GP7's 10 years 3 months ago #2576

  • 2771-chris
  • 2771-chris's Avatar
  • OFFLINE
  • Road Foreman of Engines
  • Posts: 634
  • Thank you received: 94
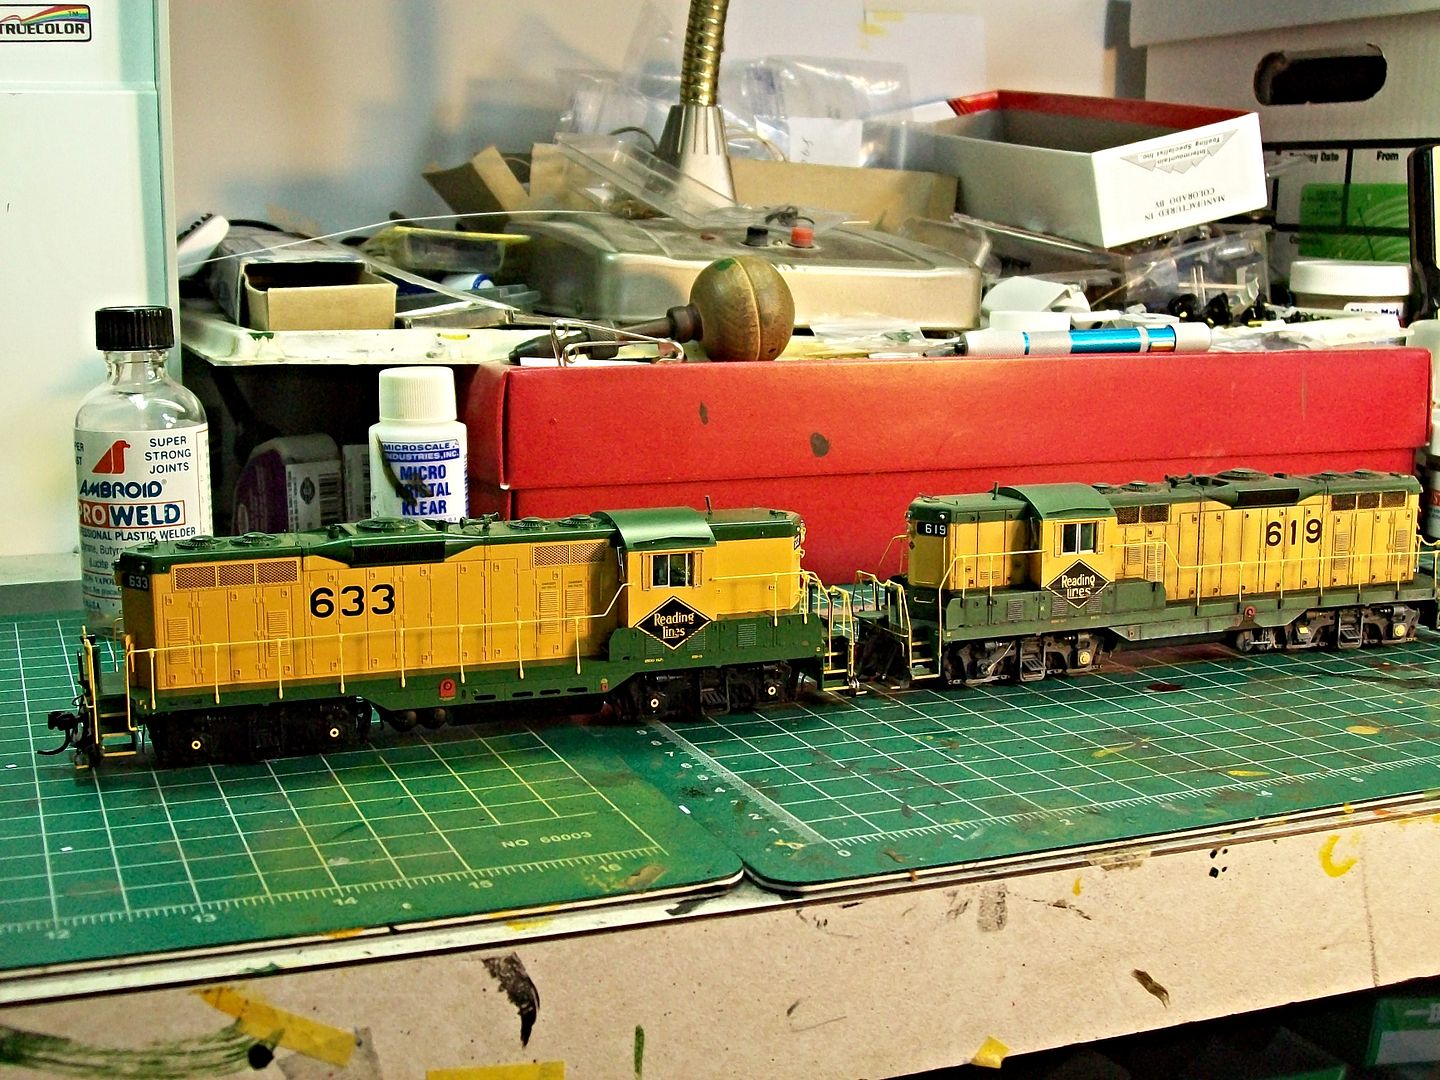
I decided that my 619 needed a partner so I picked up 633 back in November.My original plan was to turn 633 into 629,but I changed my mind.So,let's make 633 look like a vet as compared to 619.

The paint separation on the top of the long hood is correct so there was nothing needed to be done there.However,the green paint needed to be raised on the long&short hoods along with the cab.

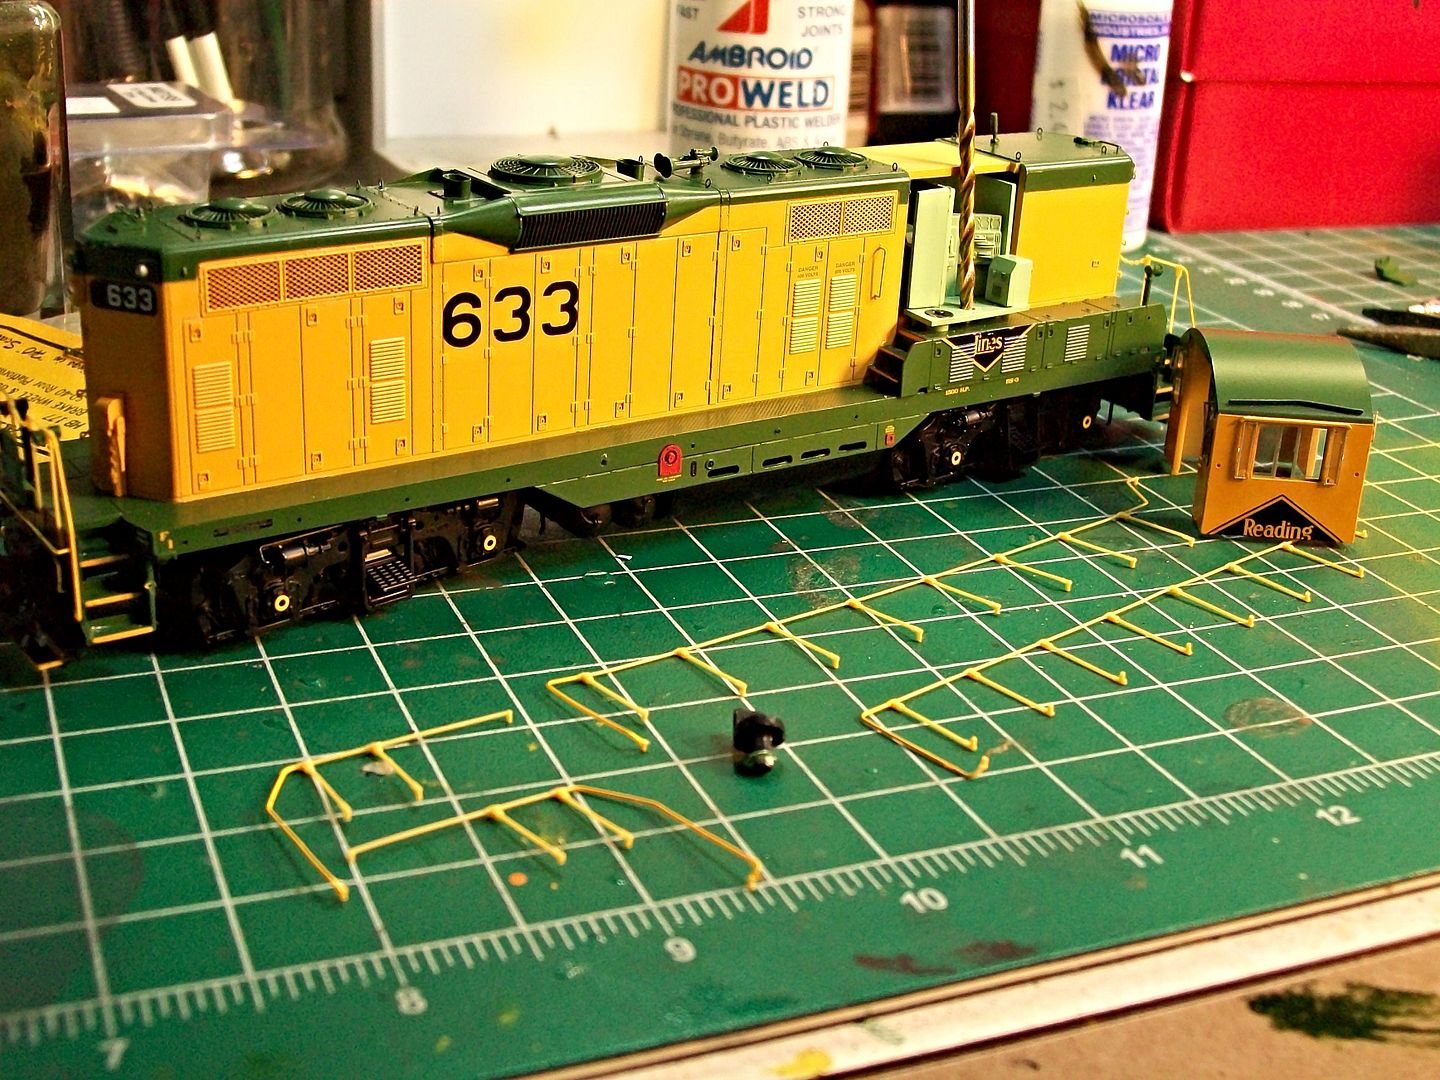
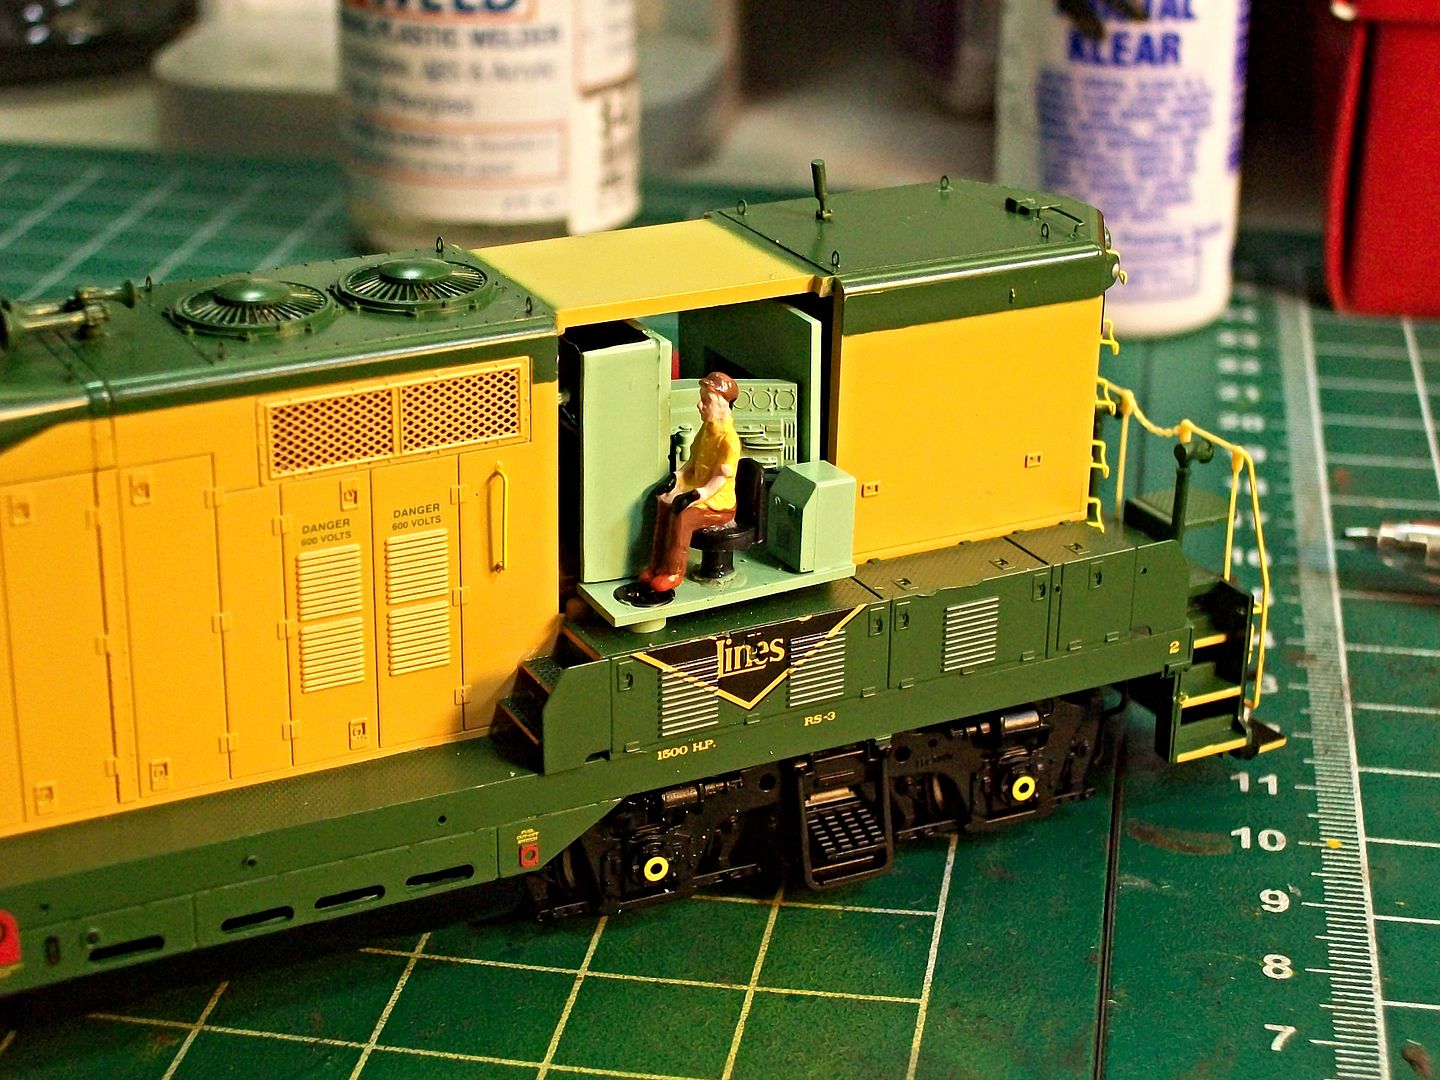
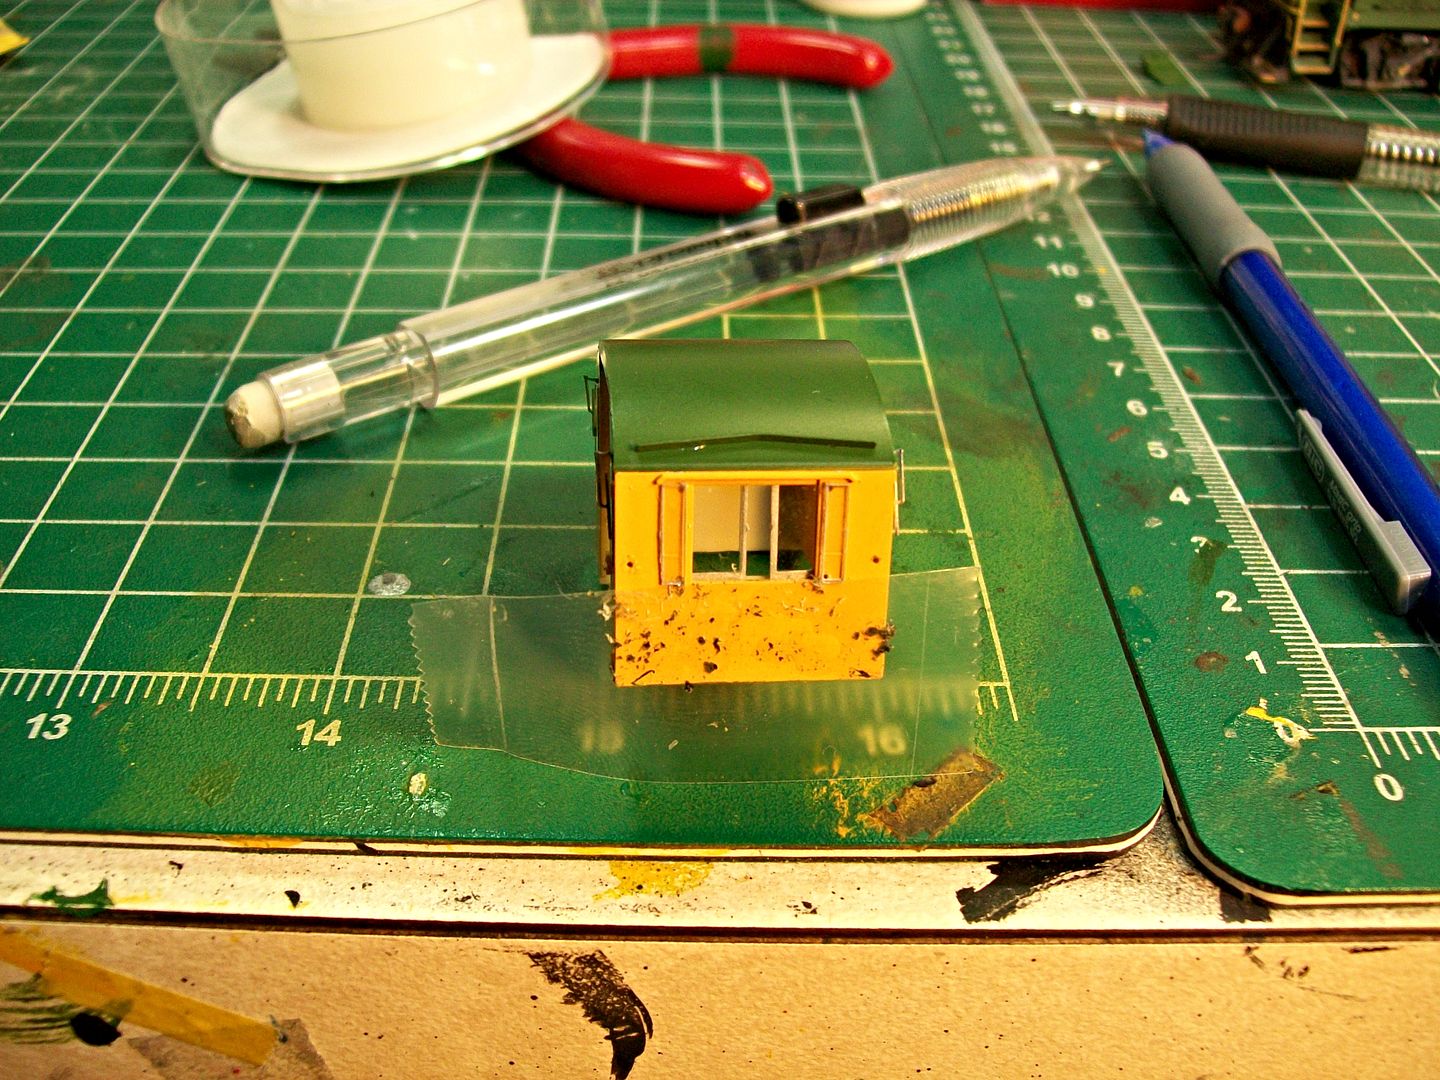
I carefully removed the hand rails and disassemble the cab according to the provided instructions.I wanted to turn the seats so they were facing longhood front.

I secured the seats and crew with a combination of Walthers goo and micro bound.I decided not to reconfigure the interior,looked to be a real pain.


Next came the removal of the RDG logo.I apply solve-set and rub off the printing with a pencil eraser.The tape is applied to pick up the loosened material.


I removed the decal on 619 before I disassembled the cab from the body.That was a lot easier then removing it after the cab disassembly.
The administrator has disabled public write access.

Athearn's RDG GP7's 10 years 3 months ago #2577

  • 2771-chris
  • 2771-chris's Avatar
  • OFFLINE
  • Road Foreman of Engines
  • Posts: 634
  • Thank you received: 94
Sorry...had to step out.Next I primered and hand painted the bottom of the hoods and cab.Since I weather my units I wasen't too concerned with the overall neatness because I would blend it all together later on.I ended up using SCII RDG green.Its darker then the Athearn applied green but again, my weathering process blends it in nicely.One thing I found,Floquil,Polyscale,Trucolor and SCII RDG greens do not match with the Athearn green.After the paint dried I reassembled the cab to the body.


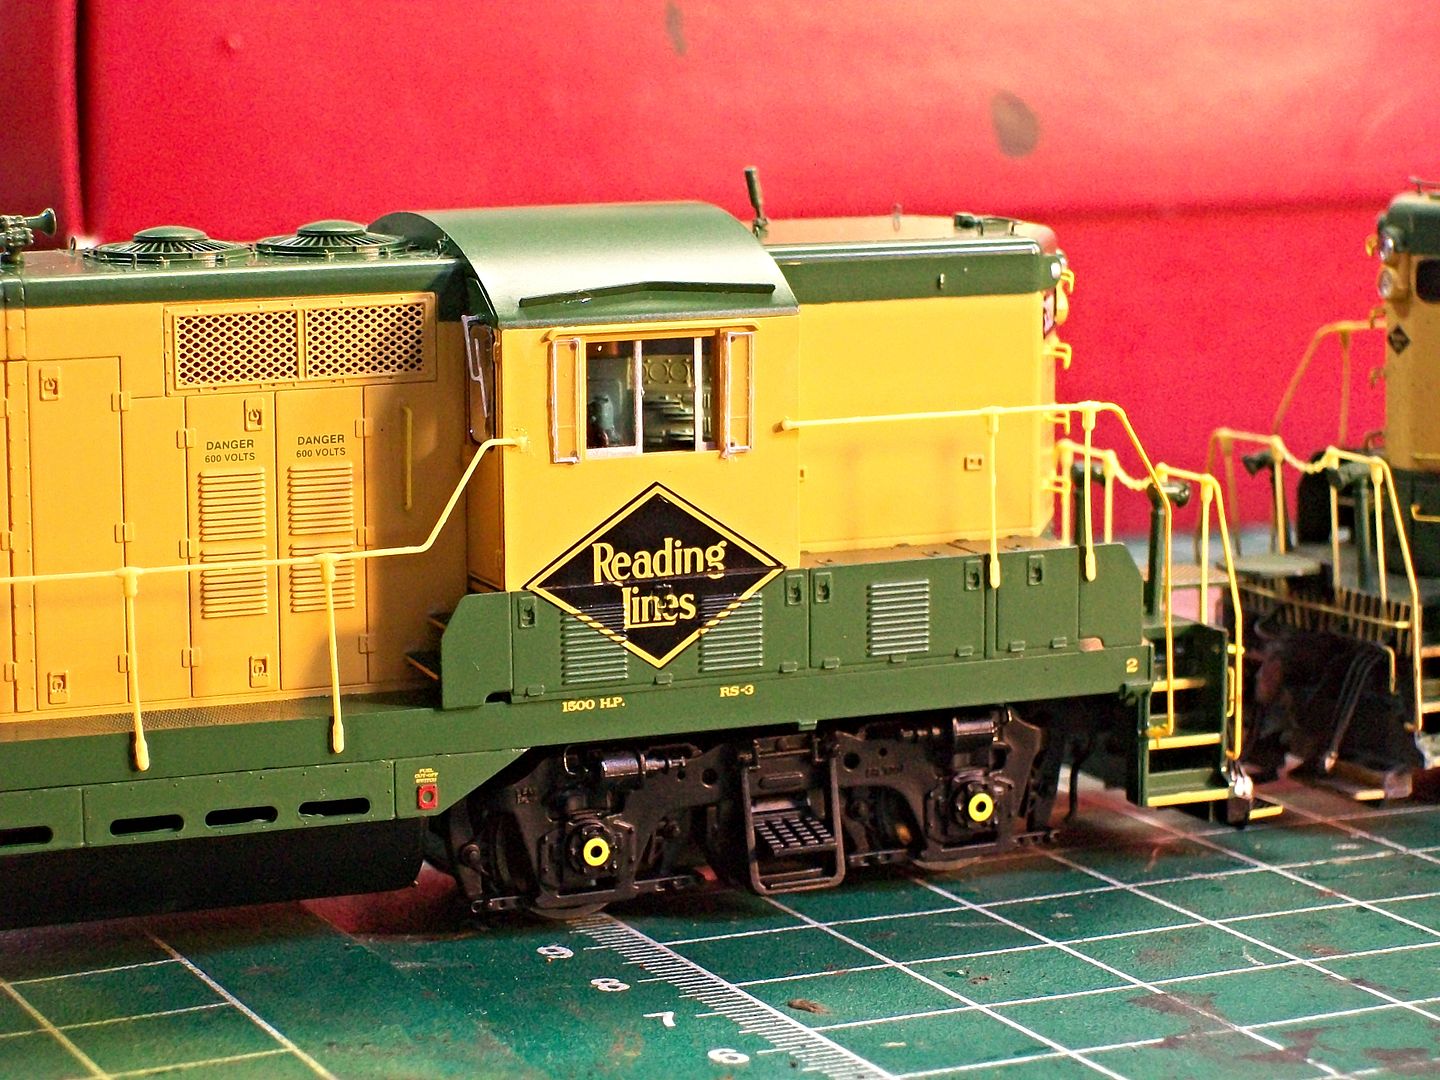
Doesn't look too neat...not to worry.A closer look.


You can see that the paint separation lines aren't crisp and the primer paint on the deck.When I add my weathering chalks it will make the primer paint look like some oil spilled on the walkway.
The administrator has disabled public write access.

Athearn's RDG GP7's 10 years 3 months ago #2578

  • 2771-chris
  • 2771-chris's Avatar
  • OFFLINE
  • Road Foreman of Engines
  • Posts: 634
  • Thank you received: 94
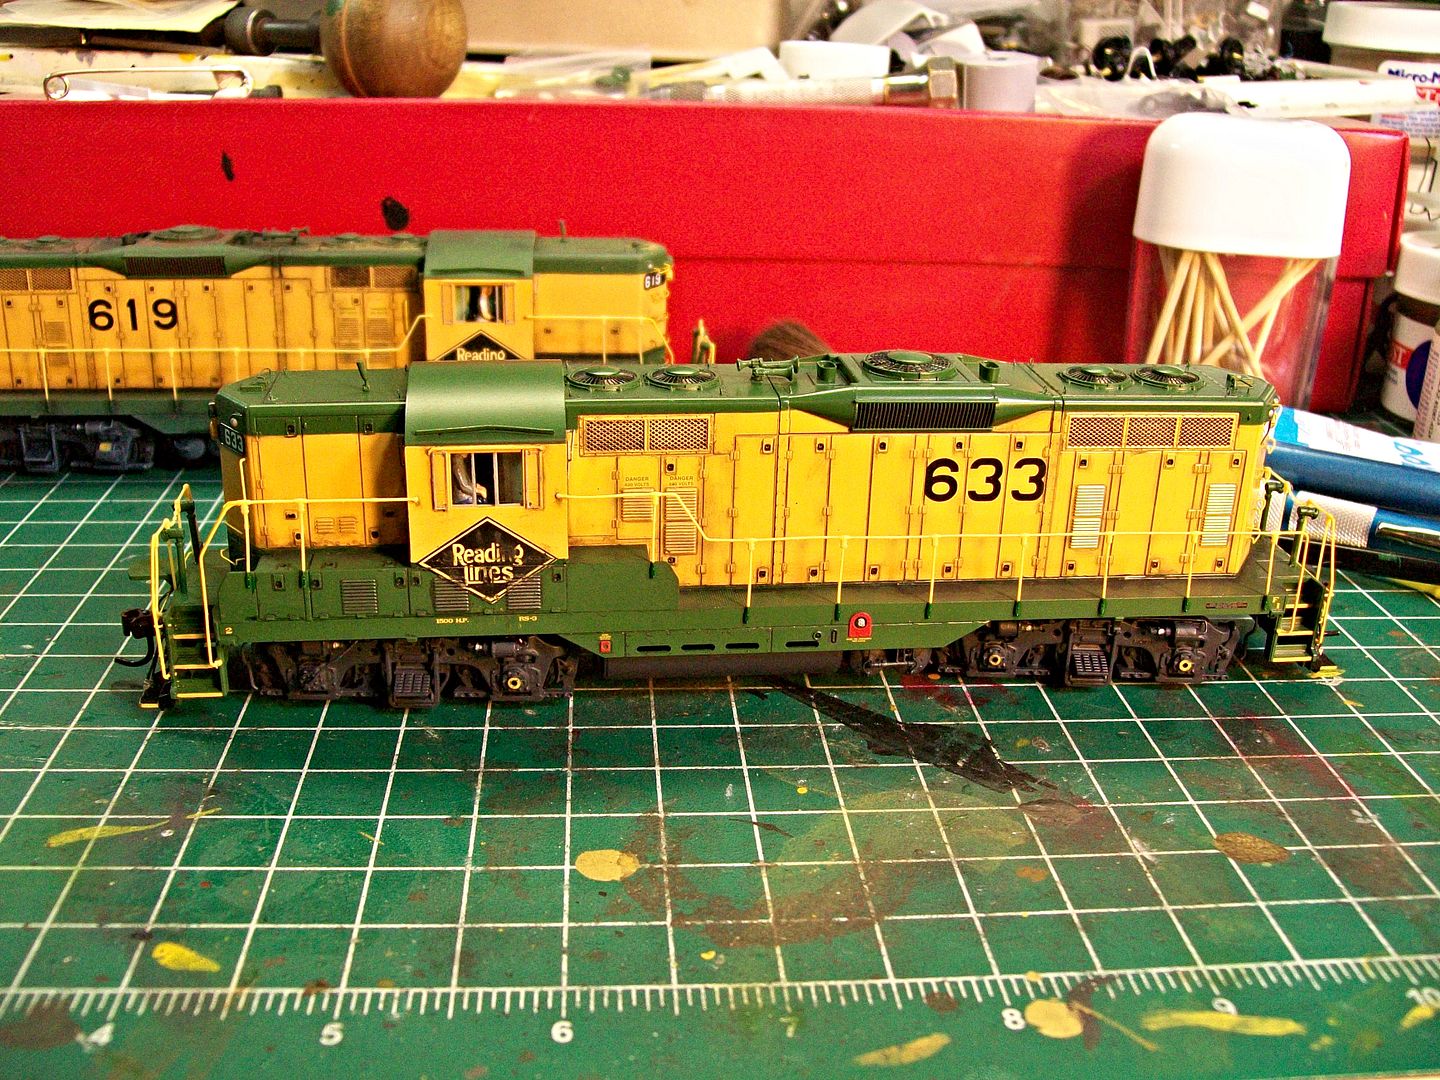
Ok...I didn't take any more pics.util the model was just about completed.I ran into a problem with the diamond application.I had a batch of bad decals that kept falling apart...went through six of them.Anyway,I applied the RDG diamond.There were areas where the decal was ripped so I blended it in with weathering chalks.I used a mechanical pencil to simulate dirt around the doors,hinges,etc.etc.I also used pastel chalks masked the window glazing and gave it a coat of dullcoat at this time.
When the dullcoat dried I painted the trucks and fuel tank weathered black.I installed the railings and painted the bottom of the stanchions SCII RDG green as found on 633.
The left and right sides of the unit before the final weathering.


I forgot to mention that I used PS oily black in the latches to simulate dirt and shadow and also for the fuel spill.
The final results.

The administrator has disabled public write access.
The following user(s) said Thank You: Robin

Athearn's RDG GP7's 10 years 1 month ago #2938

  • rdg-barry
  • rdg-barry's Avatar
  • OFFLINE
  • Road Foreman of Engines
  • Posts: 378
  • Thank you received: 44
OK... wasn't going to get one of these as I prefer the original solid green scheme. However... I now have on on it's way... a model rr friend at work IM'ed me (instant message) that factory-direct-trains website had some on sale... they had 2, may still have one, as I bought one! DCC with sound only $155 !!!!!! plus $10 shipping. Can't pass up that price.

When it arrives... I may see if my older P2K shell will fit on without too much bother...
Thanks,
Barry
The administrator has disabled public write access.

Athearn's RDG GP7's 10 years 1 month ago #2966

  • rdg-barry
  • rdg-barry's Avatar
  • OFFLINE
  • Road Foreman of Engines
  • Posts: 378
  • Thank you received: 44
received the GP7 this past week. Got home from our Division meeting and decided to see if the P2K shell will fit on this new Athearn chassis... IT DOES!
However, the coupler pads are not quite aligned and there is no place for the coupler screw to screw into. Also, the lighted number boards and headlight chunk of plastic must be cut apart and reinstalled for the number boards only. The bulbs from the new Athearn should fit into the light openings of the P2K shell and be taped to the shell top, just like they are in the Athearn.

I did place the shell over the entire chassis and ran it on the layout with no problems. It is interesting that I bought RDG 633 in Athearn and have P2K 633!!

So now I have to decide if I really want to do this "conversion". Part of it is that the shells do not reverse... the P2K chassis will not fit on the Athearn shell... so I would have to sell these separately... if I can...

Do have a question (and will admit to not looking this up in the motive power book) the Athearn has the horns on the long hood while the P2K has them on the short hood. Which is correct?

hmmm.... what to do.....???
Thanks,
Barry
The administrator has disabled public write access.

Athearn's RDG GP7's 10 years 1 month ago #2967

  • 2771-chris
  • 2771-chris's Avatar
  • OFFLINE
  • Road Foreman of Engines
  • Posts: 634
  • Thank you received: 94
Good luck with that Barry...The horns were located on the long hood.

Concerning mounting of Athearns prone to burn out lighting;I also add a little dab of Micro Crystal Clear where the bulb connects to the wiring before slipping the lights into the mounting holes.This helps secure the lights in place compared to just using tape.The glue sets to a tacky consistency so when you need to replace a little wiggling will release the bulb...make sense?
The administrator has disabled public write access.
Time to create page: 0.125 seconds

Today's Image

Did You Know?

April 12, 1962
The Reading purchases the first production GP30 (#5513) from EMD as part of initial order of 20 locomotives.

Downloads

Operations Information

Click Here!A variety of Reading Company operations related documents, etc. that may be of use in your modeling efforts.

Operations Paperwork

Click Here!A variety of Reading Company operations paperwork, such as train orders, clearance forms, etc. that will help you operate your Reading layout in a prototypical manner.

Timetables, Rulebooks, Etc.

Click Here!Public Timetables, Employe Timetables, and Rulebooks that provide much useful operational information.

Modeling Goodies

Click Here!Signs, billboards, and other FREE goodies for your use.  We ask only that you help spread the word about The Reading Modeler!

Rolling Stock Reference

Click Here!Downloadable reference documents on the various classes of Reading Company Freight and Passenger rolling stock.

Thanks for Your Support!

If you find the content on The Reading Modeler valuable, won't you please consider supporting our efforts? Your donation will help to offset operating costs and acquire new material to share on the site. Thank you!

Amount: 

Advertisements