FacebookTwitterDiggGoogle BookmarksRedditLinkedinRSS Feed
Welcome, Guest
Username: Password: Remember me
This board is the place where questions and information specific to MODELING the Reading Company, its equipment and operations can be shared - questions like "What was the window arrangement of AF Tower in Alburtis?" and "What color paint do YOU use to paint the Reading's cream-and-brown buildings?" We also want to hear about YOUR Reading modeling projects!

TOPIC: Bowser C-630's

Bowser C-630's 11 years 2 months ago #158

  • 2771-chris
  • 2771-chris's Avatar
  • OFFLINE
  • Road Foreman of Engines
  • Posts: 634
  • Thank you received: 94
Barry,thanks for the compliment.Really enjoy sharing my work with fellow RDG modelers.

T1nut,thank you.I reference multiple pictures of a particular unit before I start any weathering job.The key is not to rush.5303 took just about a week to complete,an hour here an hour there.When you feel like you messed it up,walk away and come back to it later.The biggest problem to over come is working on a nice unit,factory painted or custom painted.Don't do your first weathering job on your most prized unit until your skills meet YOUR satisfaction.Correct weathering,like RDG yellow and LV cornel red,is in the eye of the beholder.Some like it,some don't.Bottom line,if you like your results that's all that counts.
The administrator has disabled public write access.
The following user(s) said Thank You: t1nut

Bowser C-630's 11 years 2 months ago #166

  • 2771-chris
  • 2771-chris's Avatar
  • OFFLINE
  • Road Foreman of Engines
  • Posts: 634
  • Thank you received: 94
Two things I would like to point out.
1.Make sure you have a nice supply of nitrile or latex gloves on hand.When it comes to weathering you will handle the model quite a bit and you don't want finger prints all over.
2.The hand rails on this production run seem to be more flexable compared to Bowsers first run.So keep those gray colored pads between the railings and long hood while working on the front,cab and rear area of the loco.Remove the pad on the side your working on but leave the other one in place and visa versa.With the pads in place it will stop the railings from bending in towards the long hood when handling the unit.These railings seem to hold their shape if you apply too much pressure,they bend easy and hold that shape.Hope this makes sense and helps.I did remove the short hood hand rails while weathering the 5303.
The administrator has disabled public write access.
The following user(s) said Thank You: rdg-barry, t1nut

Bowser C-630's 11 years 2 months ago #181

  • rdg-barry
  • rdg-barry's Avatar
  • OFFLINE
  • Road Foreman of Engines
  • Posts: 378
  • Thank you received: 44
Yes Chris... I noticed that with the hand rails when I took mine out of the packaging the very first time... interesting and somewhat questionable!

might as well ask... does this unit come apart fairly easily? I'd like to put a crew in mine as well.

Also, did you do the weathering while the unit was together, or just do the shells, then frame and then put back together? Any reccommendations on which way may be better/easier?

So far my loco weather has been limited to a very small amount of air brushing grimey black for exhaust on roofs and maybe on side grills.

It's gonna take me some extra "guts" to dirty the Alco's to match your great work!
Thanks,
Barry
The administrator has disabled public write access.

Bowser C-630's 11 years 2 months ago #183

  • 2771-chris
  • 2771-chris's Avatar
  • OFFLINE
  • Road Foreman of Engines
  • Posts: 634
  • Thank you received: 94
Barry,the only part of the unit I took apart was the cab for installing the crew.Remove the short hood railings,on the long hood railings all I did was gently disconnect the railing where it mounts to the back of the cab and gently diconnect the stanchion from the top of the battery boxes.I kept those gray shipping pads in place between the long hood and the railings.I did not try to remove the long hood railings from the body.
Now the cab is held on to the body by two tabs.There is one located below the front door the other is located below the rear door.You can see them if you hold the unit upside down.I used a small screw driver and some gentle tugging to remove the cab,CAREFUL once you free the cab from the body you will find the wires for the front headlight.I don't know how long they are but there's plenty of room to work installing a crew while leaving these wires in place.
Now its decision time,do you want the side windows open or closed?
If you want them closed the next step is to add your crew.I used an Atlas crew,cab seats included.I mounted them to the inside of the cab wall using Walther's Goo.While its setting position the crew member to the right height while looking through the side window,after I'm satisfied with the position I add krazy glue to strengthen the bond and let it sit for awhile then repeat the process for the 2nd crewman.
If you want the side windows open your going to have to knock them out.Just use tweezers and push on the window from the outside and it will pop out.Now the side and rear windows are one piece so you'll have to make a cut and save the rear window to remount it.I use Testor's glue for clear styrene.At this time you could make your cut to remove the remaining window frame.Now,reassmble.I'll get back to you on your other questions and I hope this helped.
The administrator has disabled public write access.
The following user(s) said Thank You: rdg-barry

Bowser C-630's 11 years 2 months ago #253

  • 2771-chris
  • 2771-chris's Avatar
  • OFFLINE
  • Road Foreman of Engines
  • Posts: 634
  • Thank you received: 94
Barry,to answer some of your other questions.
If I'm starting from scratch with an undec.model I'll do the weathering seperatly,shell and frame seperate.After I assemble the model I'll mask the windows,head and marker lights and blend the weathing together. Very dirty trucks don't match to well with a clean car body side.I do not mask the number boards.When I'm satisfied I sray the model down with dull coat to seal everything up.I remove the masking tape while the dull coat is drying using tweezers.The last bit of weathering that I apply to the loco would be fuel spills.I use pscale oily black,after it dries I brush on gloss coat to give it that shine.
Factory painted models are done without taking the unit apart.
The first weathing application I use on all my power is applied with pencil.Let me know if your interest in this process.
The administrator has disabled public write access.

Bowser C-630's 11 years 2 months ago #264

  • 2771-chris
  • 2771-chris's Avatar
  • OFFLINE
  • Road Foreman of Engines
  • Posts: 634
  • Thank you received: 94
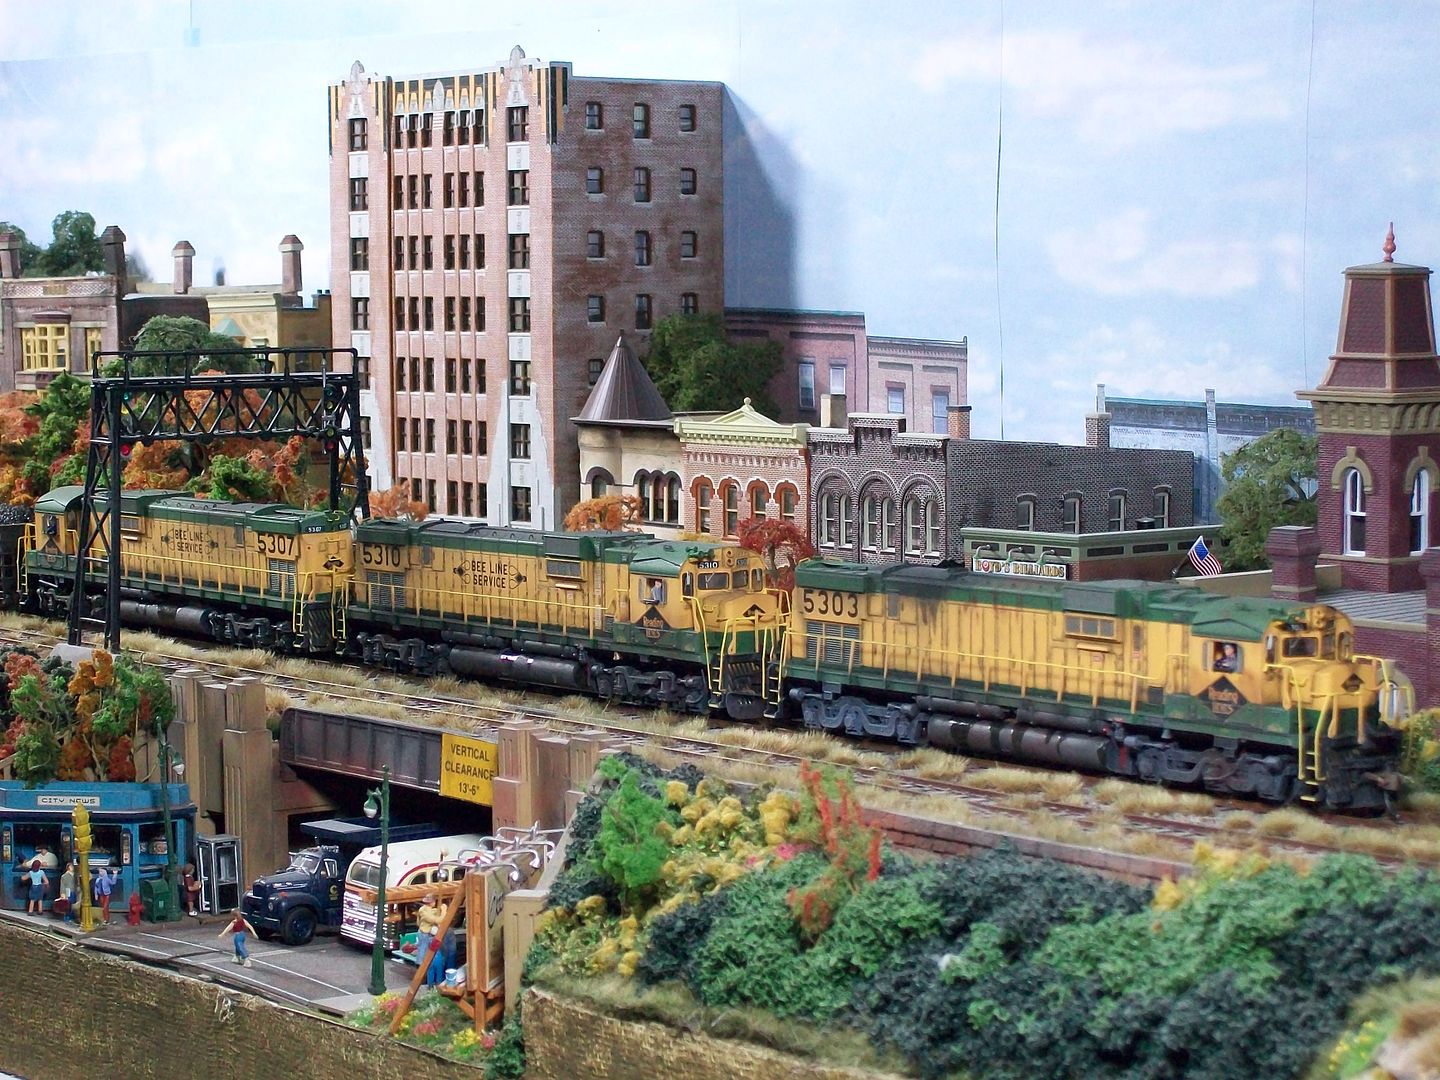
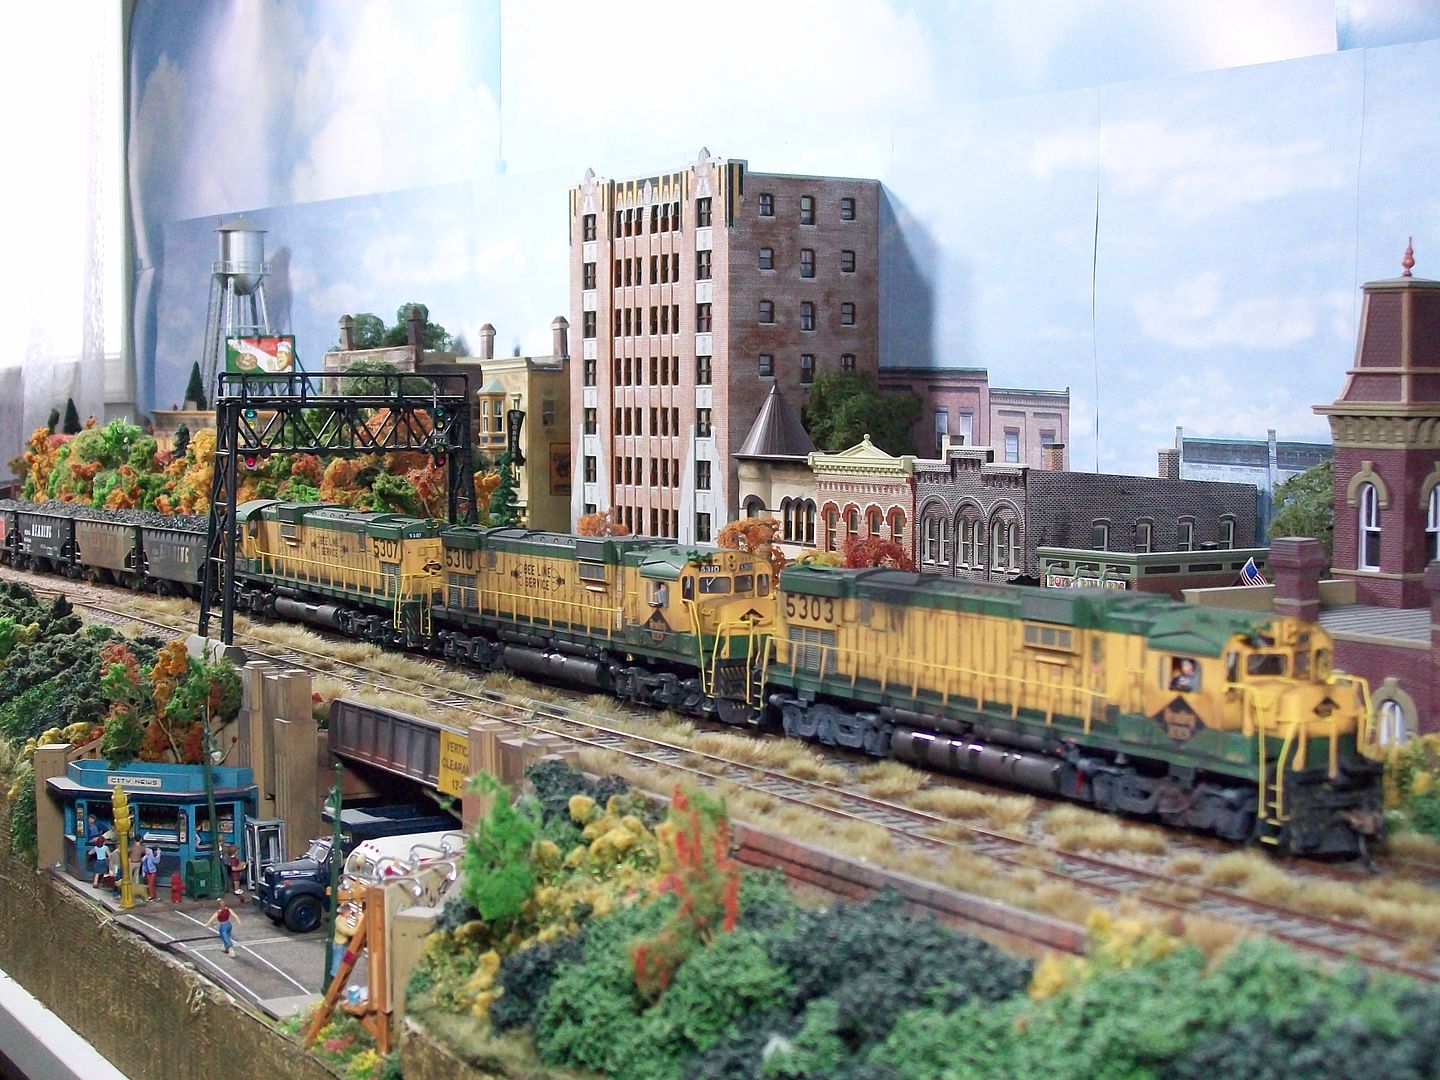
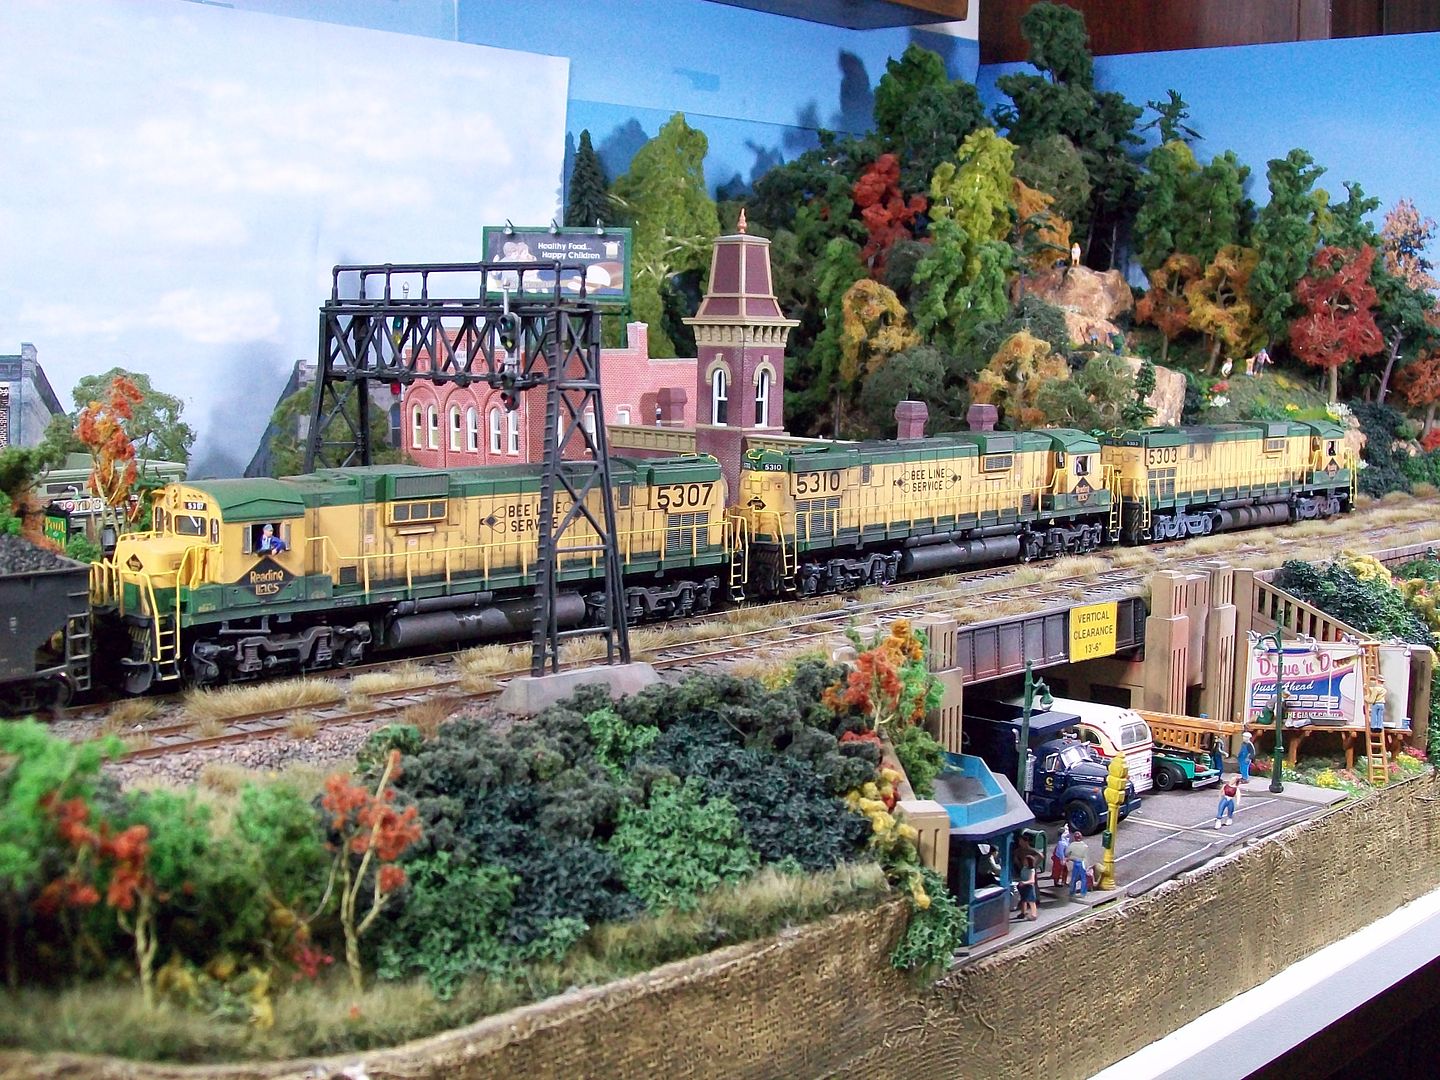
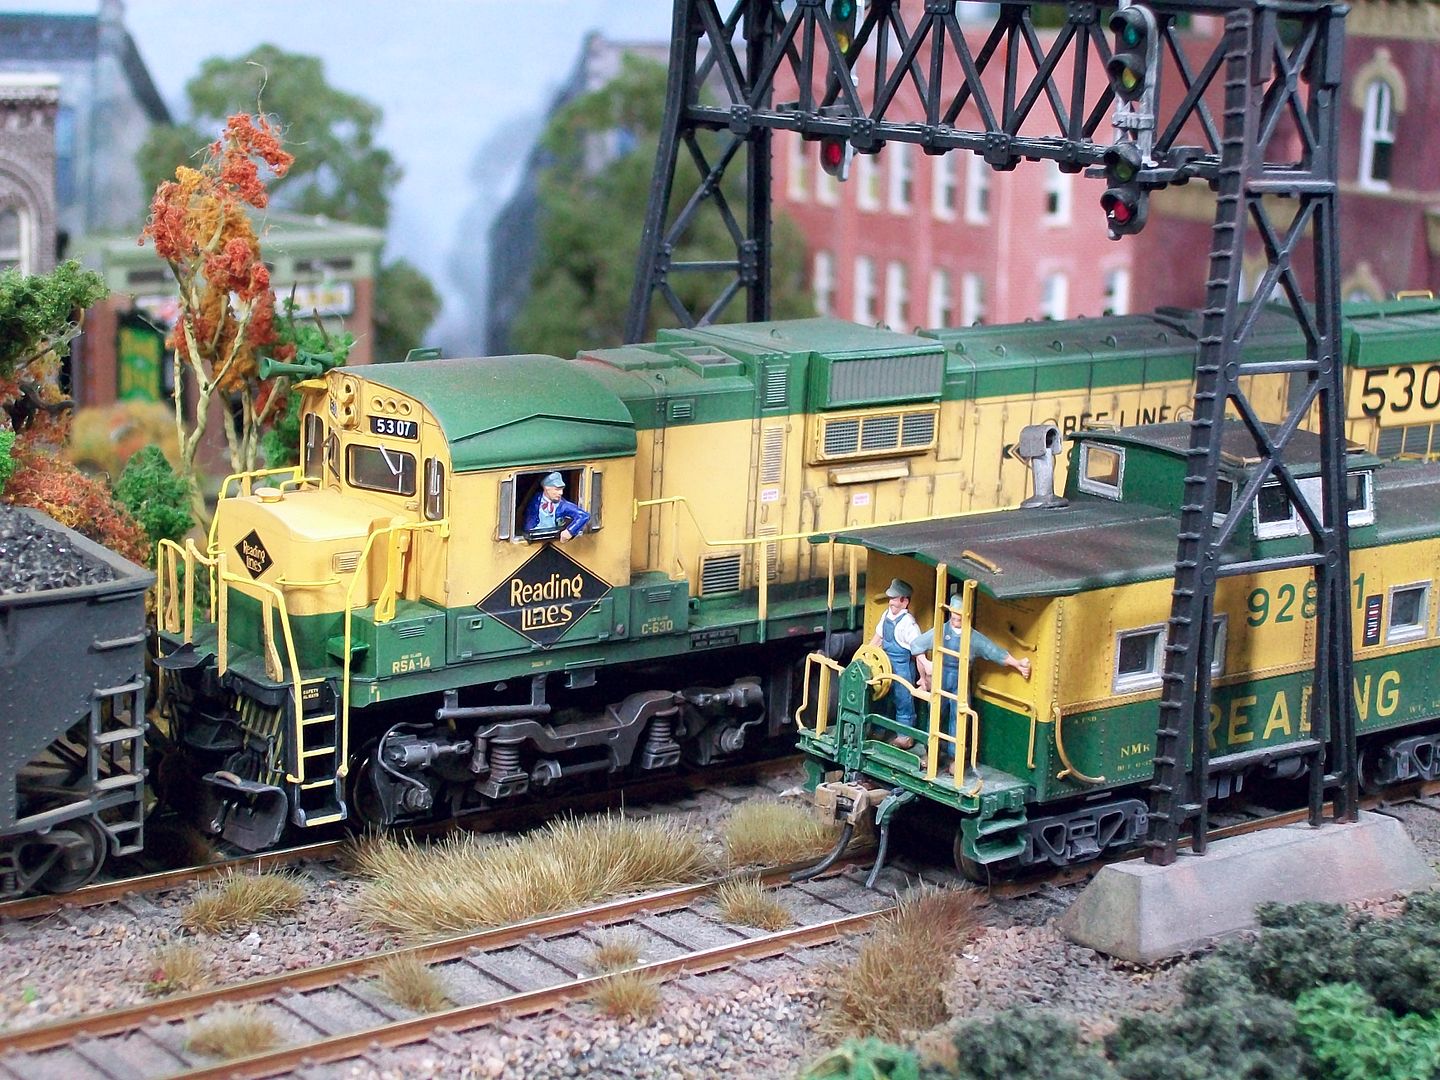
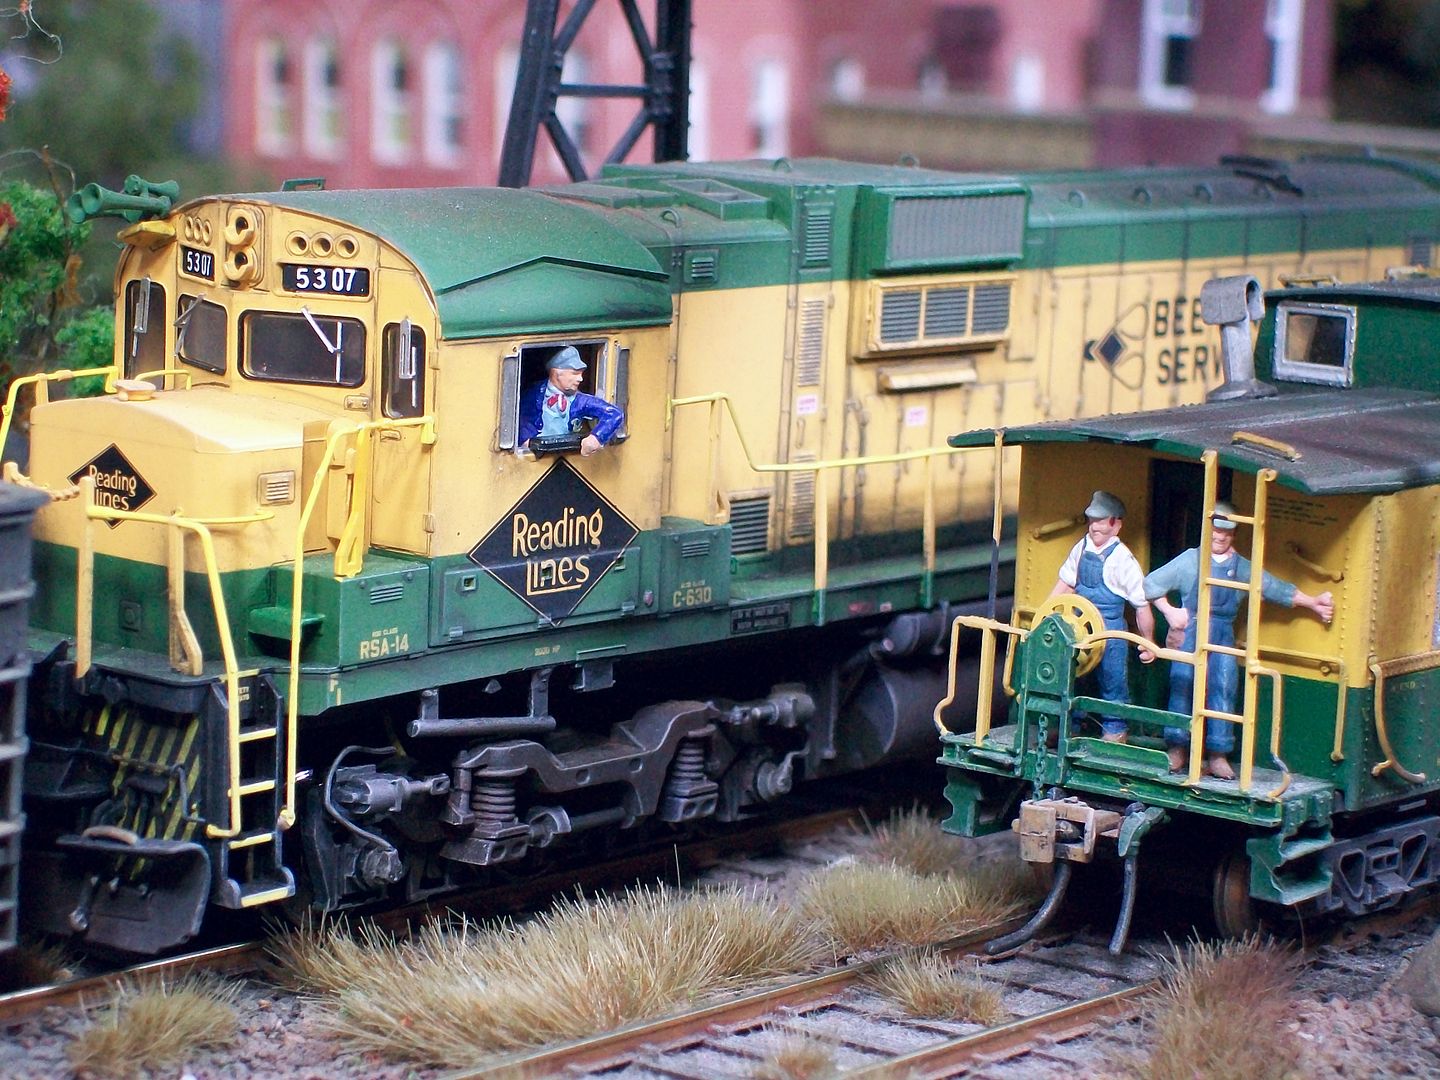
Three 630's lead a coal train east on the west bound main.


Exchanging greetings has the train passes the local,which has the eastbound main fouled.

The administrator has disabled public write access.
Time to create page: 0.322 seconds

Today's Image

Did You Know?

March 1, 1948
The "Wall Street" begins service between Philadelphia and Jersey City, hauled by new G-3 Pacific locomotives and featuring new two-toned green cars.

Downloads

Operations Information

Click Here!A variety of Reading Company operations related documents, etc. that may be of use in your modeling efforts.

Operations Paperwork

Click Here!A variety of Reading Company operations paperwork, such as train orders, clearance forms, etc. that will help you operate your Reading layout in a prototypical manner.

Timetables, Rulebooks, Etc.

Click Here!Public Timetables, Employe Timetables, and Rulebooks that provide much useful operational information.

Modeling Goodies

Click Here!Signs, billboards, and other FREE goodies for your use.  We ask only that you help spread the word about The Reading Modeler!

Rolling Stock Reference

Click Here!Downloadable reference documents on the various classes of Reading Company Freight and Passenger rolling stock.

Thanks for Your Support!

If you find the content on The Reading Modeler valuable, won't you please consider supporting our efforts? Your donation will help to offset operating costs and acquire new material to share on the site. Thank you!

Amount: 

Advertisements