FacebookTwitterDiggGoogle BookmarksRedditLinkedinRSS Feed
Welcome, Guest
Username: Password: Remember me
This section of The Interchange provides a space where members of the Reading Modeler community can showcase their Reading modeling efforts. If you've got a project that you'd like to share, start a new topic and "show and tell" the group how you did it!

TOPIC: RDG C424

RDG C424 11 years 2 months ago #478

  • MarkFJ
  • MarkFJ's Avatar
  • OFFLINE
  • Conductor
  • Posts: 227
  • Thank you received: 39
Great build up so far Chris!

Regarding the footboard and front end details; someone had posted a nice close-up shot of that area on the old forum. Hopefully they’ll repost that photo to this topic.

Also, Model Railroader did an article on modifying an Atlas C-424 to Reading configuration in the July 97 issue (page 88-91). I don’t have this article, but it is my understanding that it includes a complete bill of materials for all the detail parts.

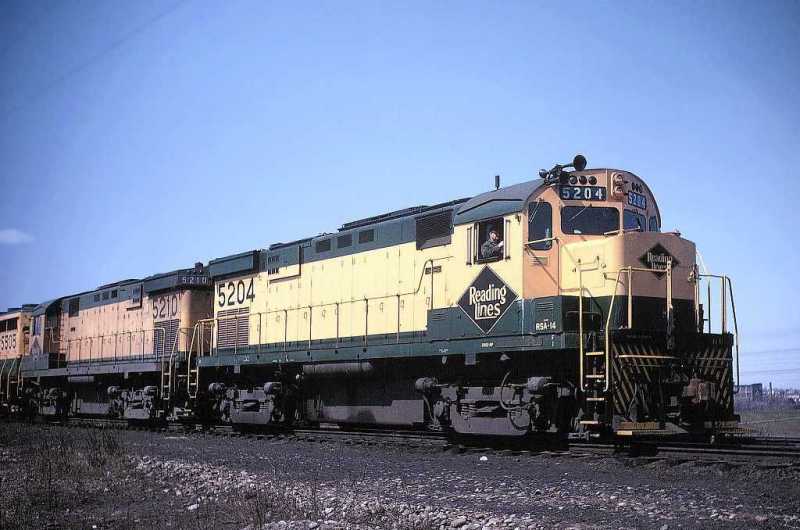
This photo shows both sides of the C-424, so it might be a good reference for those following along with the build process.


RDG-5204a.jpg
The administrator has disabled public write access.

RDG C424 11 years 2 months ago #498

  • 2771-chris
  • 2771-chris's Avatar
  • OFFLINE
  • Road Foreman of Engines
  • Posts: 634
  • Thank you received: 94
Thank You Mark...Found my copy of that 97 issue of MR this morning,guess what,it was in the last place I looked.Looking through the article there are three things I won't be doing that the modeler does on his unit.
I'm not adding the brake chain and rigging to the front truck,maybe in future.
He uses styrene to build the step assembly for the pilots.I'm using the Atlas pilot steps.Easier and in my book,"close enough".
He also describes cutting out a notch in the cab roof for mounting the fire cracker antenna,"too much work and I don't see the need".

Thanks for posting the pictures.
The administrator has disabled public write access.

RDG C424 11 years 2 months ago #501

  • 2771-chris
  • 2771-chris's Avatar
  • OFFLINE
  • Road Foreman of Engines
  • Posts: 634
  • Thank you received: 94
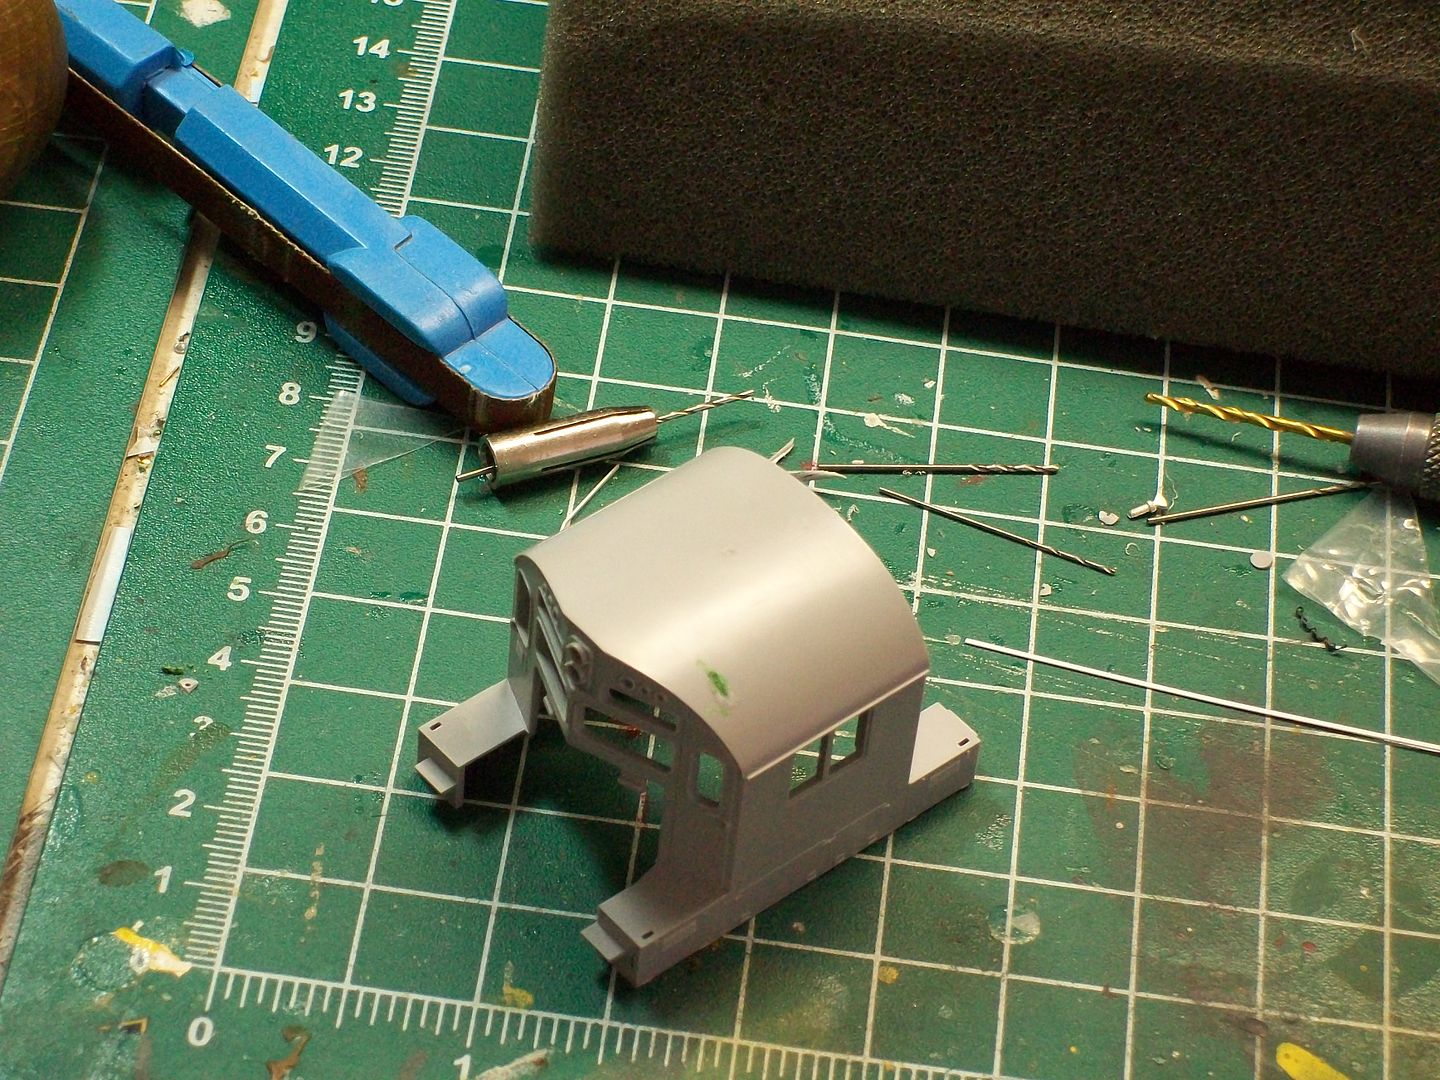
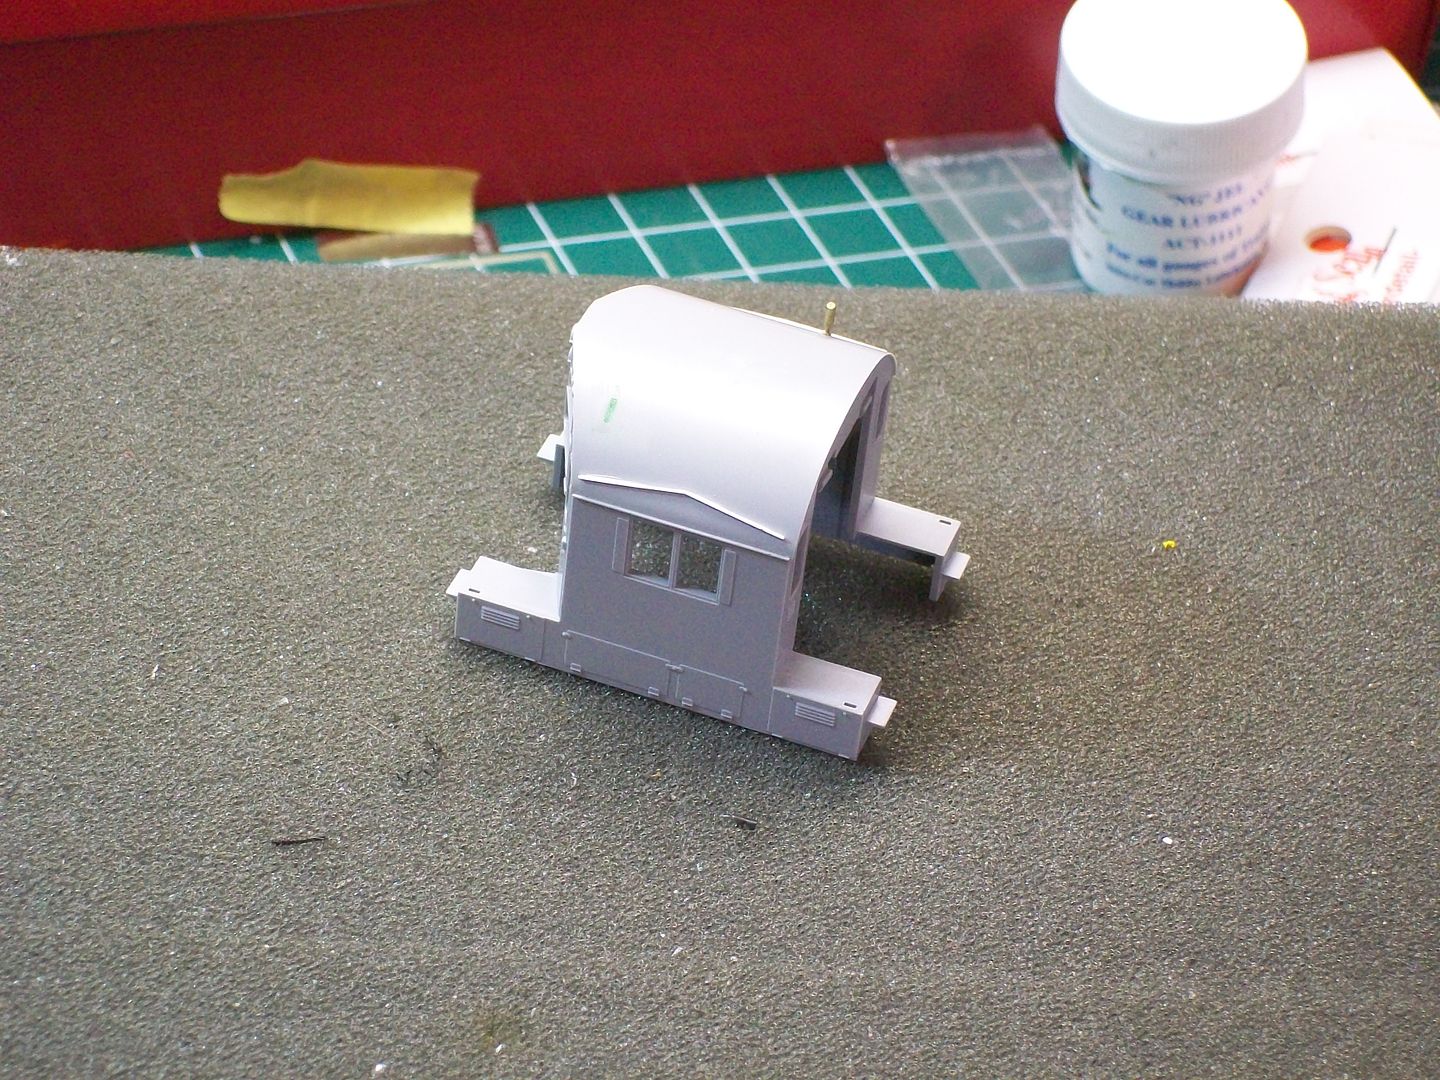
Today I started with the cab.First I removed the horn and using a straight razor trimmed off the dimpled area around the hole where the horn was mounted.Using green puddy and applying it from the inside of the cab I filled in the hole.I used a small screwdriver to work it in.I work the puddy in till it rises evenly a little above the roof line.After it sets I use the razor and remove the excess with a clean cut.Then I sanded the area.


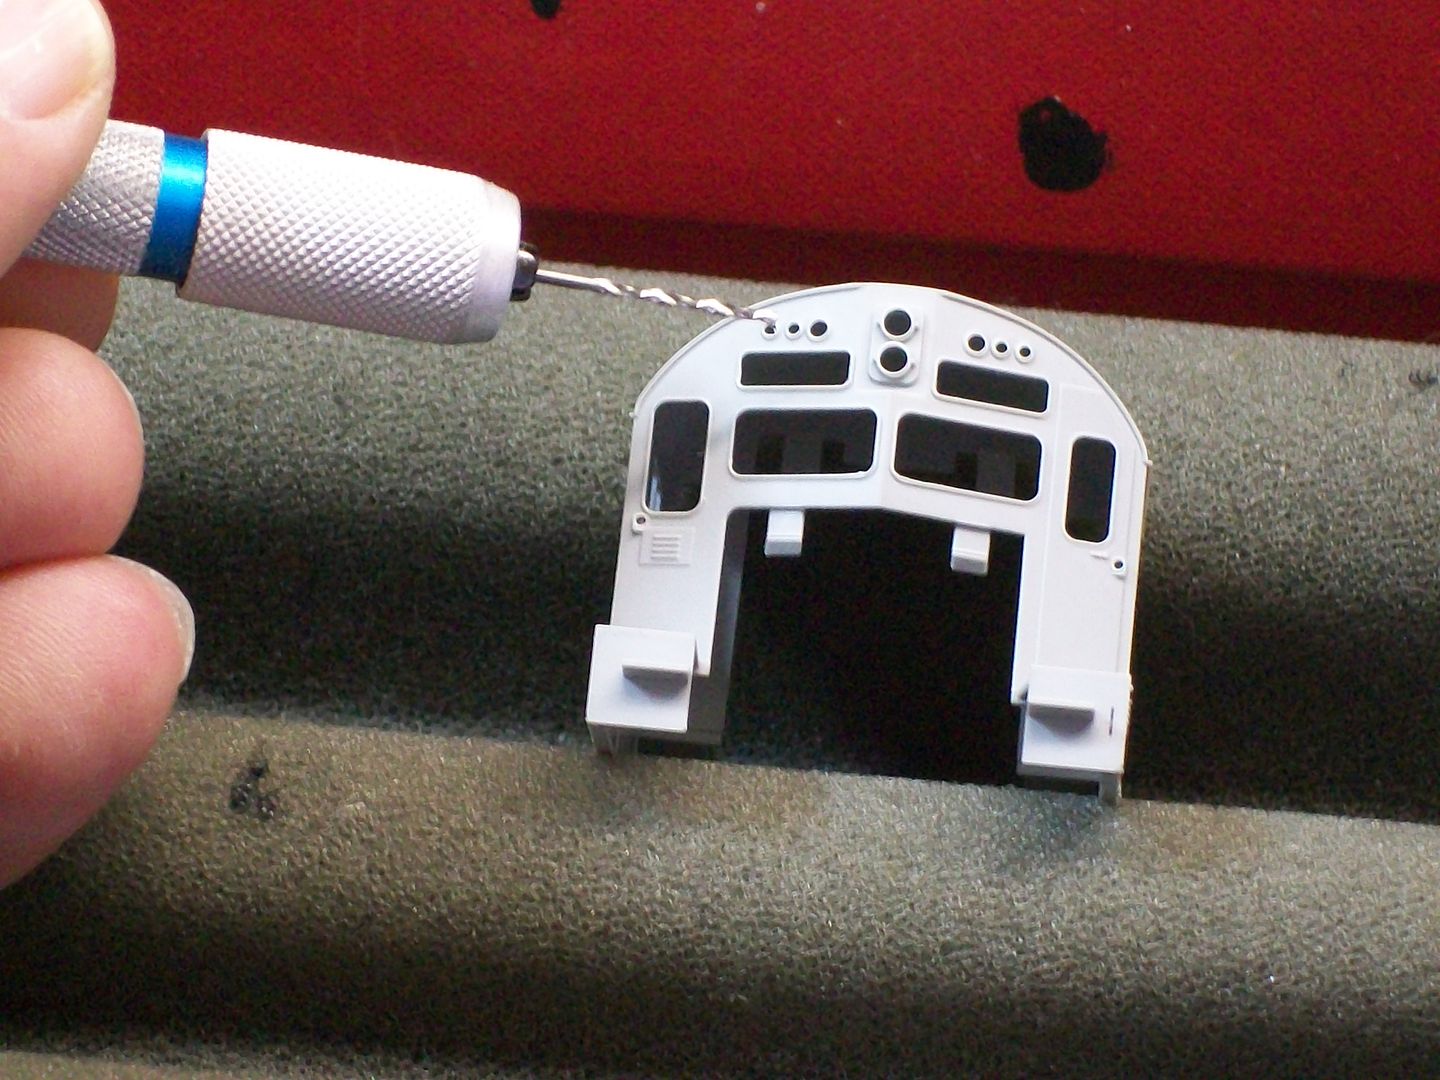
Next I countersunk the marker light holes using a #52 drill.


Not pictured, the holes for the mounting of the wipers were drilled at this time.No.78 bit.

Next,adding the old drip strips.I use strip styrene.Size and info are on the package pictured below.


Ok let's see if I could explain my process clearly.I like it because it's quite forgiving if your not satistied with your results.You can remove it from the cab roof,even after securing it with glue,with the old straight razor.Plus it's cost isn't bad,so you could practice getting it to your standards.
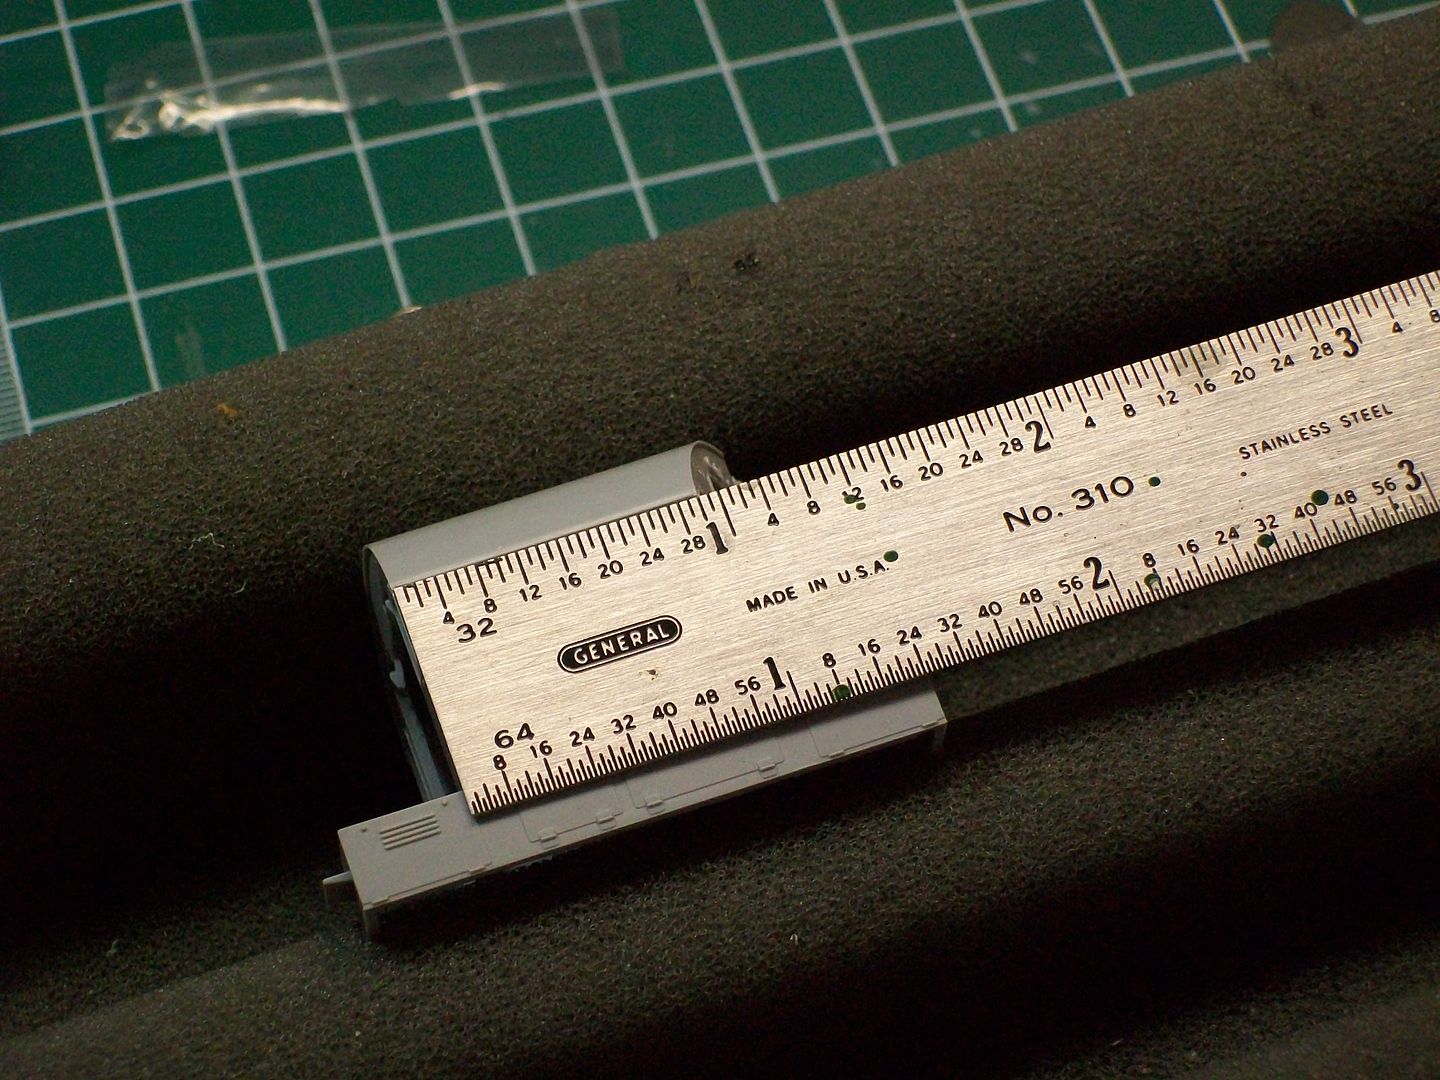
On this unit I measured the cab.I measure everything in 32nd's.

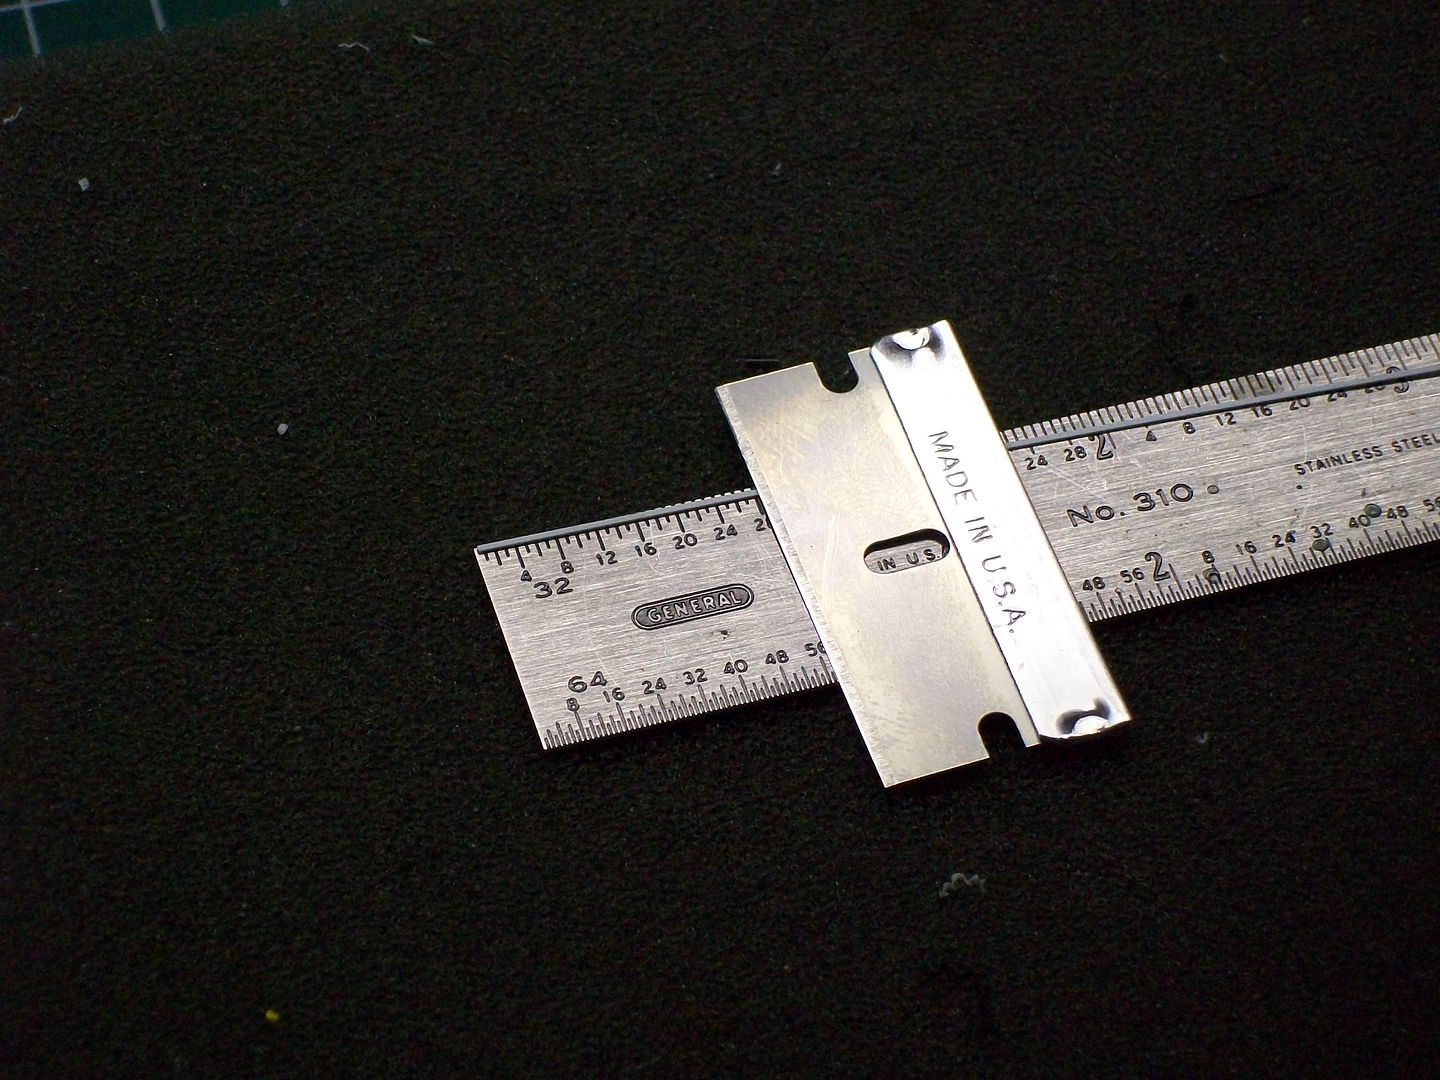
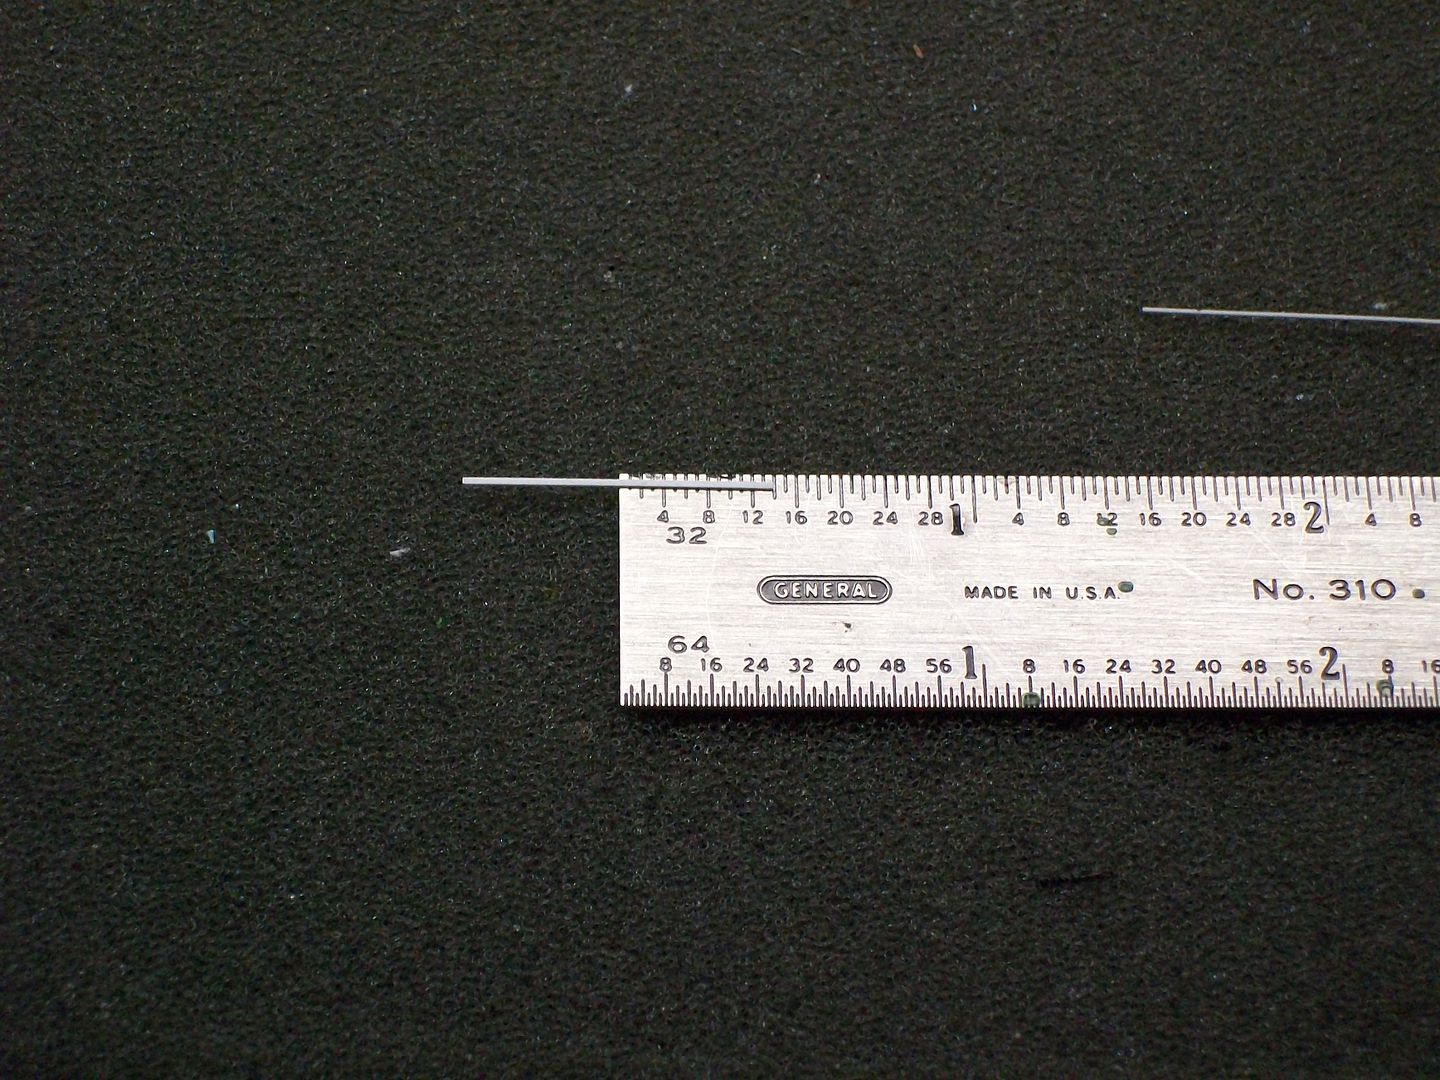
Point to point it measures 30/32.Now,as I stated,I use pictures and eyeball the close to correct position.The Alco had fairly longer d-strips,but they do not touch the edge of the roof line.If you look at Bowswers 630 they mounted it edge to edge.They would have been better leaving 1/32 off each end of the strip,I'm not complaining its just an example.With that said I want to make my stip of styrene 28/32 long.I lay the strip on top of my ruler.

Next,I measure and cut it to length using my razor.I make the cut straight down on top of the 28 mark.


Now,this is where the practice comes in.Since my strip is 28/32 I want my angle at the half way point.I slide it down on the top of the ruler to the 14/32 point.


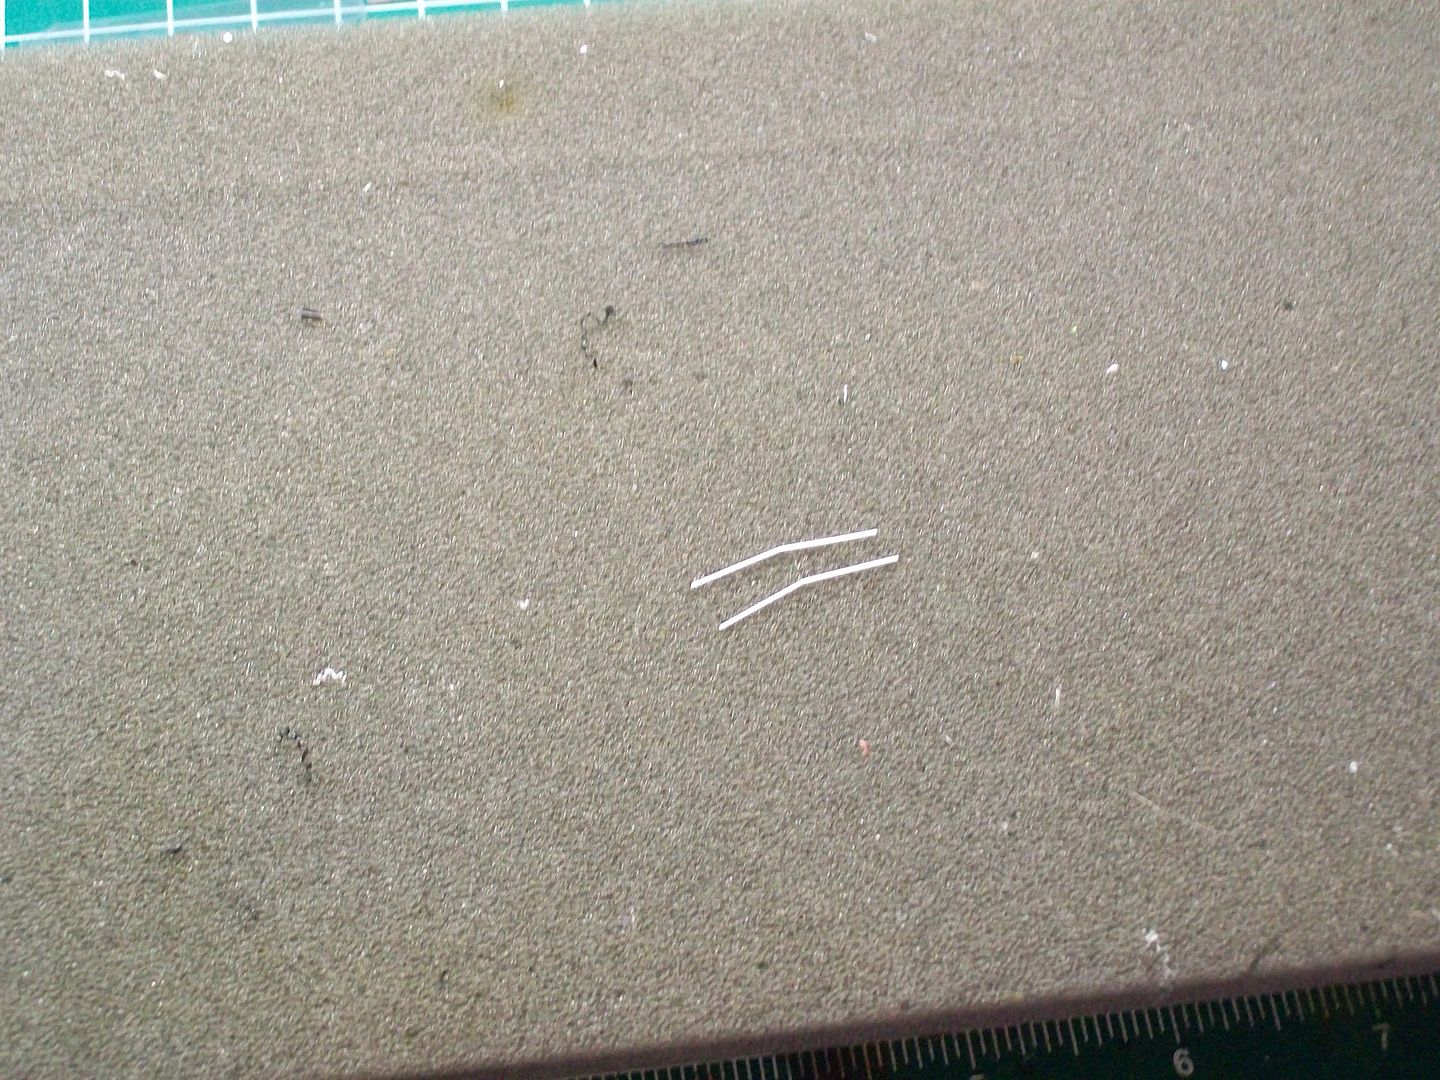
Sorry,couldn't take pics at this point only two hands.I move the ruler to the edge of the work bench so I have room to make the bend.With one finger secure the strip at the 14/32 mark.With the other hand use a finger and place on top of the strip and edge of the ruler.Gentle roll pressure to form the angle.Like I said,practice.Here are two completed strips.


Sorry,got to take my son to weight training.I'll cover my mounting process next,hopefully tonight.
The administrator has disabled public write access.

RDG C424 11 years 2 months ago #503

  • 2771-chris
  • 2771-chris's Avatar
  • OFFLINE
  • Road Foreman of Engines
  • Posts: 634
  • Thank you received: 94
Ok I'm back..one thing I failed to mention,when the holes were drilled for the wipers I also drilled the hole for the horn bracket.I'm using cal scale #190-400.It comes with two brackets,I'll be using the shorter one.It will be mounted after painting,eases the masking process.
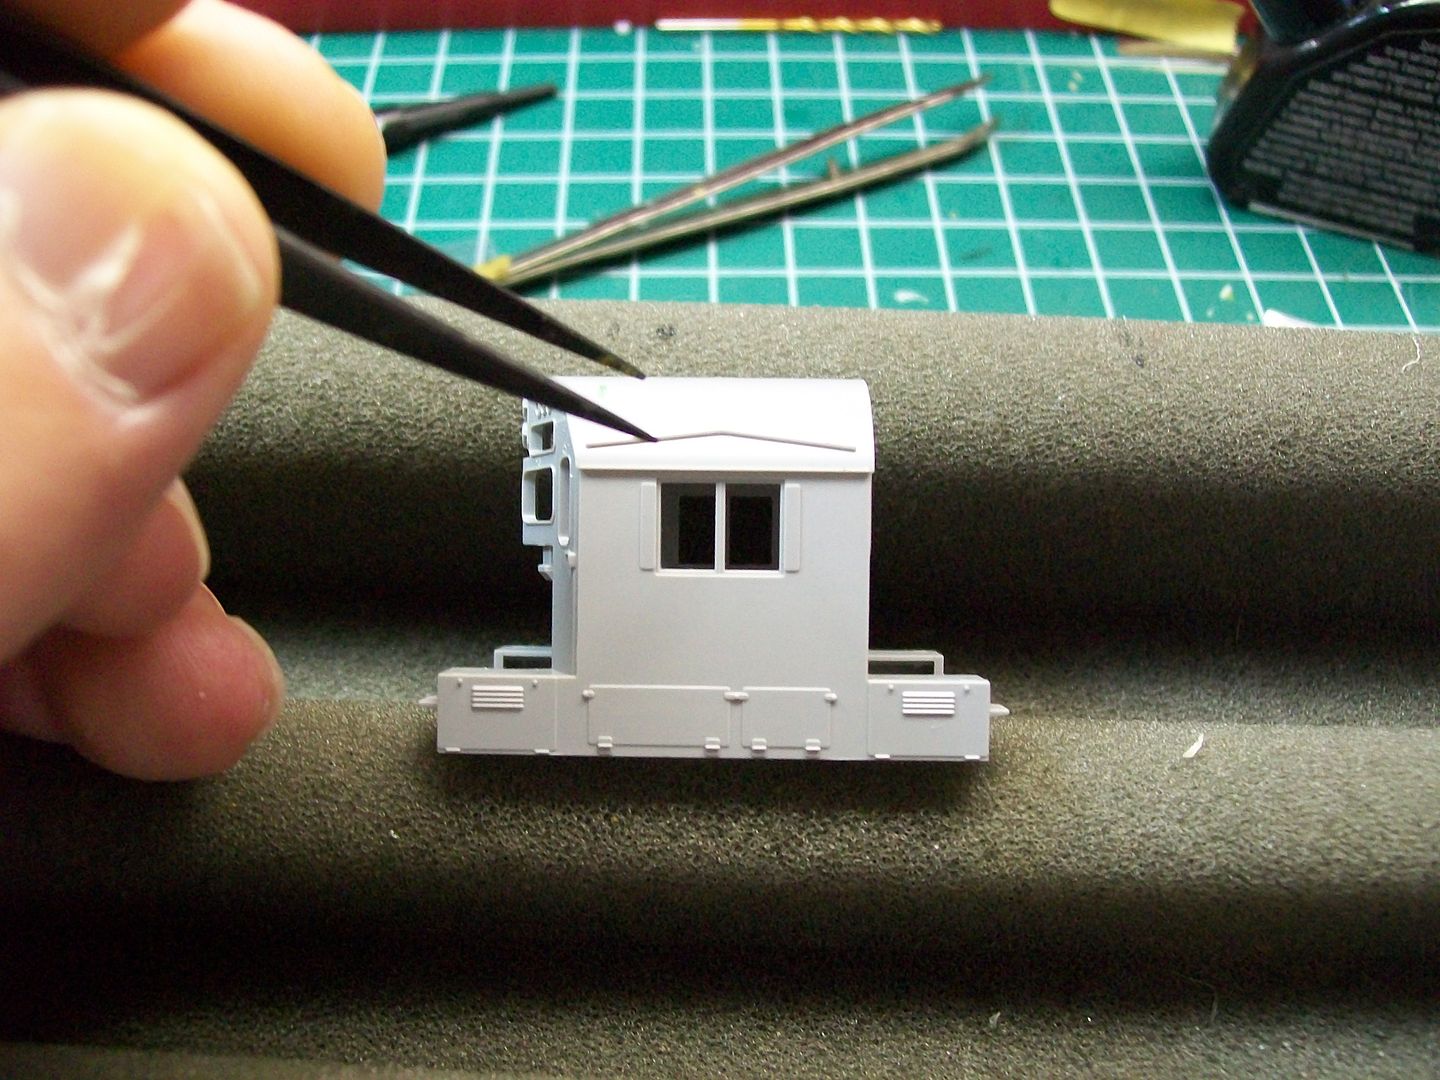
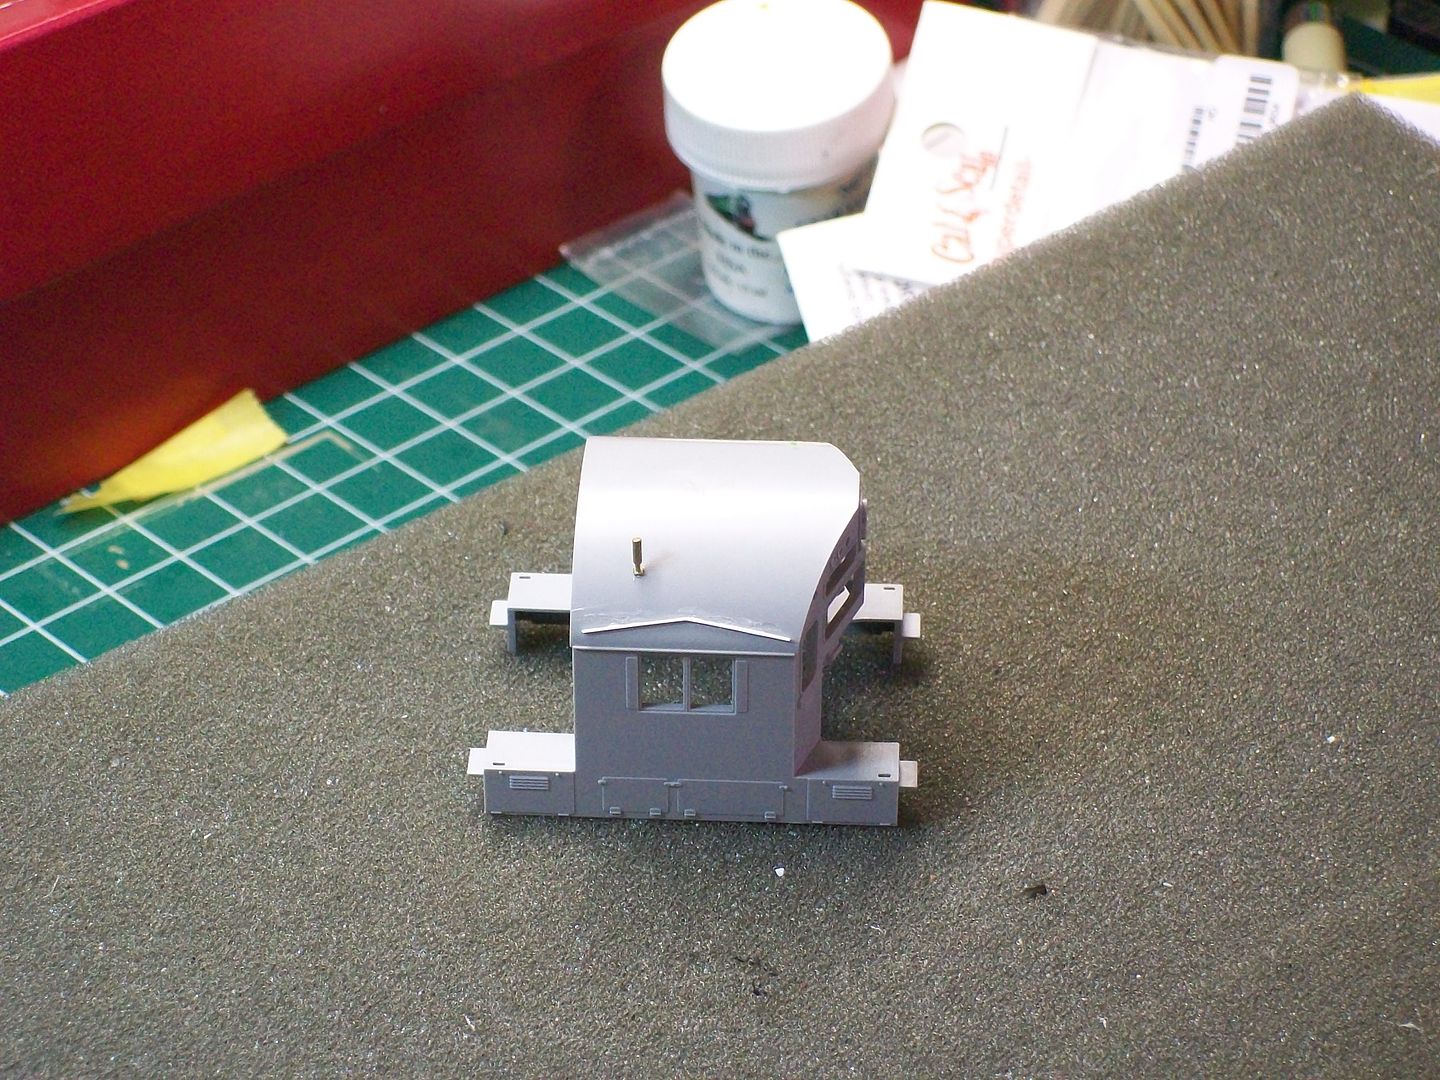
Looking at pictures of the mounted d-strip I figured 1/32 from the roof edges and 2/32 up from where the roof meets the cab wall would work for me.I tilt the cab so I could dry fit the strip and using a pin I make scores where I wnat the ends of the strip to sit.I'm left handed so using fine nosed tweezers I hold the strip about 2/32 left of the angle.I pool a drop of testor's on a empty parts package and I carefully coat the bottom edge of the strip.I use the center window frame as a guide for the angle placement.

After I'm happy with it's position I apply light pressure to make sure it's in full contact with the roof contours.

I mentioned its a forgiving process.I mounted both sides this a.m.,well I wasen't happy with the looks on the engineer's side so I removed it with the razor this p.m.and this is the result.


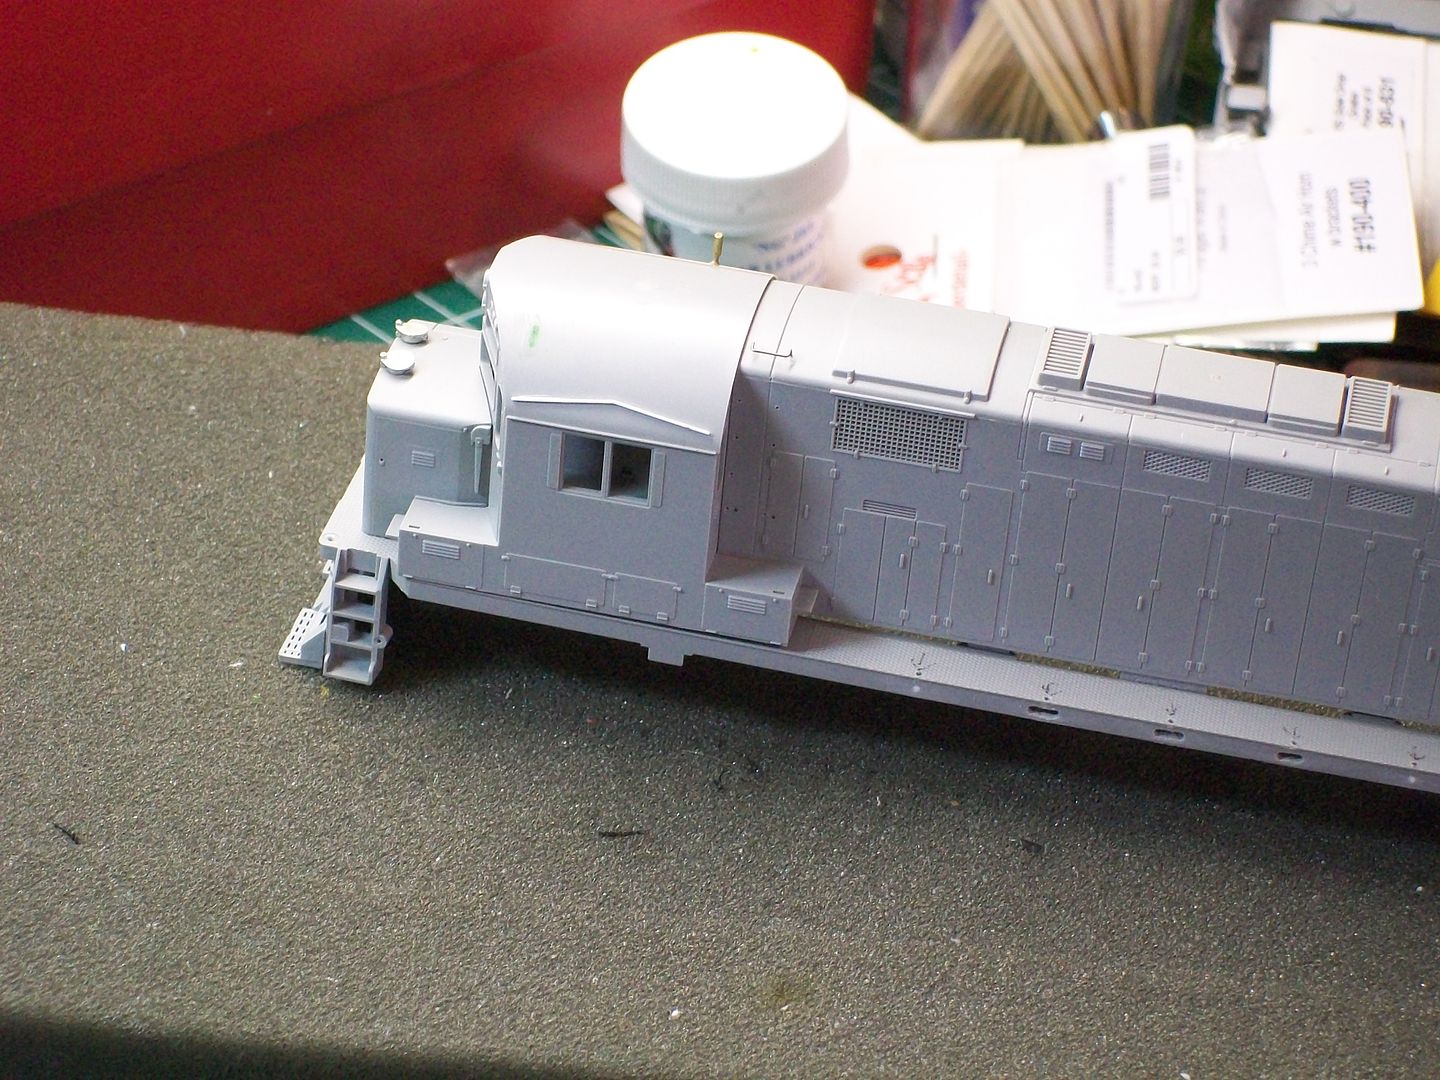
After I remounted the strip I used it as a guide for drilling and mounting the antenna,you can see it in the previous picture.
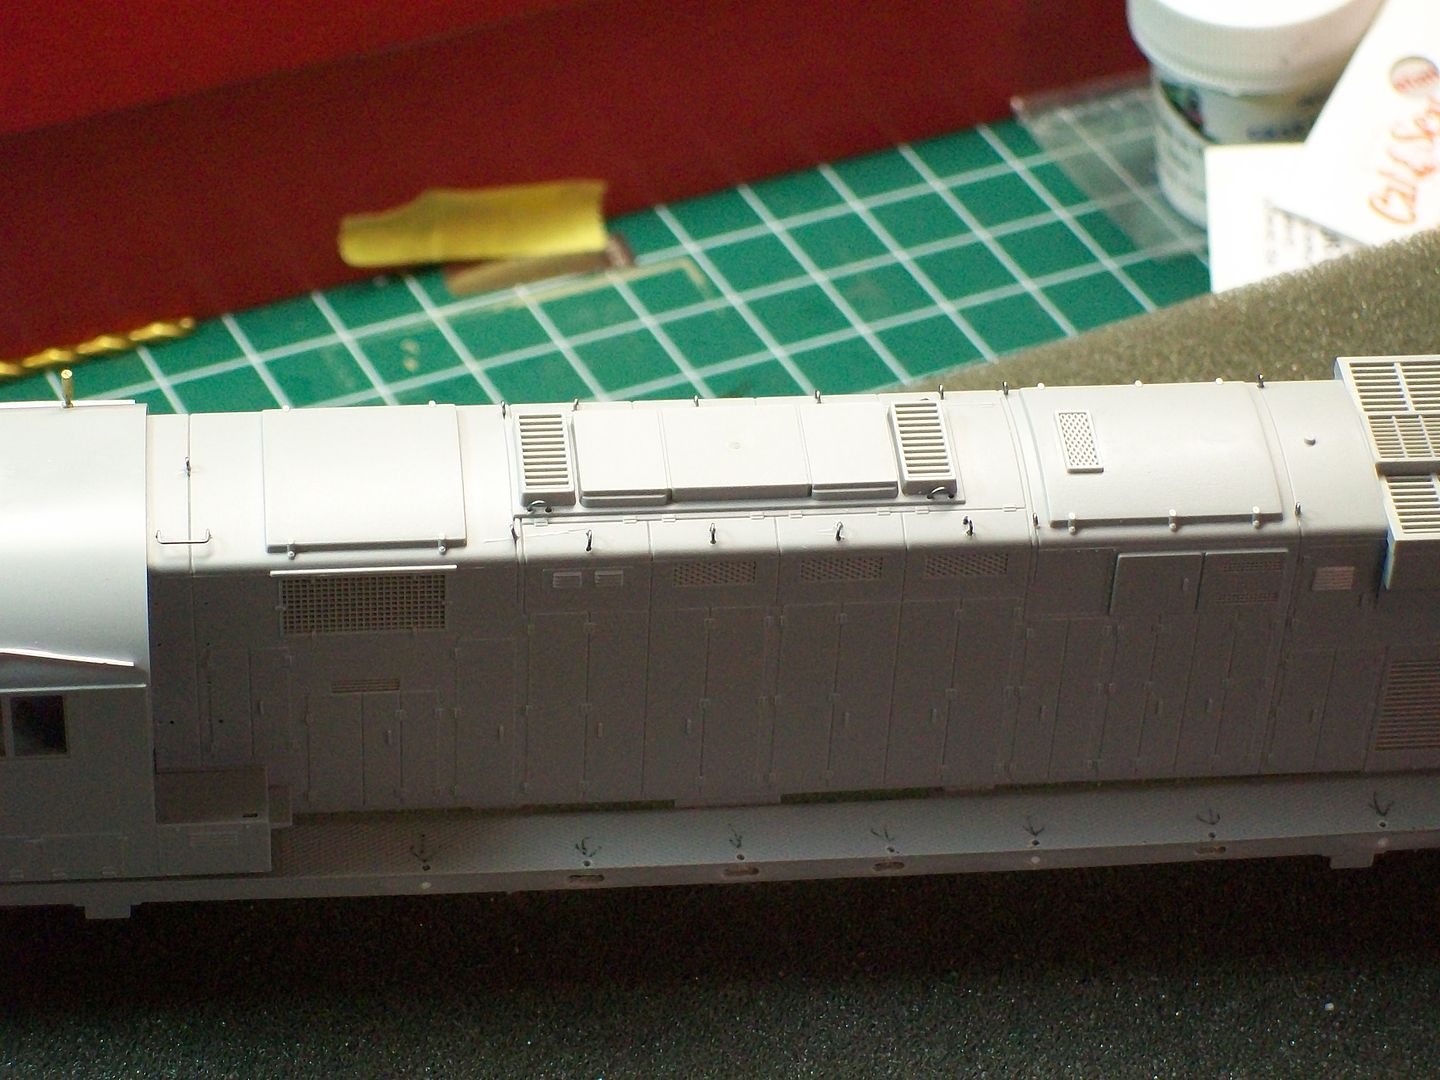
I assembled the body to get the full effect and I wasen't pleased on how bare the long hood roof looked.


Soooo...I added the "u" lift rings and eye bolts to the long hood.The parts are from a cal-scale rs32/36 I had laying around.I cut off the molded on detail and used it as a guide for making the scores.For the u bolts they recommend a #80 bit,its a little too tight so I used #78.There are two sizes of u bolts,use the smaller ones on the 4 smaller access doors.The larger ones get mounted on either side of the dymamic brake vents.For the eye bolts placement I had no clear pics.so I copied off one of my LV 628's.I used the #80 bit for them.


That's all for now.
The administrator has disabled public write access.

RDG C424 11 years 2 months ago #513

Very impressive work. Thanks for sharing.
The administrator has disabled public write access.

RDG C424 11 years 2 months ago #515

  • rdg1187prr
  • rdg1187prr's Avatar
  • OFFLINE
  • Conductor
  • Posts: 197
  • Thank you received: 38
Here is a photo of a C424 pilot

i1001.photobucket.com/albums/af137/rdg11...ilot_zps5dfc0a9c.jpg

John Caples
Last Edit: 11 years 2 months ago by rdg1187prr.
The administrator has disabled public write access.
Time to create page: 0.115 seconds

Today's Image

Did You Know?

September 23, 1955
The Blandon Low Grade line enters service.

Downloads

Operations Information

Click Here!A variety of Reading Company operations related documents, etc. that may be of use in your modeling efforts.

Operations Paperwork

Click Here!A variety of Reading Company operations paperwork, such as train orders, clearance forms, etc. that will help you operate your Reading layout in a prototypical manner.

Timetables, Rulebooks, Etc.

Click Here!Public Timetables, Employe Timetables, and Rulebooks that provide much useful operational information.

Modeling Goodies

Click Here!Signs, billboards, and other FREE goodies for your use.  We ask only that you help spread the word about The Reading Modeler!

Rolling Stock Reference

Click Here!Downloadable reference documents on the various classes of Reading Company Freight and Passenger rolling stock.

Thanks for Your Support!

If you find the content on The Reading Modeler valuable, won't you please consider supporting our efforts? Your donation will help to offset operating costs and acquire new material to share on the site. Thank you!

Amount: 

Advertisements